

Butterfinger Pie Ultimate Recipe Everyone Craves The Dessert is a dreamy, no-bake treat that combines creamy peanut butter, crushed Butterfinger candy bars, and a luscious chocolate base to create an unforgettable dessert experience.
This indulgent pie is the perfect blend of smooth, crunchy, and sweet, making it a favorite for parties, holidays, and anytime cravings strike. The best part? It’s simple to make, requires minimal ingredients, and delivers bakery-level results right at home.
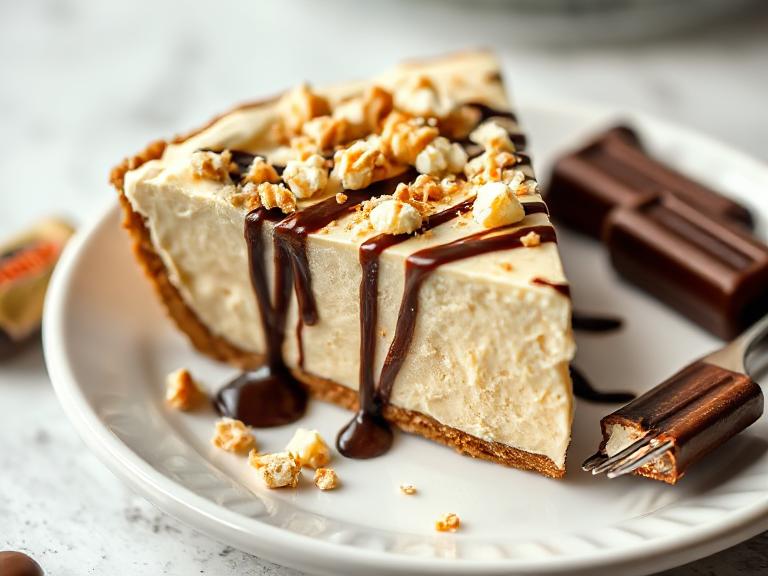
Using a graham cracker or Oreo crust, the filling comes together with cream cheese, peanut butter, powdered sugar, and whipped topping for a silky texture that melts in your mouth. Topped generously with crushed Butterfingers and chilled to perfection, this pie delivers both flavor and crunch in every bite.
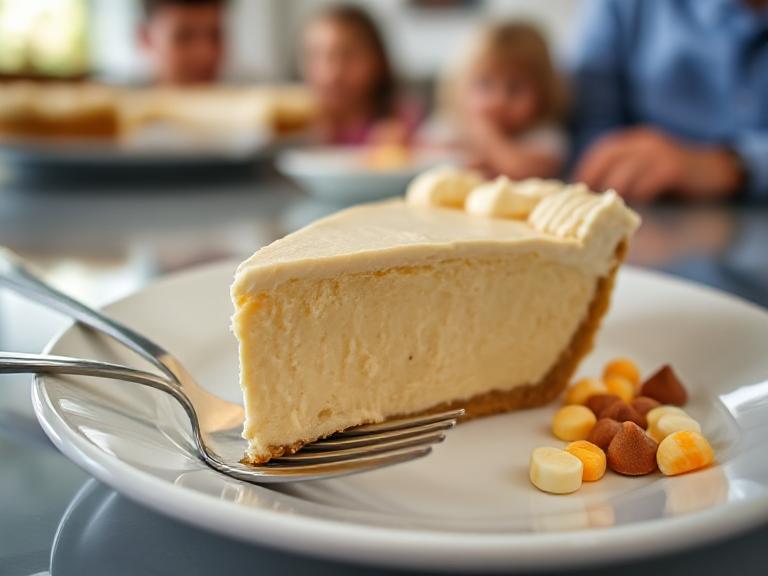
It’s a crowd-pleaser dessert that’s as visually appealing as it is delicious — perfect for impressing guests or treating yourself. Whether you’re new to baking or an experienced dessert lover, this Butterfinger Pie Ultimate Recipe Everyone Craves The Dessert will become your go-to for a fast, easy, and impressive sweet dish.
Enjoy a perfect balance of textures, rich peanut butter flavor, and candy crunch that leaves everyone asking for seconds. For the step-by-step instructions and complete recipe details, including ingredient measurements and pro tips, check out the complete recipe in the section given below.
What Makes This the Ultimate Butterfinger Pie
What truly sets this dessert apart from other no-bake pies is its precision in texture and flavor. Most versions stop at peanut butter and candy pieces, but this recipe uses stabilized whipped cream and cream cheese to achieve a light yet firm filling that holds its shape beautifully even after chilling overnight.
Every slice reveals neat, defined layers — crunchy base, creamy filling, glossy topping — that feel luxurious yet effortless. And because it’s no-bake, the pie remains quick, convenient, and foolproof, even for beginners.
Key highlights include:
- Creamy meets crunchy – smooth peanut butter filling meets crisp candy bits.
- Perfect balance – sweetness, saltiness, and texture all harmonized.
- Make-ahead friendly – stays fresh for up to three days in the fridge.
- Eye-catching – the chocolate ganache makes it look bakery-level.
Ingredient Breakdown and Their Roles
| Ingredient | Purpose in Recipe | Pro Tip |
| Butterfinger bars (crushed) | Crunchy texture & signature candy flavor | Freeze before crushing for cleaner pieces |
| Cream cheese (full-fat) | Adds tang and structure to the filling | Soften at room temperature for easy blending |
| Creamy peanut butter | Main flavor base | Avoid natural peanut butter (separates easily) |
| Whipped topping / heavy cream | Adds volume and lightness | Whip to soft peaks for the best texture |
| Powdered sugar | Sweetens & thickens filling | Sift to prevent lumps |
| Vanilla extract | Enhances flavor depth | Use pure extract, not imitation |
| Oreo cookies | Base crust with rich cocoa notes | Crush with filling intact |
| Butter (unsalted, melted) | Binds crust crumbs | Mix until every crumb is moistened |
| Chocolate chips + heavy cream | For ganache topping | Use equal ratios for glossy finish |
LSI Keywords integrated: no-bake dessert, peanut butter pie, crushed Butterfinger bars, Oreo crust, creamy filling, chocolate ganache, easy make-ahead pie, candy bar dessert.
Step-by-Step: How to Make the Butterfinger Pie Ultimate Recipe
Step 1: Prepare the Oreo Crust
Start by creating the perfect base for your pie — the Oreo crust. In a food processor, add about 24 Oreo cookies (with filling) and pulse until finely crushed. You’re aiming for a sandy texture, not coarse chunks. Transfer the crumbs to a mixing bowl and pour in 5 tablespoons of melted unsalted butter. Stir until every crumb glistens with butter.
Press this mixture firmly into a 9-inch pie dish or springform pan. Use the back of a spoon or a flat measuring cup to pack it evenly along the bottom and slightly up the sides. This compacting ensures the crust won’t crumble when sliced. Place the crust in the refrigerator for at least 30 minutes to set firmly while you prepare the filling.
Step 2: Create the Creamy Peanut Butter Filling
In a large bowl, beat together one package of softened full-fat cream cheese and ¾ cup of creamy peanut butter using a hand or stand mixer. The goal here is a smooth, lump-free consistency that’s airy yet rich. Once the mixture turns pale and fluffy, add 1 cup of powdered sugar and 1 teaspoon of vanilla extract, mixing until fully incorporated.
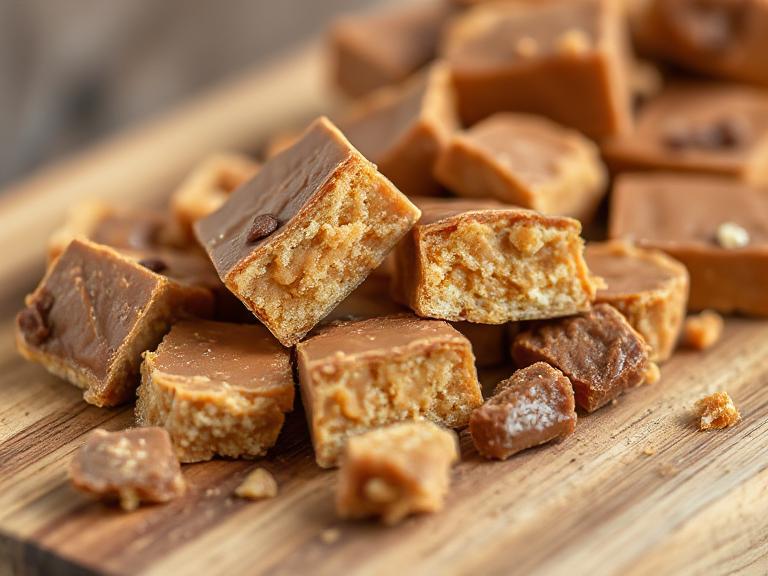
Now it’s time for the magic ingredient — crushed Butterfinger bars. Roughly chop or crush 4 full-size bars and fold them gently into the mixture. Finally, take your whipped cream or whipped topping and fold it into the peanut butter mixture using a spatula. Folding (not mixing) helps retain the light, mousse-like texture.
You’ll end up with a filling that’s both creamy and crunchy, sweet and salty — the perfect balance for the ultimate dessert experience.
Step 3: Assemble the Pie
Once your crust is chilled, remove it from the refrigerator. Spoon the peanut butter filling onto the crust, spreading it evenly with an offset spatula. Take time to smooth out the surface for a neat finish.
This layer is the star of the show, so be generous and make sure the edges touch the crust completely. Doing so prevents air gaps and creates a clean, professional look once you slice into it later.
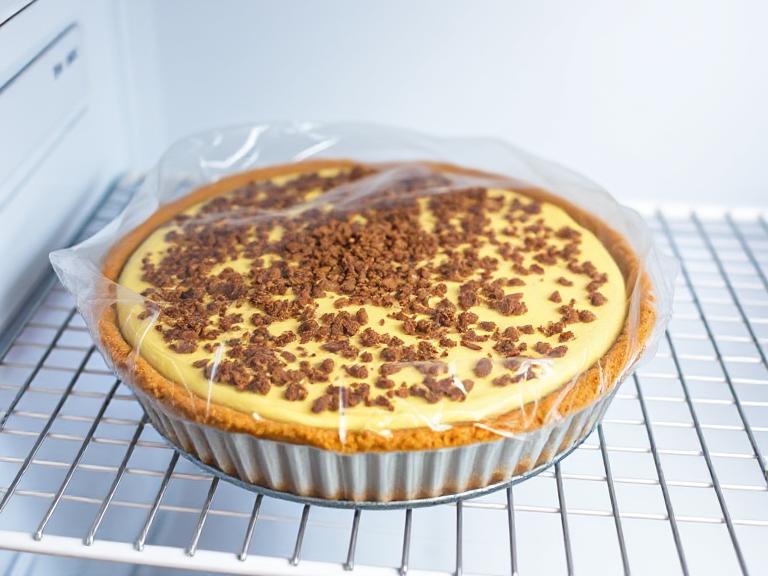
Cover the pie with plastic wrap and chill again for at least one hour to allow the filling to firm up. This ensures it’s stable enough to support the chocolate ganache topping you’ll add next.
Step 4: Make the Chocolate Ganache
To craft the glossy chocolate topping, pour ½ cup of heavy cream into a small saucepan and heat it until it just begins to simmer (don’t let it boil). Remove from heat and pour it over ½ cup of semi-sweet chocolate chips placed in a heatproof bowl. Let it sit for 1–2 minutes to melt, then stir slowly until you achieve a smooth, shiny ganache.
If you prefer a slightly thicker ganache, let it cool for a few extra minutes before pouring. When ready, pour the ganache over the chilled peanut butter layer and use a spatula to spread it evenly. Sprinkle crushed Butterfinger crumbs over the top for added crunch and decoration. This step locks in flavor and creates that irresistible candy bar appeal.
Place the entire pie back in the refrigerator for at least 4–6 hours, preferably overnight, to fully set all layers together.
Step 5: Slice, Serve & Enjoy
When it’s time to serve, remove the pie from the fridge and let it sit for 10–15 minutes to soften slightly. Dip a sharp knife in warm water, wipe it dry, and slice through the pie. This trick ensures clean, smooth edges without pulling at the crust.
Each slice should reveal four distinct layers — the dark Oreo base, the pale peanut butter filling, the rich chocolate ganache, and the golden Butterfinger crumbs on top. Serve chilled, and watch how fast it disappears. This is the kind of dessert that gets people talking long after the plates are empty.
Expert Pro Tips
- Use Full-Fat Ingredients
Low-fat or light alternatives will compromise both flavor and structure. For the richest texture, full-fat cream cheese and peanut butter are essential. - Avoid Overmixing
Folding the whipped cream gently keeps the filling airy. Overmixing can deflate the volume and make it dense. - Crush Butterfingers Strategically
Freeze the bars before crushing. A few larger pieces add pleasant crunch, while smaller bits infuse flavor throughout the filling. - Chill Time is Key
Rushing the chilling process leads to a soft, messy pie. Give it the recommended 6 hours (or overnight) to set completely.
Creative Variations for Butterfinger Pie Lovers
- Graham Cracker Crust: For a lighter, buttery contrast, swap Oreos for graham crackers.
- Reese’s Variation: Replace Butterfinger bars with Reese’s Cups for a double-peanut-butter treat.
- Salted Caramel Drizzle: Add a thin layer of caramel sauce between the filling and ganache for extra indulgence.
- Mini Pies: Divide the filling among mini tart shells or mason jars for portable desserts.
- Frozen Version: Freeze the finished pie for an ice-cream-like treat during summer months.
Storage and Make-Ahead Instructions
| Storage Method | Duration | Instructions |
| Refrigerator | 3–4 days | Cover tightly with plastic wrap or store in airtight container. |
| Freezer | Up to 2 months | Wrap in foil and plastic; thaw overnight in fridge before serving. |
| Serving Tip | Chill 15 min before slicing | Ensures firm, clean layers and maximum flavor. |
Pro Tip: Always refrigerate leftovers promptly to maintain creaminess and prevent crust sogginess
📊 Nutrition Facts (Per Slice, Approx.)
| Nutrient | Amount |
| Calories | 480 kcal |
| Carbohydrates | 42 g |
| Protein | 8 g |
| Fat | 32 g |
| Sugar | 33 g |
| Sodium | 270 mg |
❓Frequently Asked Questions (FAQs)
1. What makes the Butterfinger Pie Ultimate Recipe so irresistible?
The Butterfinger Pie Ultimate Recipe Everyone Craves The Dessert is loved for its rich, creamy texture and crunchy candy topping. It perfectly balances peanut butter, cream cheese, whipped topping, and Butterfinger candy bars, creating a melt-in-your-mouth experience. The contrast of smooth filling and crisp Butterfinger bits is what makes it irresistible.
2. Is Butterfinger Pie a no-bake recipe?
Yes! One of the best parts about this dessert is that it’s a no-bake pie recipe, which means you don’t need an oven. You simply prepare the crust, mix the filling, chill, and top with crushed Butterfingers — making it an easy and convenient dessert for any occasion.
3. Can I make this pie ahead of time?
Absolutely. This Butterfinger Pie Ultimate Recipe is perfect for make-ahead preparation. You can make it 24–48 hours before serving. Simply cover it tightly with plastic wrap or store it in an airtight container in the refrigerator until ready to serve.
4. What type of crust works best for Butterfinger Pie?
The most popular choices are Oreo crust or graham cracker crust. The Oreo crust adds a deep chocolate flavor that complements the peanut butter filling, while graham crackers create a buttery, slightly sweet base. Both work perfectly depending on your taste preference.
5. How long should I chill the Butterfinger Pie before serving?
For best results, chill the pie for at least 4 hours — or overnight if possible. This allows the filling to firm up, creating a creamy yet sliceable texture. The longer it chills, the better the consistency and flavor.
6. Can I freeze Butterfinger Pie for later?
Yes, you can freeze it for up to 2 months. Wrap the pie tightly with plastic wrap, then aluminum foil to prevent freezer burn. Before serving, thaw it in the refrigerator for 5–6 hours. The texture remains smooth and creamy, just like fresh.
7. What are some variations of Butterfinger Pie?
There are many creative variations! You can add a chocolate ganache layer, drizzle caramel sauce, or use mini Butterfinger bites for extra crunch. Some people also swirl in Nutella or top with extra whipped cream for a richer dessert experience.
8. Can I make a healthier version of this dessert?
Yes — for a lighter version, use reduced-fat cream cheese, light whipped topping, and natural peanut butter. You can also choose a low-fat graham cracker crust. It won’t be identical in flavor, but it’s still a delicious, guilt-reduced treat.
9. Why is my pie filling runny or not setting properly?
If your pie didn’t firm up, it may not have been chilled long enough or the whipped topping was overmixed. Always chill for a minimum of 4 hours and fold the whipped topping gently to keep the airy texture intact.
10. Can I use other candy bars instead of Butterfinger?
Definitely! While Butterfinger is the signature flavor, you can substitute it with Reese’s Cups, Snickers, Twix, or even Heath Bars for a different twist. Each candy gives the pie a unique texture and taste.
11. How can I make the pie look more professional for parties?
To make your Butterfinger Pie Ultimate Recipe Everyone Craves The Dessert look bakery-quality, decorate the top with whipped cream swirls, chocolate drizzle, and crushed candy edges. Chill it in a glass pie dish for a clean, elegant presentation.
12. How long can Butterfinger Pie sit out at room temperature?
It’s best not to leave this pie out for more than 1–2 hours, as the filling contains dairy. Always keep it refrigerated until ready to serve to maintain its creamy consistency and prevent spoilage.
13. Can I use homemade whipped cream instead of whipped topping?
Yes, you can! Whip heavy cream with powdered sugar and vanilla extract until soft peaks form. Use it in place of store-bought whipped topping for a fresher, lighter texture. However, keep in mind that homemade cream may deflate faster.
14. What is the best way to crush Butterfinger bars for the topping?
Place Butterfinger bars in a ziplock bag and crush them using a rolling pin or food processor. Make sure not to over-blend; small candy chunks add the perfect crunchy texture to your pie topping.
15. Can I turn this Butterfinger Pie into mini desserts?
Absolutely! You can make mini Butterfinger pies by layering the crust and filling into small cups or ramekins. It’s a fun, portion-controlled way to serve this dessert at parties, potlucks, or events.
16. How many servings does the Butterfinger Pie recipe make?
A standard 9-inch Butterfinger pie typically serves 8–10 people, depending on slice size. It’s perfect for family gatherings, holidays, or potluck events.
17. Does Butterfinger Pie contain eggs?
No, this recipe is egg-free, making it safe and simple for all ages. The creamy texture comes from the combination of cream cheese, peanut butter, and whipped topping — no eggs required.
18. Can I add chocolate or caramel drizzle to the top?
Yes — adding melted chocolate, caramel syrup, or even peanut butter drizzle enhances both the look and flavor of your pie. It adds extra indulgence and makes your dessert stand out visually.
Final Thoughts: Why This Butterfinger Pie Wins Every Time
The Butterfinger Pie Ultimate Recipe Everyone Craves The Dessert isn’t just a dessert; it’s a celebration of indulgence and nostalgia. It’s easy to prepare, absolutely irresistible, and universally loved. With minimal ingredients and no baking, it’s accessible to both experienced bakers and complete beginners.
Each bite delivers the unmistakable Butterfinger crunch surrounded by velvety peanut butter cream and smooth chocolate. It’s that contrast — the harmony of comfort and excitement — that makes this pie stand out in any lineup.
So next time you’re looking for a dessert that impresses without stress, look no further. This pie will not only satisfy your sweet tooth but also secure your place as the dessert hero in your kitchen.