


If you’re looking for a quick and delicious treat, this Fluffy Perfect Fruit Scones Easy Recipe Quick Delight is your new go-to. These scones are soft, airy, and packed with sweet dried fruit, making them perfect for breakfast, brunch, or an indulgent afternoon tea. With simple ingredients like self-raising flour, cold butter, milk or buttermilk, and your favorite dried fruits, this recipe is beginner-friendly yet produces bakery-style results every time.
The secret to light and fluffy fruit scones is keeping the butter cold, rubbing it into the flour until it resembles fine breadcrumbs, and handling the dough gently. Minimal kneading ensures a tender crumb, while preheating the oven and baking tray gives your scones an instant rise. Adding a pinch of salt and optional zest like lemon or vanilla enhances the flavor without complicating the process.
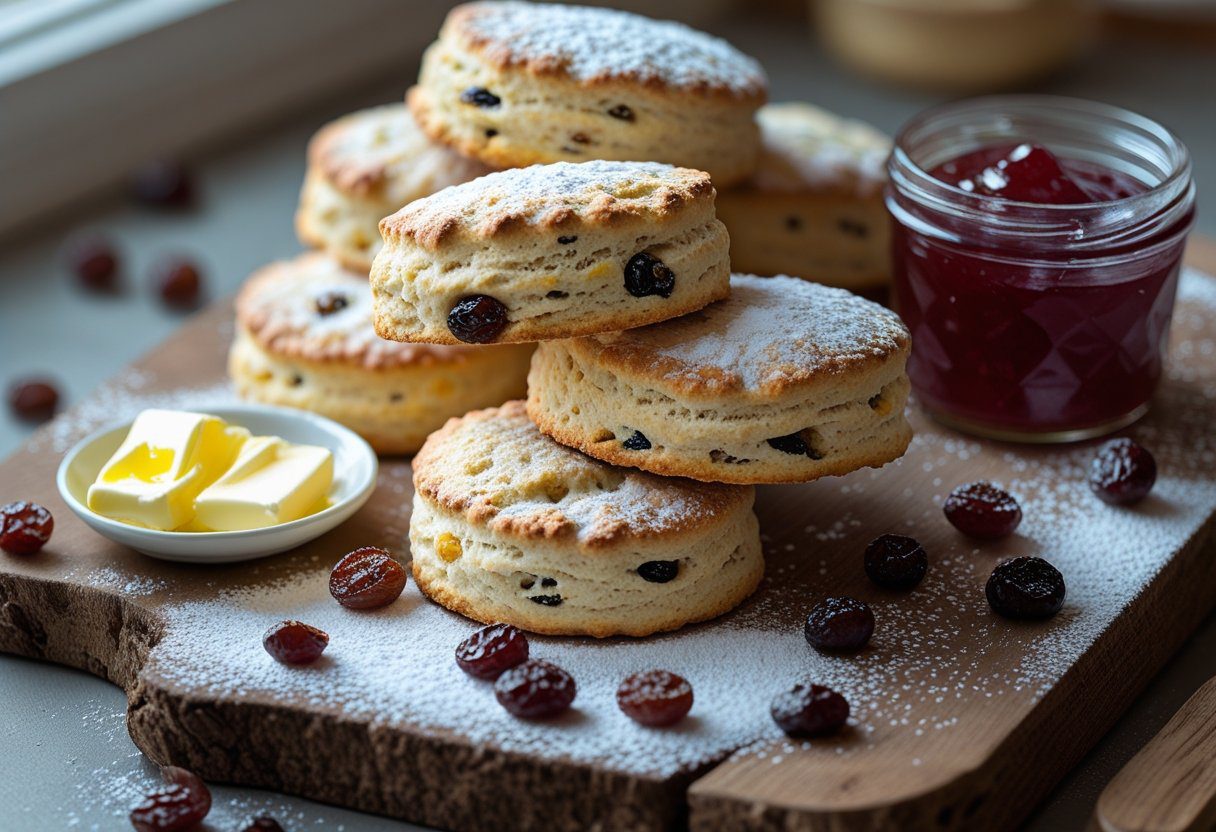
To make the scones, mix the dry ingredients, rub in butter, fold in milk and fruit, then gently roll the dough and cut into rounds. Bake until golden brown, and you’ll have tall, soft scones with slightly crisp edges. Serve warm with jam and clotted cream for a classic afternoon tea scones experience, or enjoy plain for a quick breakfast treat.
Whether you prefer dried fruit scones, sultana scones, or mixed fruit scones, this recipe adapts easily and is perfect for any occasion. For a detailed, step-by-step guide with tips for flawless results, you can find the complete recipe in given below.
Why This Recipe Works (And Why Others Fail)
Before diving into ingredients and steps, let’s chat about why some scone recipes fail while this one consistently works. Most scone disasters happen because of one or more of these mistakes:
- Using warm butter instead of cold. Warm butter melts too quickly and creates dense scones.
- Overworking the dough. Scones need minimal mixing; overkneading activates gluten, making them tough.
- Cutting the dough incorrectly. Twisting the cutter seals the edges, which prevents the scones from rising properly.
- Ignoring oven temperature. A hot oven with a preheated tray gives your scones that coveted “oven spring” for tall, fluffy results.
By avoiding these mistakes, you get consistently light, airy easy fruit scones that taste like they were baked by a professional — without all the stress. Trust me, once you nail this method, you’ll never go back.
Ingredients For fluffy fruit Scones Recipe

Here’s what makes these scones so magical:
- 350g self-raising flour (or plain flour + 2 tsp baking powder) – the base for soft, high-rise scones.
- 75g cold butter, cubed – keeps the dough light and airy.
- 100–125g dried fruit (sultanas, raisins, or mixed dried fruit) – adds sweetness and texture.
- 180ml cold milk or buttermilk – helps create tender crumbs and subtle tang.
- Optional: 1 tsp vanilla extract or zest of 1 lemon – enhances aroma and flavor.
- A pinch of salt – balances sweetness and enriches flavor.
Everything here is simple and probably already in your kitchen. No exotic ingredients, no fancy tools — just classic homemade fluffy fruit scones goodness.
Step 1: Preheat and Prep
The first step might seem obvious, but it’s crucial. Preheat your oven to 220°C (425°F) and place a baking tray inside to heat. Why a hot tray? Well, when you place the scones on a hot surface, they get an instant oven spring, which helps them rise tall and fluffy instead of sprawling out flat.
While the oven heats, gather all your ingredients. Cold butter is essential, so keep it in the fridge until the very last moment. If you live in a warm kitchen like I do, consider chilling your mixing bowl too. This little extra step ensures your scones maintain that soft, tender texture. Prepping now saves heartache later.
Step 2: Mix the Dry Ingredients
Sift 350g of self-raising flour into a large mixing bowl. Add a pinch of salt and any optional flavorings, like lemon zest or vanilla. Sifting not only removes lumps but also aerates the flour, contributing to that light, fluffy texture we’re aiming for.
At this point, also toss in your dried fruit (sultanas, raisins, or mixed fruit). Doing this now helps distribute the fruit evenly so that each scone has the perfect sweet bite in every mouthful. This step might seem simple, but even distribution of ingredients is the key to consistent, bakery-quality scones.
Step 3: Rub in the Butter
Now comes the fun part. Grab your cold, cubed butter and rub it into the flour with your fingertips. The goal is to achieve a texture resembling fine breadcrumbs — not coarse, not oily, and definitely not melted. This step creates little pockets of butter within the dough.
Why does this matter? When baked, those pockets turn into steam, creating air pockets that make your scones rise beautifully and remain soft inside. Overdoing this step, or letting the butter get warm, is a common rookie mistake. Keep it quick and efficient — think “gentle rub, no mush.”
Step 4: Combine with Milk
Next, make a well in the center of your flour-butter mixture and pour in 180ml of cold milk or buttermilk. Use a wooden spoon or spatula to fold the mixture gently until it just comes together. Minimal kneading is key.
At this stage, it might look a bit shaggy or uneven — that’s perfect. Don’t panic. Overworking the dough is the fastest way to end up with dense, heavy scones. The goal is a slightly sticky, soft dough that’s easy to handle but not wet or runny.
Step 5: Shape the Dough
Turn the dough out onto a lightly floured surface. Here’s where you start forming the scones. Pat or gently roll the dough to a thickness of about 2–3 cm (around 1 inch). Remember: gentle pressure only. This is not the time for a workout session. Overworking or compressing the dough will activate the gluten and make your scones tough.
Use a sharp round cutter to cut out your scones. Press straight down — no twisting, no turning. Twisting seals the edges and prevents your scones from rising. Each cut should yield a perfectly round, tall scone ready for baking.
Step 6: Bake to Perfection
Carefully place your scones on the preheated baking tray, leaving a little space between each one. Optional: brush a tiny bit of milk on top for a shiny, golden crust.
Pop them in the oven for 12–15 minutes, or until the tops are golden and the scones feel firm when lightly pressed. You’ll notice the aroma filling your kitchen — the sweet, buttery smell is already making mouths water. The hot tray combined with cold dough creates that perfect rise, soft interior, and slightly crisp exterior that makes bakery scones irresistible.
Step 7: Cool and Serve
Once baked, remove the scones from the oven and let them cool for a few minutes on a wire rack. Why not dive in immediately? The scones continue to set slightly as they cool, giving the crumb structure a chance to stabilize.
Serve them warm with jam and clotted cream, or go wild with yogurt, fresh fruit, or a drizzle of honey. Honestly, these scones are so good, you could eat them plain and still feel like royalty. Personally, I love a slightly generous dollop of raspberry jam with clotted cream — classic afternoon tea scones style.
Tips for Consistently Fluffy Scones

Here’s my no-fail checklist for perfect light and fluffy fruit scones every time:
- Always use cold butter. Warm butter = dense disaster.
- Mix just enough to bring the dough together.
- Preheat your oven and tray for instant oven spring.
- Press down straight with the cutter — no twisting.
- Distribute dried fruit evenly to avoid clumping.
- Serve fresh and warm — it’s a game-changer.
Follow these steps, and I promise you’ll never have sad, flat scones again.
Variations to Experiment With
Don’t feel limited by this recipe. Here are some ideas to make your scones extra special:
- Fruit combos: Use sultanas, raisins, currants, dried cranberries, or chopped apricots.
- Flavor boosters: Add lemon zest, orange zest, or vanilla for subtle aroma.
- Buttermilk twist: Swap milk for buttermilk for tangy, richer scones.
- Brunch edition: Bake slightly larger scones for brunch, top with melted butter and honey.
You can mix and match according to what you like or what’s in your pantry. Flexibility is key to making homemade quick scone recipe scones your signature recipe.
Why This Recipe Wins
IMO, this method beats other “easy scone recipes” because it balances simplicity and technique. You get:
- Consistently light, fluffy, and tall scones.
- Minimal ingredients and no exotic steps.
- Versatility — can make sweet, fruity, or slightly savory versions.
- Beginner-friendly but with professional results.
It’s a fail-proof formula that turns even a first-time baker into a scone hero.
Baking Timeline For homemade fruit scones (Quick Reference)
| Step | Time |
| Preheat oven & tray | 10 min |
| Mix dry ingredients & rub-in butter | 2–3 min |
| Fold in milk & fruit | 2 min |
| Shape & cut dough | 3–4 min |
| Bake | 12–15 min |
| Total | ~30–35 min |
Yes, you read that right — less than 40 minutes from zero to glorious, fluffy classic fruit scones. Perfect for spontaneous tea cravings.
Related About Easy Fluffy fruit Scones Recipe
How to Make the Best Fluffy Scones from Scratch at Home
Making the best fluffy scones from scratch is easier than most people think, and it all starts with simple, high-quality ingredients. To achieve that soft, airy texture, always use cold butter, rub it into the flour until it resembles breadcrumbs, and avoid overworking the dough. Using self-raising flour or combining plain flour with baking powder ensures your scones rise beautifully.
Fold in your choice of dried fruits like sultanas, raisins, or currants gently to avoid crushing them. Preheating your oven and using a hot baking tray provides an instant “oven spring,” giving scones that signature light, fluffy texture. For added flavor, you can incorporate lemon zest, vanilla, or a touch of sugar. Proper technique and attention to moisture levels are crucial to create soft, tender crumb scones that rival bakery-quality treats.
Top 10 Tips for Baking Perfect Fruit Scones Every Time
Perfect fruit scones baking tips are key for consistently achieving tall, fluffy scones. First, always handle dough gently and avoid flat scones by keeping butter cold and incorporating it correctly. Do not over-mix, as this can make scones tough. Preheat the oven and tray for maximum rise, and cut dough using a straight-down motion rather than twisting the cutter.
Ensure even distribution of dried fruit to prevent clumping or sinking. Brush tops lightly with milk for golden color and bake until just done to maintain moisture. Using the right flour and checking the freshness of baking powder are critical. Finally, serve scones warm for maximum enjoyment and store leftovers properly to maintain softness.
Best Types of Flour for Light and Fluffy Scones
Choosing the best flour for scones determines whether your scones are light and tender or dense and heavy. All-purpose or pastry flour works best for soft, crumbly texture, while bread flour can make scones chewy. Understanding self-raising vs plain flour for scones is essential; self-raising flour already contains leavening, whereas plain flour requires baking powder.
The protein content in flour affects rise, tenderness, and crumb structure, so selecting the correct type helps ensure consistent results. Some bakers experiment with gluten-free or whole wheat flour blends, but maintaining the right balance is critical to keep scones soft without being gummy.
Gluten-Free Fruit Scones Recipes That Actually Rise and Taste Delicious
Gluten free fruit scones can be just as fluffy as traditional ones if you know the right techniques. The key is choosing the best gluten free flour for scones, such as a blend of rice flour, almond flour, or oat flour. Using binding agents like psyllium husk or flaxseed meal ensures the dough holds together.
Many recipes achieve fluffy gluten free scones recipe without xanthan gum by carefully balancing liquid and fat. Folding in dried fruits and flavorings gently preserves texture and prevents heavy, dense results. Baking at a high temperature for a short period promotes an “oven spring,” producing soft, light scones that rise properly.
Dairy-Free and Vegan Fruit Scones Recipe Variations
For those avoiding dairy, vegan fruit scones recipe variations are easy to prepare while maintaining lightness and flavor. Replace butter with solid plant-based fats like coconut oil or vegan margarine and swap milk with almond, oat, or soy milk to make dairy free scones without butter.
Adjusting fat and liquid ratios carefully ensures a tender crumb and proper rise. You can experiment with flavors like cinnamon, nutmeg, or citrus zest for added depth. These plant based scones recipes are ideal for breakfast, brunch, or afternoon tea, and using the right substitutes for butter and milk in scones produces results that rival traditional recipes.
How to Choose and Prepare Dried Fruit for Perfect Scones
Choosing the best dried fruit for scones is essential for consistent taste and texture. Popular choices include sultanas, raisins, currants, and chopped dried apricots. To prevent fruit from sinking to the bottom of scones, toss them lightly in flour before folding into dough.
Decide between freeze dried vs regular dried fruit in baking, as freeze-dried fruit is lighter but may be less sweet, while regular dried fruit adds natural moisture. Properly prepping fruit ensures even distribution in dough, giving each scone a balanced burst of sweetness without clumping or dryness.
Classic British Afternoon Tea: Serving Fruit Scones with Jam and Clotted Cream
Fruit scones are a staple of afternoon tea scones tradition, often served with rich clotted cream vs butter on scones and sweet jams. Popular accompaniments include strawberry, raspberry, or apricot jam. Serve warm scones split open with a generous dollop of clotted cream and your favorite jam.
Knowing how to serve fruit scones properly enhances the experience, and this classic presentation reflects British elegance. Perfectly baked scones, with a golden crust and soft crumb, elevate afternoon tea or special occasions.
Quick Breakfast Ideas Using Leftover Scones
Leftover scones don’t have to go to waste. Try breakfast recipes with leftover scones like scone French toast, crumbled scones in yogurt parfaits, or toasted with jam and fruit.
Creative scone breakfast ideas make mornings easier and tastier, while learning how to reheat scones for breakfast ensures they remain soft and moist. These are excellent options for easy brunch recipes with scones, turning leftovers into delicious new meals without extra effort.
Scone-Shaped Variations and Creative Recipes
Scones can be shaped and flavored creatively. Try savory fruit scones recipe by adding cheese, herbs, or nuts, or make cheese and fruit scones for a sweet-salty twist. Smaller mini fruit scones bite-sized versions are great for parties or kids.
Understanding scone shapes and cutting techniques can also improve baking consistency and presentation. Experimenting with different shapes and sizes allows for unique flavors and visually appealing results without compromising texture.
How to Store, Freeze and Reheat Fruit Scones for Freshness
Maintaining scone freshness is simple with proper storage. Use airtight containers for short-term storage and the best way to freeze scones is individually wrapped, so they don’t stick together.
Learning how to store homemade scones correctly preserves softness, while reheating scones without drying in a low oven or microwave ensures they regain texture. Proper techniques for keeping scones fresh for days let you enjoy bakery-quality taste even when made in advance.
Conclusion
So there you have it: a detailed, foolproof guide to baking fluffy perfect fruit scones that are easy, quick, and absolutely delightful. You don’t need to be a professional baker, and you don’t need fancy tools — just follow the steps, respect the cold butter, and avoid overworking the dough.
Once you master this, you’ll have a recipe that’s versatile, adaptable, and consistently delicious. Serve them with jam and cream, enjoy them plain, or experiment with your favorite flavor combinations. Honestly, a warm, fresh scone straight from the oven is a small joy worth savoring every time.
Now, grab your apron, preheat that oven, and let’s make some tall, fluffy, sweet buttermilk fruit scones! Your kitchen (and taste buds) will thank you
Frequently Asked Questions (FAQ) — Fruit Scones & Baking Tips
Q1: Why did my fruit scones turn out flat or didn’t rise?
Flat or non-rising scones often come from a few common mistakes: over‑mixing the dough (which develops gluten and makes scones heavy), using old or weak raising agent, or letting butter melt before baking.
- Make sure you rub cold butter into the flour until it becomes fine crumbs.
- Use a proper raising agent (like baking powder) or self‑raising flour. If using plain flour, add correct amount of baking powder.
- Handle the dough minimally — only fold until just combined, avoid over‑kneading.
- Preheat oven (and tray) properly — a hot oven gives an instant “oven spring” for tall, fluffy scones.
Q2: What type of flour should I use for light and fluffy simple fruit scones recipe?
For best results, use a low- to medium‑protein flour. All‑purpose flour or pastry flour works great because it gives enough structure without making the scones tough. High‑protein flour (like bread flour) tends to produce chewy, dense scones.
If you use plain flour, add the right amount of baking powder to give scones the “rise” they need — otherwise they stay heavy.
Q3: Why are my scones dry or crumbly instead of soft inside?
Dry or crumbly scones usually indicate not enough moisture — either too little liquid (milk/buttermilk), too much flour (dusting/rolling), or over‑baking.
To avoid that:
- Aim for a slightly sticky, soft dough before shaping — not a dry, powdery one.
- Roll gently and avoid pressing too hard while shaping. Too much pressure activates gluten and dries out texture.
- Bake just until golden. Over-baking dries them out — usually 12–15 min at ~220°C (425 °F) or until tops are light golden and scones feel firm.
Q4: Can I substitute ingredients — like use non-dairy milk, different flour, or alternate fats?
Yes — but with caution. Many bakers adapt fruit scones to dietary needs or pantry availability. For instance:
- You can use milk alternatives (almond, soy, oat) — but the fat content and moisture level matter. Lower-fat or thinner milks may lead to less rise or drier texture.
- If you use plain flour instead of self-raising, add the right amount of baking powder. Missing or old leavening = flat scones.
- Butter (or a solid fat) works best cold. Substituting with oil or soft margarine may affect texture — you’ll lose those little air pockets that steam creates during baking.
Q5: When adding dried fruit (like sultanas, raisins), any specific hacks so they stay evenly spread and don’t sink?
To keep fruit evenly distributed and avoid sinking:
- Toss your dried fruit lightly in a bit of flour before folding them into dough — this helps suspend them in batter rather than let them sink.
- Don’t overwork the dough while adding fruit. Gentle folding helps maintain dough structure and stops fruit clumping or sinking.
This way you get evenly studded dried fruit scones with chewy, juicy bits rather than weird clumps.
Q6: Should I chill the shaped scones before baking? Does resting help?
It can help, but it’s not absolutely necessary. Letting shaped scones rest (10‑15 min in fridge) or while the oven preheats gives butter a chance to firm up again — resulting in better “oven spring” and preventing spread.
If you skip chilling, just make sure dough stays cool, and bake immediately after shaping for best rise.
Q7: What’s the ideal baking temperature and time for soft, tall fruit scones?
Most classic easy fruit scones recipes recommend baking at around 220 °C (425 °F).
Usually they bake in 12–15 minutes. Watch for a golden-brown top, lightly firm feel (not mushy), and a little spring when you press them gently. Over‑baking risks dryness; under‑baking leads to soggy centres.
Q8: Can I make these scones without butter (for dairy‑free or vegan version)?
Some people do try — replacing butter with plant‑based margarine or oil and using non‑dairy milk. It can work, but outcome varies. Because butter helps create steam pockets for fluffiness, using a different fat may reduce the “light and airy” texture.
If you go dairy-free, aim for a fat substitute that’s solid (not liquid oil), keep it cold, and handle dough gently. Expect a different but still tasty result.
Q9: My scones are rising but taste heavy or feel dense — what am I doing wrong?
If scones rise but stay heavy inside, common culprits include: too much flour (dusting or rolling surface), over-kneading, or insufficient fat distribution. Over‑kneading or over‑mixing develops gluten — making crumb tight and dense.
Also, make sure your butter is properly rubbed into flour as fine crumbs — this ensures even air pockets. If butter clumps or melts, those pockets don’t form properly.
Q10: How should I store leftover fruit scones — and can I freeze them?
Many homemade fruit scones freeze and reheat surprisingly well. Storing cooled scones in an airtight container (or freezing individually) preserves freshness.
When ready to eat, reheat gently in the oven or microwave, or enjoy them with jam and cream — they regain softness and taste delicious.