
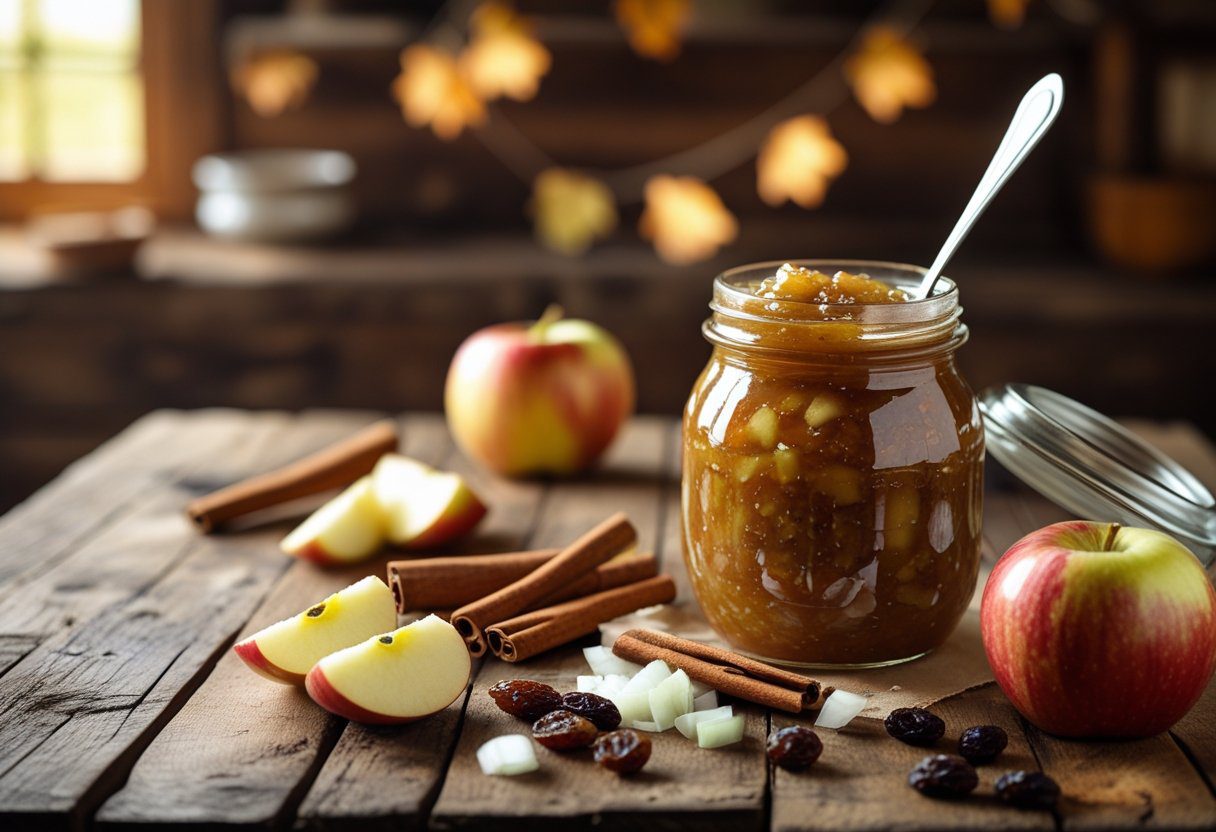


If you’re looking to bring warmth, nostalgia, and that comforting old-school British charm into your kitchen, this Mary Berry Apple Chutney Recipe is exactly the recipe you need. It’s inspired by the classic cooking style of the legendary Mary Berry, yet simplified so anyone—yes, even total beginners—can master it at home.
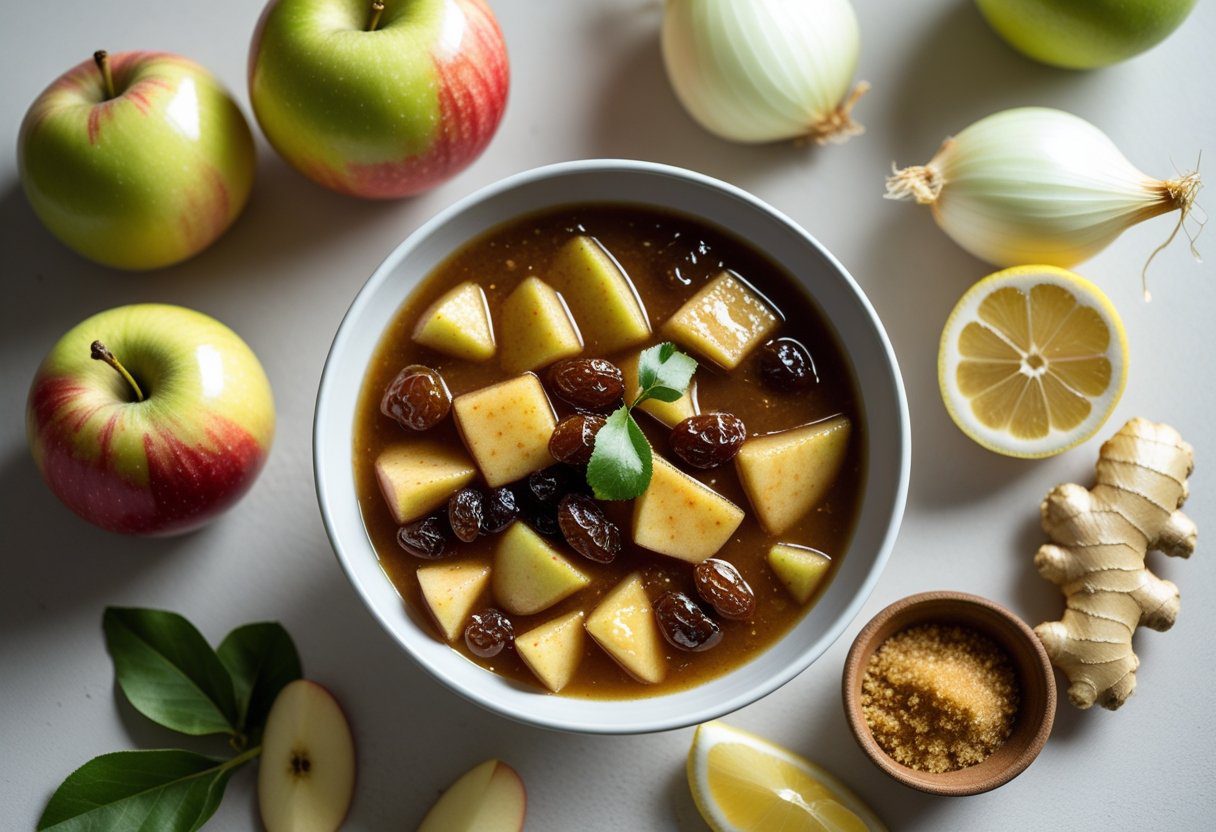
With tender apples, cozy spices, vinegar, onions, and dried fruits simmered slowly into a sweet and tangy preserve, this chutney captures everything people love about homemade British condiments. It’s the perfect blend of tradition, flavor, and ease.
And today? You’re about to learn far more than just how to cook it.
You’ll discover:
✔ Step-by-step instructions
✔ Expert troubleshooting
✔ Flavor-boosting tips
✔ Storage secrets
✔ Pairing ideas
✔ Holiday variations
✔ Semantic-rich insights for deeper understanding
Let’s bring this British kitchen staple to life—slowly, lovingly, and with the flavor-packed charm it deserves.
Why This Mary Berry Apple Chutney Recipe Is the Best Homemade Version
This Mary Berry apple chutney recipe isn’t just another condiment—it’s a heartfelt multipurpose preserve that transforms ordinary meals into something special. Whether you’re spreading it over bread, dolloping it onto cheese boards, or pairing it with roasted meats, each spoonful tastes like comfort, tradition, and craftsmanship.
What sets this recipe apart?
- A deep, aromatic flavor created by slow simmering
- A naturally thick texture—no artificial thickeners needed
- Ingredients easily found in any kitchen
- A balance of acidity and sweetness that matures beautifully
- A forgiving cooking process that even beginners can master
And let me share a small anecdote.
The first time I served this chutney during a family gathering, I placed a modest jar next to the cheese board. Within minutes, guests were asking, “Where did you BUY this?”—only to be shocked when I said, “I made it.” That moment convinced me: this recipe is foolproof, memorable, and impressive enough for guests.
What Makes This Apple Chutney Recipe Mary Berry Style So Popular?
This Apple chutney recipe Mary Berry approach is beloved for its wholesome simplicity. It uses pantry staples and reliable spices, yet produces a complex, rich spiced apple condiment that tastes like it has simmered in a British farmhouse kitchen.
Why it delivers every time:
- Uses the best apples for chutney (cooking varieties)
- Follows a slow-cooking process that thickens flavors naturally
- Requires only one pot
- Balances sweetness and acidity beautifully
- Stores exceptionally well
It’s a recipe people come back to year after year — especially during autumn, holidays, and cozy home-cooking seasons.
Ingredients You Need for a Homemade Apple Chutney Recipe with Perfect Flavor
Making this Homemade apple chutney recipe doesn’t require fancy ingredients. Most items are already in your pantry.
Core Ingredients
- 1kg cooking apples, peeled and chopped
- 2 onions, finely chopped
- 250g raisins or sultanas (apple chutney with raisins)
- 300ml malt vinegar (malt vinegar chutney recipe)
- 250g light brown sugar (brown sugar apple chutney)
- 1 tsp ground ginger
- 1 tsp ground cinnamon (apple cinnamon chutney)
- ½ tsp mixed spice
- ½ tsp salt
- Zest and juice of 1 lemon
Optional Add-Ins
- Chilli flakes
- Figs, cranberries, dates
- Orange zest
- Cider vinegar (cider vinegar apple chutney)
- Extra cinnamon for warmth
- Fresh ginger (apple ginger chutney)
These ingredients create a comforting condiment that works beautifully as part of homemade jam and chutney ideas, easy British condiments, and homemade relish recipes.
Step-by-Step: The Most Easy Apple Chutney Mary Berry Style Guide
Making this Easy apple chutney Mary Berry style recipe is—honestly—so uncomplicated that even first-time cooks can nail it. Just follow this simple guide.
Step 1 — Prep Your Apples
Chop them evenly so they cook uniformly.
Anecdote: I once chopped mine unevenly in a hurry, and half the apples turned mushy while the others stayed chunky. Lesson learned—size consistency matters!
Step 2 — Add Everything Into One Pot
Combine apples, onions, raisins, spices, sugar, lemon, and vinegar.
Step 3 — Warm Until Sugar Melts
Heat gently until the sugar dissolves completely.
Step 4 — Bring to a Gentle Boil
Let the mixture bubble softly and fill your kitchen with warmth.
Step 5 — Slow Simmer (45–60 minutes)
This is where the magic happens.
The chutney thickens, flavors deepen, and you get that Slow-cooked apple chutney aroma.
Remember your apple chutney simmering guide:
- Cook uncovered
- Stir occasionally
- Use low heat
Step 6 — Test for Thickness
Drag a spoon through the chutney.
If the mixture parts and holds its shape, it’s ready.
Step 7 — Jar It Hot
Transfer into sterilized jars (sterilizing jars for preserves is crucial).
Step 8 — Let Maturity Develop Flavor
Store for 1–2 weeks before opening.
This improves balancing sweetness and acidity naturally.
Why This Traditional British Apple Chutney Tastes So Authentic
This Traditional British apple chutney feels like something passed down through generations. The combination of apples, brown sugar, vinegar, and spices echoes old farmhouse recipes—the kind simmered on stovetops during autumn harvests.
It’s nostalgic, warming, and timeless.
This also makes it perfect as an Autumn chutney recipe or Holiday chutney gifts.
How to Serve the Classic Apple Chutney for Cheese and More
This Classic apple chutney for cheese is made for pairing.
Use it with:
- Cheddar
- Brie
- Stilton
- Camembert
- Goat cheese
It’s also a winning side for:
- Roast turkey
- Pork chops (best chutney for meat dishes)
- Ham
- Burgers
- Charcuterie boards (chutney for cheese boards)
- Toasted sandwiches (apple chutney for sandwiches)
This is one of the reasons the recipe stays so popular—it fits effortlessly into everyday meals.
How to Perfect a Simple Apple Chutney with Spices Every Time
A Simple apple chutney with spices still requires a delicate touch. Here’s how to guarantee perfect results:
- Use firm apples for good chunks
- Follow a proper vinegar-to-sugar ratio in chutney
- Keep heat low when thickening
- Stir more frequently near the end (stirring chutney to prevent burning)
- Taste and adjust the acidity or sweetness
If your chutney becomes too thick, add a splash of hot water to loosen it.
Flavorful Variations: Apple Chutney with Vinegar and Spices
This Apple chutney with vinegar and spices can be customized easily:
- Swap malt vinegar for cider
- Add chilli flakes for a spicy kick
- Stir in cranberries for a festive twist
- Add figs for a rich, jammy flavor
- Add orange zest for brightness
- Use white wine vinegar for a milder acidity
Each variation keeps the base recipe intact while introducing exciting flavors.
Quick Apple Chutney at Home: Same Flavor, Less Time
Running short on time?
This quick apple chutney at home trick will help:
- Dice apples smaller
- Increase the heat slightly (but still stir often)
- Add a bit less vinegar
- Cook uncovered to thicken faster
You’ll get a chutney ready in as little as 35–40 minutes.
Apple and Onion Chutney Recipe for a Deeper Savory-Sweet Flavor
This Apple and onion chutney recipe gives your chutney a beautiful savory-sweet balance. The onions melt into the mixture, creating richness and extra complexity.
If you enjoy preserves that lean slightly toward savory, this style may become your favorite.
Small-Batch Apple Chutney Recipe: Perfect for Beginners
A Small-batch apple chutney recipe is ideal when:
- You’re experimenting with flavors
- You don’t have many apples on hand
- You want different chutney variations
- You’re preparing small jars for gifting
Small batches also help you master consistency and texture faster.
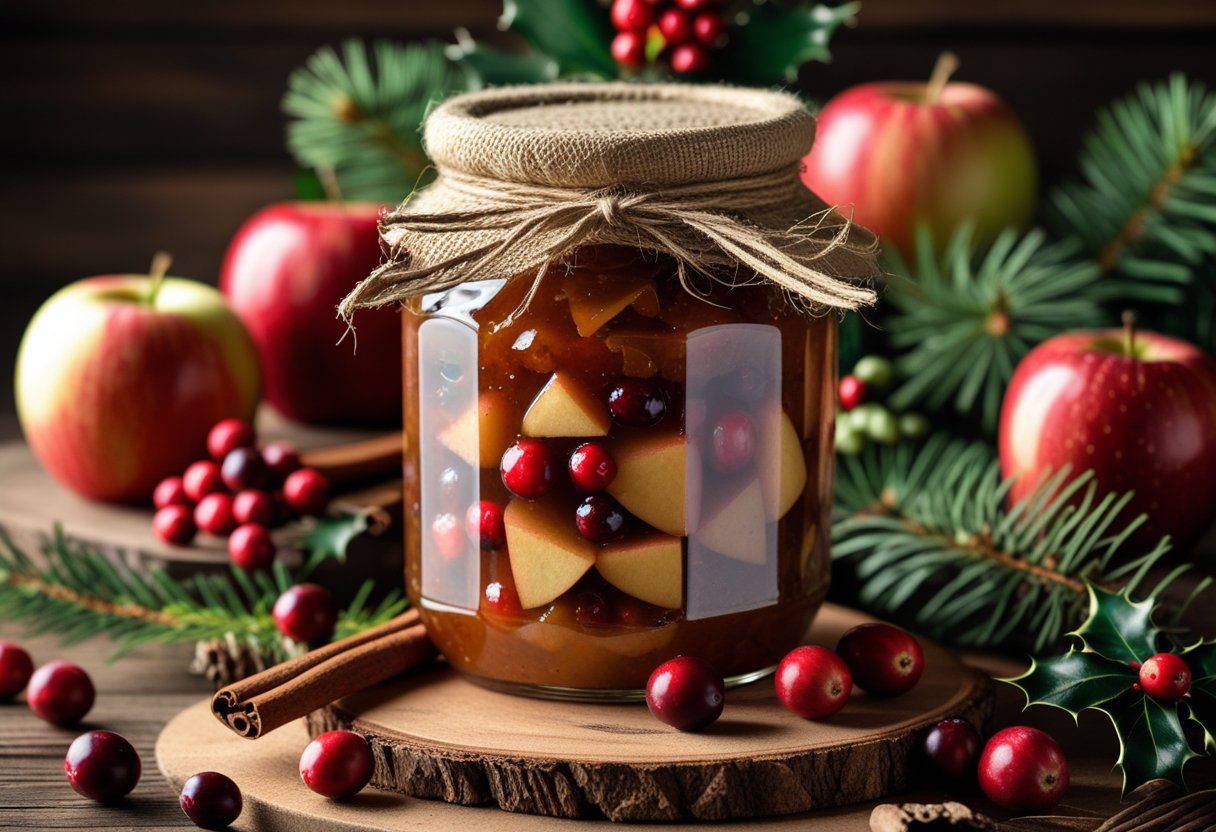
Festive Apple Chutney Homemade for the Holidays
This Festive apple chutney homemade version is perfect for:
- Christmas
- Thanksgiving
- New Year
- Holiday gifting
- Seasonal cheese boards
Add cranberries, cloves, orange zest, or nutmeg to make it feel celebratory.
Wrap the jar with twine, add a handwritten label, and you have a heartwarming handmade holiday gift.
How to Store Homemade Chutney the Right Way
Your chutney will last:
- Unopened: up to 12 months
- Opened: 4–6 weeks in refrigerator
Keep it away from sunlight and always use clean spoons to avoid contamination.
Texture Tips: How to Get the Best Results Every Time
- Simmer uncovered
- Use firm apples
- Add sugar early to help natural thickening
- Stir more during final 10–15 minutes
- Let chutney cool fully before judging thickness
For thickening apple chutney naturally, simply simmer longer.
Why This Is Truly the Best Apple Chutney Recipe
This Best apple chutney recipe stands out because it is:
- Deeply flavorful
- Foolproof
- Beginner-friendly
- Flexible
- Affordable
- Long-lasting
- Perfect for gifting (homemade preserves for gifting)
It’s the kind of recipe that becomes part of family tradition.
Final Words An Old-Fashioned Apple Chutney Recipe You’ll Use Forever
This Old-fashioned apple chutney recipe brings together nostalgia, homemade comfort, and the signature charm of traditional British cooking.
Whether you’re pairing it with meals, gifting it during the holidays, or enjoying it on warm buttered toast, this chutney delivers everything you want from a homemade preserve:
✔ Rich flavor
✔ Beautiful texture
✔ Simple ingredients
✔ Easy technique
It’s timeless, reliable, and guaranteed to bring joy to your table.
FAQs
What apples work best for making this chutney?
Cooking apples like Bramley, Granny Smith, or any firm, tart apple work best because they hold their shape and balance the sweetness and acidity beautifully.
Why is my apple chutney too runny?
It usually means it hasn’t simmered long enough. Cook uncovered on low heat and let excess liquid evaporate slowly until the chutney thickens naturally.
How do I fix chutney that tastes too vinegary?
Let it mature for 1–2 weeks. The sharp vinegar flavor mellows over time. If still too acidic, add a bit more sugar or a handful of raisins to balance the taste.
Can I reduce the sugar in this apple chutney recipe?
Yes. You can reduce sugar slightly, but remember sugar helps preserve and thicken chutney. Lower sugar will result in a softer, slightly shorter shelf-life chutney.
Why did my chutney burn at the bottom?
This happens when the heat is too high or when the mixture thickens toward the end. Always simmer on low heat and stir more frequently during the last 10–15 minutes.
How long does homemade apple chutney last?
Unopened sterilized jars can last up to 12 months if stored in a cool, dark place. Once opened, keep refrigerated and consume within 4–6 weeks.
Can I use regular eating apples instead of cooking apples?
Yes, but eating apples cook down faster and may create a softer chutney. Reduce sugar slightly and add a bit more vinegar to balance sweetness.
How do I know when my apple chutney is ready?
Drag a spoon through the mixture. If it leaves a clear trail and no liquid pools at the bottom, the chutney has thickened enough.
Can I freeze apple chutney?
Yes! Although not traditional, chutney freezes well. Pack it in airtight containers and freeze for up to 6 months.
What foods pair well with homemade apple chutney?
It’s wonderful with cheese boards, cold meats, sandwiches, burgers, roasted poultry, pork chops, charcuterie boards, and warm crusty bread.
Why is maturation time important for chutney?
As chutney rests, the flavors blend, vinegar mellows, and spices deepen. Matured chutney always tastes smoother and more rounded.