


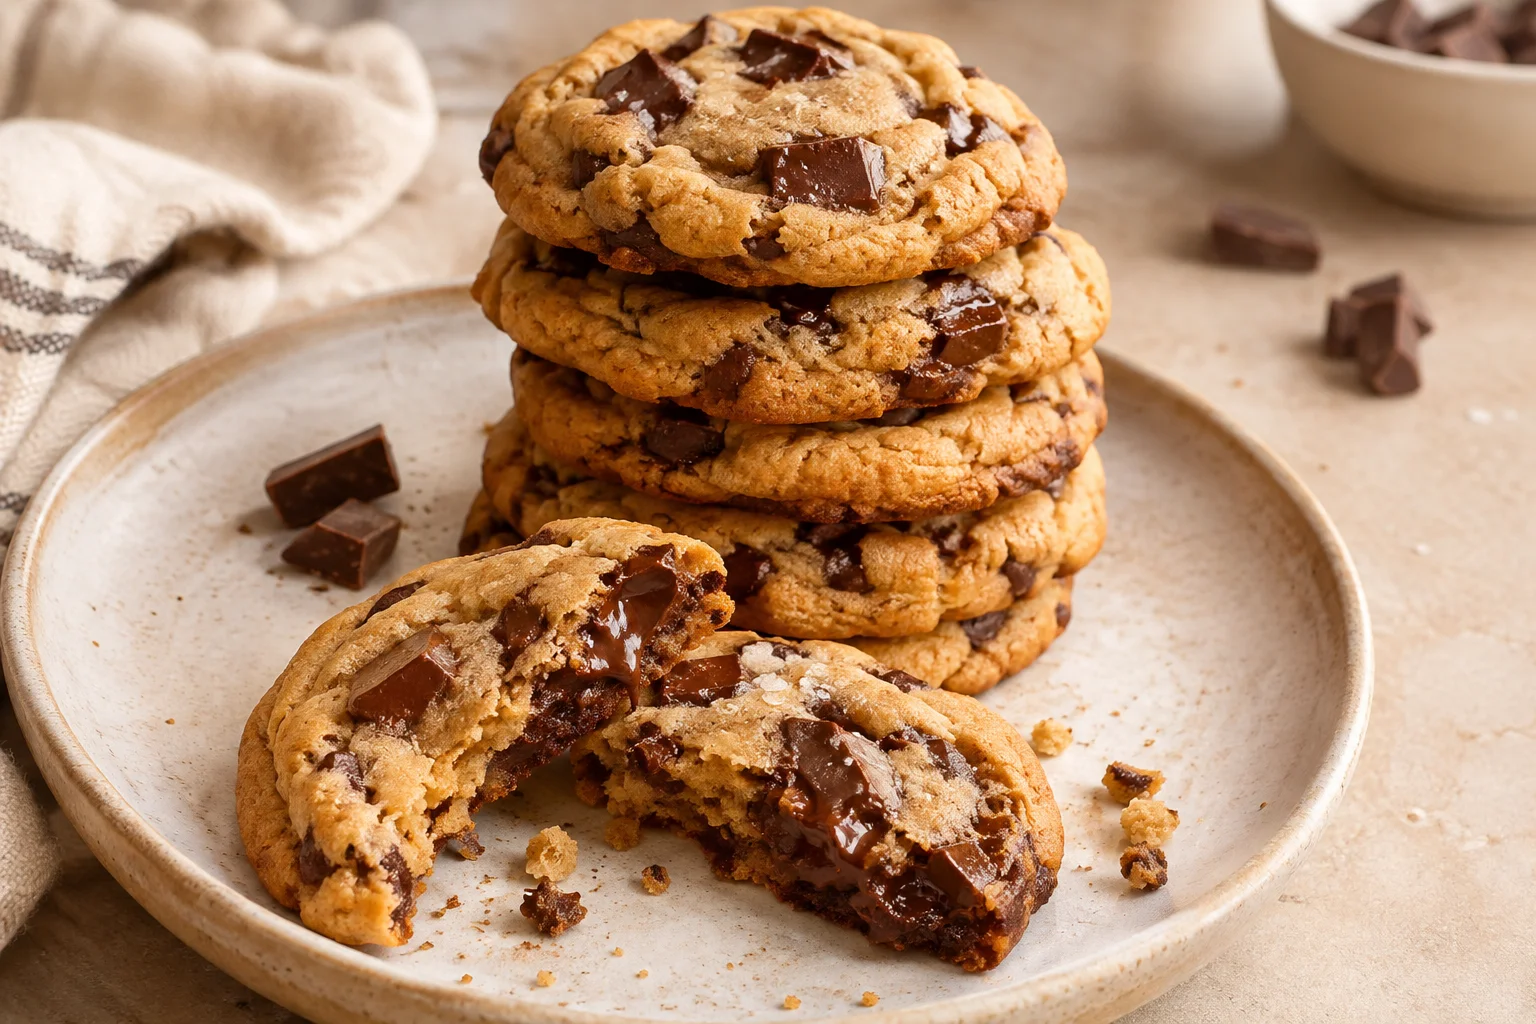

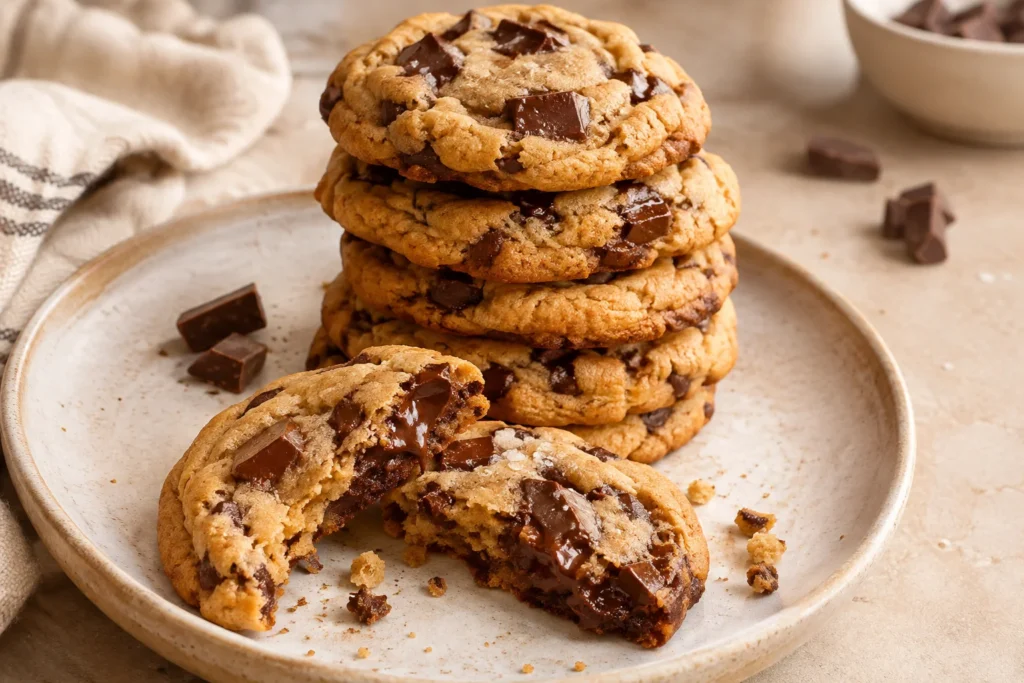
These homemade chewy chocolate chunk cookies are a delicious treat you can make with simple pantry ingredients and easy baking steps. In this recipe, I’ll walk you through the ingredients, preparation, baking techniques and practical tips to help you avoid common cookie mistakes.
You’ll also learn how to get thicker cookies, choose the best chocolate chunks and keep your cookies soft after baking. Grab your mixing bowl and favorite chocolate bar, and let’s make a batch of soft, chewy chocolate chunk cookies that you’ll want to bake again and again!
Why You’ll Love These Chewy Chocolate Chunk Cookies
These chewy chocolate chunk cookies have soft, gooey centers, lightly crisp edges and plenty of melted chocolate in every bite. They’re easy to make with simple pantry ingredients, and you can customize the chocolate, cookie size and sweetness to suit your taste. Whether you enjoy them warm from the oven or save a few for later, this homemade recipe delivers the classic bakery-style cookie experience.
Here are a few reasons these cookies deserve a spot in your baking routine.
1. Soft and chewy centers with crispy edges
The best part of these cookies is their texture. The edges turn lightly golden during baking while the centers stay soft and chewy. Brown sugar helps create a moist, tender texture, while the right balance of butter and flour helps the cookies hold their shape without becoming dry or cakey.
2. Big pools of melted chocolate
Unlike regular chocolate chip cookies, chocolate chunk cookies give you different sizes of chocolate pieces in every bite. Chopped chocolate creates rich, melted pockets throughout the dough, so you get plenty of chocolate flavor instead of small, evenly sized chips.
3. Simple ingredients and easy preparation
You don’t need special baking equipment or hard-to-find ingredients. All-purpose flour, unsalted butter, brown sugar, granulated sugar, eggs, vanilla extract, baking soda and chocolate chunks are enough to make delicious homemade cookies. A mixing bowl, baking sheet and cookie scoop make preparation even easier.
4. Perfect for chocolate lovers
You can use semisweet chocolate, dark chocolate or milk chocolate depending on how sweet you like your cookies. Semisweet chocolate offers a nice balance, dark chocolate adds a deeper cocoa flavor, and milk chocolate gives each cookie a sweeter taste.
5. A delicious bakery-style texture at home
These cookies have the thick, satisfying texture many people love in bakery-style chocolate chunk cookies. Their soft centers and golden edges make them feel special without requiring complicated baking techniques.
6. Easy to customize and make ahead
You can adjust the cookie size, change the type of chocolate or add a sprinkle of flaky sea salt for extra flavor. You can also prepare cookie dough ahead of time and freeze individual dough portions, making it easier to bake fresh cookies whenever a craving hits.
7. Perfect for almost any occasion
Serve these chewy chocolate chunk cookies with a cold glass of milk, a cup of coffee or your favorite hot chocolate. They’re great for afternoon snacks, lunchbox treats, holiday baking, family gatherings and homemade gifts.
The best thing is that you can enjoy them slightly warm when the chocolate is still melted or let them cool completely for a soft, chewy cookie that’s easy to store and share.
To make chewy chocolate chunk cookies, you’ll need all-purpose flour, unsalted butter, brown sugar, granulated sugar, an egg, vanilla extract, baking soda, salt and chopped chocolate. Each ingredient has a specific role in creating cookies with soft centers, lightly crisp edges and rich, melted chocolate pockets. For the best results, measure your ingredients accurately and use good-quality chocolate.
Here is what you’ll need and why each ingredient matters.
1. All-Purpose Flour
All-purpose flour gives the cookie dough its structure and helps the cookies hold their shape during baking. Measure it using the spoon-and-level method rather than scooping directly from the bag. Adding too much flour can make your cookies thick, dry and cakey instead of soft and chewy.
2. Unsalted Butter
Butter adds richness, flavor and moisture to chocolate chunk cookies. Unsalted butter is a good choice because it lets you control the amount of salt in the recipe. Depending on the recipe method, melted butter can help create a chewier texture, while softened butter can produce a slightly different cookie structure.
3. Light Brown Sugar
Light brown sugar is one of the key ingredients for soft and chewy cookies. Its molasses content adds moisture, a subtle caramel flavor and a tender texture. It also gives the cookies their classic golden-brown color.
4. Granulated White Sugar
Granulated sugar balances the moisture from brown sugar and helps the cookie edges spread and turn lightly crisp during baking. Using both brown sugar and white sugar creates a better balance of chewy centers and crisp edges.
5. Large Egg
An egg binds the ingredients together and adds moisture and structure to the cookie dough. Use a large egg at room temperature so it combines more easily with the butter and sugar mixture.
6. Pure Vanilla Extract
Vanilla extract adds a warm, sweet aroma that complements the brown sugar and chocolate. Pure vanilla extract gives the cookies a pleasant flavor without overpowering the chocolate chunks.
7. Baking Soda
Baking soda helps the cookies spread and brown during baking. It also reacts with the acidic molasses in brown sugar, helping create the desired cookie texture. Measure it carefully because too much can leave an unpleasant aftertaste.
8. Salt
Salt balances the sweetness of the sugars and brings out the flavor of the chocolate. Fine table salt works well in the dough. You can also finish the baked cookies with a little flaky sea salt for a sweet-and-salty flavor.
9. Semisweet Chocolate Chunks
Chocolate chunks are the main attraction of this recipe. They create larger melted chocolate pockets than standard chocolate chips, giving every bite a rich chocolate flavor.
You can chop a semisweet chocolate baking bar into small and medium-sized pieces. This creates a nice mix of melted chocolate pockets and smaller chocolate pieces throughout the cookies.
If you prefer a different flavor, you can use:
-
Dark chocolate: For a deeper, less sweet chocolate flavor.
-
Milk chocolate: For sweeter cookies with a creamy chocolate taste.
-
Bittersweet chocolate: For a richer cocoa flavor with less sweetness.
-
Chocolate chips: If you don’t have a chocolate bar available.
Ingredient Measurement Tips
For consistent baking results, measure your ingredients carefully. Use measuring cups and spoons for US customary measurements or a kitchen scale for more accurate gram measurements.
A few things to keep in mind:
-
Spoon flour into your measuring cup and level it with a straight edge.
-
Use room-temperature eggs for easier mixing.
-
Measure baking soda and salt with proper measuring spoons.
-
Chop chocolate into a mixture of small and medium chunks for different textures.
-
Avoid adding extra flour unless the recipe specifically requires it.
A little tip: Save a small handful of chocolate chunks before mixing the dough. Press them onto the tops of the cookie dough balls before baking. This gives the finished cookies an attractive bakery-style appearance with visible chocolate pieces on top.
Making chewy chocolate chunk cookies is easy. Start by mixing the butter and sugars, then add the egg and vanilla extract. Combine the wet and dry ingredients to form a soft cookie dough, fold in the chocolate chunks, chill the dough if needed, and bake until the edges turn lightly golden while the centers remain soft. Let the cookies rest on the baking sheet before moving them to a cooling rack.
Follow these simple steps to get homemade chocolate chunk cookies with soft centers, crisp edges and plenty of melted chocolate in every bite.
Step 1: Prepare the Dry Ingredients
In a medium mixing bowl, whisk together the all-purpose flour, baking soda and salt until evenly combined. This helps distribute the baking soda and salt throughout the flour, so the cookies bake evenly.
Set the bowl aside while you prepare the wet ingredients.
Step 2: Mix the Butter and Sugars
In a large mixing bowl, combine the melted unsalted butter, light brown sugar and granulated sugar. Whisk until the mixture looks smooth and glossy, with no large lumps of brown sugar.
Brown sugar adds moisture and a mild caramel flavor, while granulated sugar helps create lightly crisp cookie edges. Make sure the melted butter isn’t piping hot before adding the other ingredients.
Step 3: Add the Egg and Vanilla Extract
Add the large egg and vanilla extract to the butter and sugar mixture. Whisk until everything is well combined and the mixture looks smooth.
Avoid overmixing at this stage. You simply want the egg and vanilla to blend evenly into the mixture.
Step 4: Combine the Wet and Dry Ingredients
Gradually add the flour mixture to the wet ingredients. Use a rubber spatula or wooden spoon to fold everything together until a soft cookie dough forms.
Stop mixing as soon as the flour disappears. Overmixing can develop too much gluten, which may make the baked cookies tough instead of tender and chewy.
Step 5: Fold in the Chocolate Chunks
Add the semisweet chocolate chunks to the cookie dough and gently fold them in until evenly distributed.
Try to use a mixture of small and medium chocolate pieces. Smaller pieces spread chocolate flavor throughout the dough, while larger chunks create gooey chocolate pockets after baking.
Save a few chocolate chunks to press onto the tops of the dough balls before baking. This gives the finished cookies a bakery-style appearance.
Step 6: Shape the Cookie Dough
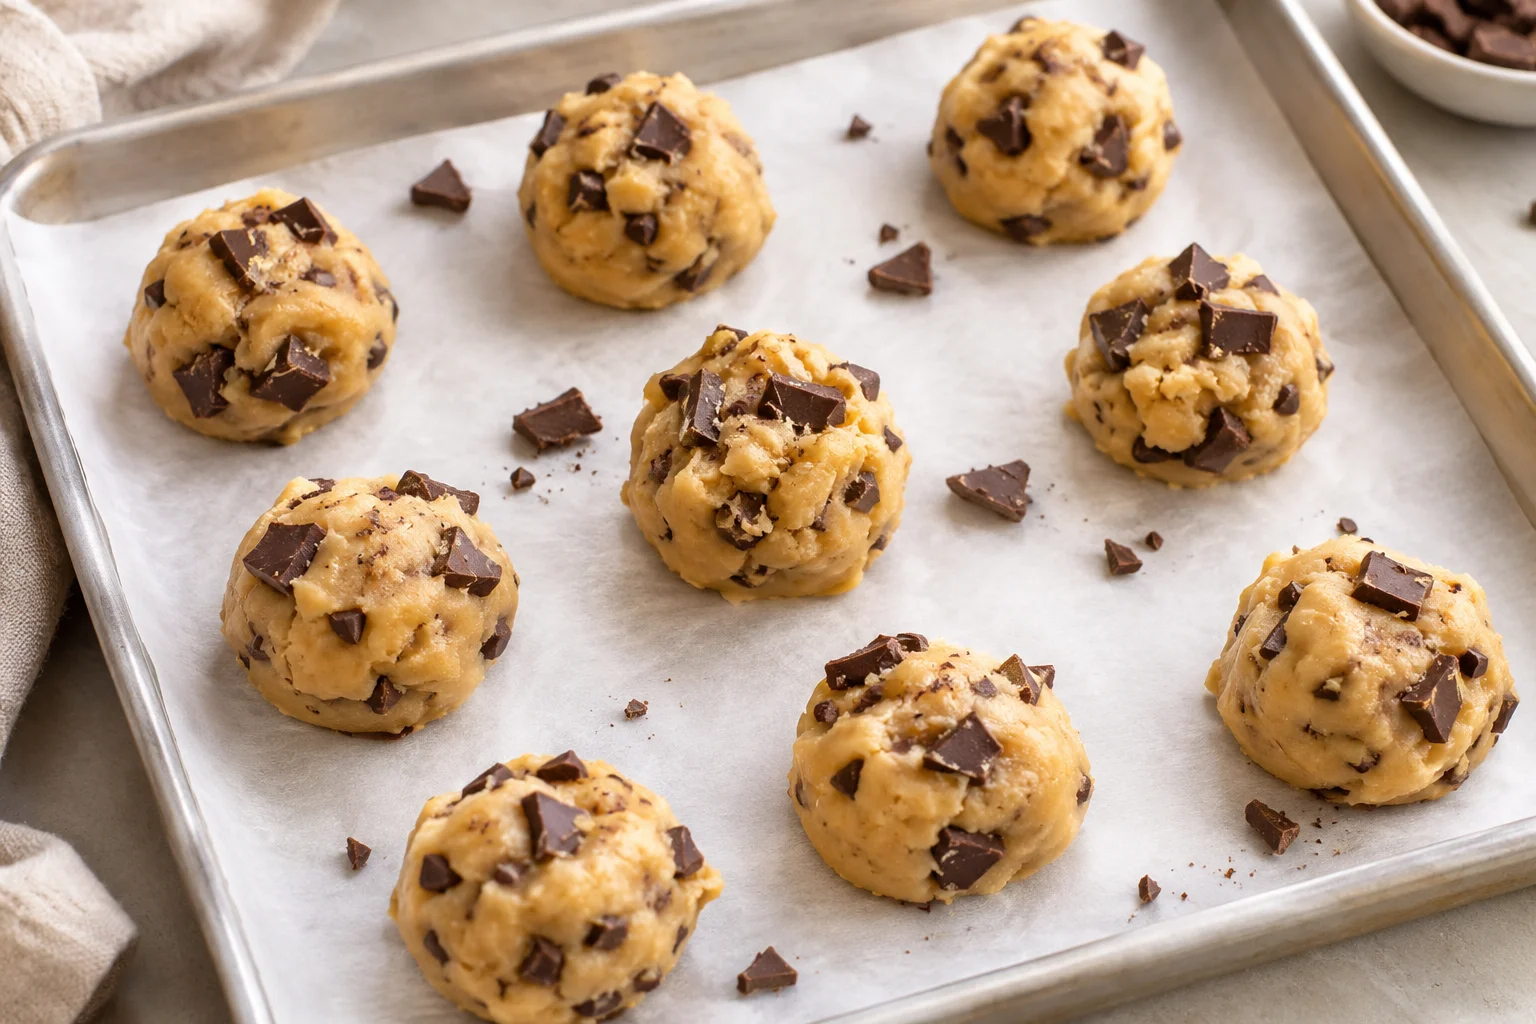
Use a cookie scoop or tablespoon to divide the dough into evenly sized portions. Roll each portion gently between your palms to form a ball.
Place the dough balls on a parchment-lined baking sheet, leaving enough space between them for spreading during baking.
Try to keep all the dough portions similar in size. This helps the cookies bake evenly and finish at around the same time.
Step 7: Chill the Cookie Dough
If your recipe calls for chilling, cover the dough and place it in the refrigerator for the recommended time.
Chilling helps firm up the butter, making the dough easier to handle and helping control spreading in the oven. It can also allow the flour to absorb moisture from the other ingredients.
If you’re short on time, follow the recipe’s instructions for baking without chilling rather than changing the dough preparation randomly.
Step 8: Bake the Chocolate Chunk Cookies
Preheat your oven to 350°F (175°C). Arrange the cookie dough balls on a parchment-lined baking sheet, leaving about 2 inches of space between them.
Bake for approximately 10–12 minutes, or until the edges look lightly golden and the centers still appear slightly soft.
Don’t wait for the entire cookie to turn dark golden brown. The centers will continue cooking from the residual heat after you remove the baking sheet from the oven.
The exact baking time depends on your cookie size and oven. Use the appearance of the cookies as your main guide.
Step 9: Let the Cookies Cool
Remove the baking sheet from the oven and let the cookies rest for about 5–10 minutes. During this time, the centers will finish setting while the edges become firm enough to handle.
Transfer the cookies carefully to a wire cooling rack and let them cool further.
If you enjoy warm chocolate chunk cookies, try one while the chocolate is still melted and the center is soft. Serve with a cold glass of milk or your favorite coffee.
Baking tip: For the best chewy texture, take the cookies out when their edges are set but their centers still look a little underdone. Leaving them in the oven until the centers look completely firm can result in dry, crunchy cookies once they cool.
Key Tips for Making Perfect Chocolate Chunk Cookies
The secret to making perfect chocolate chunk cookies is using the right ingredient measurements, choosing good-quality chocolate, avoiding overmixing and keeping a close eye on baking time. For cookies with soft, chewy centers and lightly crisp edges, pay attention to your butter temperature, flour quantity, dough consistency and oven temperature. A few small adjustments can make a big difference in the final texture and flavor.
Here are some helpful baking tips to get consistent results every time.
1. Measure the Flour Correctly
Too much flour is one of the most common reasons homemade chocolate chunk cookies turn out dry, thick or cakey. Instead of dipping your measuring cup directly into the flour bag, use a spoon to fill the cup and level the top with a straight edge.
If you have a kitchen scale, weighing the flour in grams is even more accurate. Correct flour measurements help maintain the right balance between moisture and structure.
2. Use the Right Butter Temperature
Butter plays an important role in how cookies spread and develop their texture. If your recipe calls for melted butter, let it cool slightly before mixing it with the sugars and egg.
Hot butter can affect the egg mixture and make the dough too loose. If you’re using softened butter, make sure it is soft enough to press with a finger but not oily or melted.
3. Use More Brown Sugar Than White Sugar
Brown sugar contains molasses, which helps retain moisture and gives chocolate chunk cookies their soft, chewy texture. Granulated sugar helps the edges spread and become lightly crisp.
Using the right balance of both sugars creates a pleasant contrast between tender centers and golden edges.
4. Avoid Overmixing the Cookie Dough
Once you add the all-purpose flour, mix only until the dry ingredients are incorporated. Overmixing develops gluten in the flour, which can make cookies tougher and less tender.
A rubber spatula works well for folding the ingredients together without overworking the dough.
5. Choose Good-Quality Chocolate
Chocolate chunks make a noticeable difference in the final cookies. Choose a good-quality semisweet or dark chocolate baking bar and chop it into different-sized pieces.
Larger pieces create melted chocolate pockets, while smaller pieces distribute chocolate flavor throughout the dough. You can also use milk chocolate if you prefer sweeter cookies.
6. Chill the Dough When Needed
Chilling cookie dough helps firm up the butter and makes the dough easier to handle. It can also reduce excessive spreading and allow the flavors to develop.
Follow the chilling time specified in your recipe. If you’re making a no-chill version, pay close attention to dough consistency and baking time.
7. Don’t Overcrowd the Baking Sheet
Leave around 2 inches of space between cookie dough balls so they have room to spread. Overcrowding can cause cookies to bake unevenly or merge together.
A parchment-lined, light-colored baking sheet is a good choice for more even baking and easier cleanup.
8. Use the Correct Oven Temperature
Preheat your oven to 350°F (175°C), unless your specific recipe calls for a different temperature.
An oven that is too hot can brown the edges before the centers bake properly. An oven that is too cool may cause the cookies to spread too much before they set.
An oven thermometer can help you check whether your oven temperature matches the setting.
9. Take the Cookies Out Before They Look Completely Done
For soft and chewy chocolate chunk cookies, look for lightly golden edges and centers that still appear slightly soft.
Don’t wait until the entire cookie becomes firm inside the oven. Residual heat from the baking sheet continues cooking the centers after you remove the cookies.
10. Let the Cookies Rest Before Moving Them
Freshly baked cookies are delicate and can break if you move them immediately. Leave them on the baking sheet for about 5–10 minutes before transferring them to a wire cooling rack.
This short resting period helps the centers set while keeping the cookies soft and chewy.
11. Add Extra Chocolate Chunks on Top
Before baking, press a few reserved chocolate chunks into the top of each cookie dough ball. This creates visible chocolate pieces and gives the cookies an attractive bakery-style appearance.
You can finish the cookies with a small pinch of flaky sea salt to balance the sweetness and bring out the chocolate flavor.
My best advice: Pay the most attention to flour measurements, butter temperature and baking time. These three factors have a major effect on whether your chocolate chunk cookies turn out soft and chewy or dry and overly crisp.
What Makes Chocolate Chunk Cookies Soft and Chewy?
Chocolate chunk cookies get their soft and chewy texture from the right balance of brown sugar, butter, flour, eggs and baking time. Brown sugar helps retain moisture, butter adds richness, eggs provide structure, and the correct amount of flour keeps the cookies tender. Baking them until the edges are lightly golden while the centers remain slightly soft also helps prevent dry, crunchy cookies.
Here are the main factors that make a difference in the texture of homemade chocolate chunk cookies.
1. Brown Sugar Helps Keep Cookies Moist
Brown sugar is one of the most important ingredients for making chewy cookies. It contains molasses, which adds moisture and gives the dough a slightly caramel-like flavor.
Using more brown sugar than granulated sugar generally helps create softer, chewier cookies. Granulated sugar still has an important role because it helps the edges spread and develop a light crispness.
The combination gives you a delicious contrast between soft centers and slightly crisp edges.
2. Butter Adds Richness and Affects Cookie Texture
Butter gives chocolate chunk cookies their rich flavor and tender texture. Melted butter can help create dense, chewy cookies because it mixes easily with the sugars and coats the flour.
However, butter temperature matters. If melted butter is too hot, it can make the dough excessively loose and affect how the cookies spread.
Allow melted butter to cool slightly before combining it with the other ingredients.
3. The Right Amount of Flour Prevents Dry Cookies
All-purpose flour provides structure and helps cookies hold their shape during baking. However, adding too much flour can make the dough stiff and produce dry, thick or cakey cookies.
For the best results, measure flour using the spoon-and-level method or weigh it with a kitchen scale.
The goal is to use enough flour to hold the dough together without taking away its moisture.
4. Egg Yolk Adds Extra Chewiness
Eggs help bind the ingredients together and provide moisture and structure.
The egg yolk contains fat, which contributes to a richer, more tender texture. Some chewy cookie recipes use an additional egg yolk to create a denser and softer result.
If your recipe includes an extra yolk, avoid adding unnecessary extra flour to compensate for the softer dough.
5. Cornstarch Can Help Create a Tender Texture
Some chocolate chip and chocolate chunk cookie recipes include a small amount of cornstarch.
Cornstarch contains no gluten-forming proteins, so replacing a small amount of flour with cornstarch can help produce a more tender cookie texture.
It is an optional ingredient rather than a requirement. You can make delicious soft and chewy chocolate chunk cookies without it.
6. Chilling the Dough Helps Control Spreading
Refrigerating cookie dough firms up the butter before baking. This helps the dough hold its shape longer in the oven and can reduce excessive spreading.
Chilling also gives the flour more time to absorb moisture and allows the flavors to develop.
The result depends on your recipe and chilling time. A longer chill does not automatically mean a chewier cookie, so follow the recommended resting time.
7. Baking Time Determines the Final Texture
Baking time has a major effect on whether your cookies stay soft or become crunchy.
For soft and chewy chocolate chunk cookies, remove them when:
-
The edges are lightly golden.
-
The centers still look slightly soft.
-
The cookies have spread but haven’t become completely firm.
-
The tops look mostly set rather than wet.
The cookies continue cooking from residual heat after coming out of the oven. Leaving them in too long can remove too much moisture and make them hard once cooled.
8. Chocolate Chunks Create Rich, Gooey Pockets
Chocolate chunks add more than chocolate flavor. Their different sizes create pockets of melted chocolate throughout the cookies.
Chopped semisweet chocolate bars are a great option because they produce a mixture of small chocolate pieces and larger melted sections.
For an extra-rich result, you can combine semisweet chocolate with dark chocolate. This balances sweetness while adding a deeper cocoa flavor.
The Secret to Perfectly Soft and Chewy Cookies
The best results come from balancing all these factors rather than relying on one special ingredient. Use enough brown sugar for moisture, measure flour carefully, avoid overmixing, chill the dough when required and remove the cookies before their centers become completely firm.
These small details help create chocolate chunk cookies with tender centers, lightly crisp edges and plenty of melted chocolate in every bite.
Best Chocolate to Use for Chocolate Chunk Cookies
The best chocolate for chewy chocolate chunk cookies is a good-quality semisweet chocolate baking bar with around 50% to 60% cocoa content. It provides a nice balance of sweetness and rich chocolate flavor while creating delicious melted chocolate pockets throughout the cookies. You can also use dark chocolate for a deeper cocoa taste or milk chocolate for a sweeter, creamier result.
The type of chocolate you choose affects the sweetness, flavor and texture of your homemade cookies. Here are the best options to consider.
1. Semisweet Chocolate
Semisweet chocolate is one of the best choices for chocolate chunk cookies because it offers a balanced combination of sweetness and cocoa flavor.
It melts beautifully during baking and creates rich chocolate pockets without making the cookies overly sweet. You can find semisweet chocolate in baking bars, wafers and chips.
Best for: Classic chewy chocolate chunk cookies with balanced sweetness.
2. Dark Chocolate
Dark chocolate is a great option if you enjoy a stronger cocoa flavor and less sweetness. It pairs especially well with brown sugar because its slightly bitter taste balances the caramel-like sweetness of the cookie dough.
Choose a dark chocolate bar with around 60% to 70% cocoa for a rich chocolate flavor without overwhelming the other ingredients.
Best for: Rich, less-sweet cookies with deep chocolate flavor.
3. Milk Chocolate
Milk chocolate contains more milk solids and generally has a sweeter, creamier taste than semisweet or dark chocolate.
It melts into smooth, sweet chocolate pockets and works well if you prefer a dessert with a milder cocoa flavor. Since milk chocolate is quite sweet, you may want to combine it with semisweet chocolate for better balance.
Best for: Sweeter cookies with a creamy chocolate taste.
4. Bittersweet Chocolate
Bittersweet chocolate has a stronger cocoa flavor and less sweetness than semisweet chocolate. It is a good choice for people who enjoy rich, bakery-style cookies without too much sugar.
You can combine bittersweet chocolate with semisweet chocolate to create a more balanced flavor.
Best for: Deep chocolate flavor with less sweetness.
Chocolate Chunks vs. Chocolate Chips
Although chocolate chunks and chocolate chips can both be used in homemade cookies, they produce slightly different results.
| Feature | Chocolate Chunks | Chocolate Chips |
|---|---|---|
| Shape | Irregular pieces | Uniform small pieces |
| Size | Small to large | Mostly consistent |
| Chocolate pockets | Larger melted sections | Smaller chocolate spots |
| Appearance | Rustic bakery-style look | Classic cookie appearance |
| Best use | Gooey chocolate chunk cookies | Traditional chocolate chip cookies |
Chopped chocolate bars are especially useful because they create different-sized pieces. Smaller pieces spread chocolate throughout the dough, while larger chunks create noticeable melted pockets.
My Favorite Chocolate Combination
For a balanced chocolate flavor, try combining semisweet chocolate with a little dark chocolate. The semisweet chocolate adds sweetness, while dark chocolate gives the cookies a deeper cocoa taste.
You can also reserve a few larger chunks to press into the tops of the cookie dough balls before baking. This creates an attractive bakery-style finish with visible chocolate pieces.
Quick tip: Avoid choosing chocolate based on cocoa percentage alone. Flavor, sweetness and how the chocolate behaves during baking all matter. A good-quality baking bar that you enjoy eating is usually a great starting point for delicious chewy chocolate chunk cookies.
How to Keep Chocolate Chunk Cookies from Going Flat
To keep chocolate chunk cookies from going flat, measure the flour correctly, use butter at the right temperature, chill the cookie dough when needed and make sure your oven is fully preheated before baking. Flat cookies usually happen when the dough contains too much melted butter, too little flour or becomes too warm before it reaches the oven. A few simple adjustments can help your cookies hold their shape and bake into thick, soft centers with lightly crisp edges.
Here are the most common reasons chocolate chunk cookies spread too much and how to fix them.
1. Measure the Flour Correctly
Using too little flour is one of the most common reasons cookies spread excessively. Flour provides structure and helps the dough hold its shape as the butter melts in the oven.
For accurate measurements, use the spoon-and-level method:
-
Spoon all-purpose flour into your measuring cup.
-
Avoid packing the flour down.
-
Level the top with a straight edge.
-
Use a kitchen scale if you want more precise measurements.
Adding too little flour can make the dough greasy and loose, causing the cookies to spread into thin, flat circles.
2. Avoid Using Butter That Is Too Hot
Melted butter works well in chewy chocolate chunk cookies, but it should not be extremely hot when you mix it with the other ingredients.
Hot butter can make the dough too loose and contribute to excessive spreading. Allow melted unsalted butter to cool slightly before adding the brown sugar, granulated sugar and egg.
If your dough looks unusually oily or runny, check the butter temperature and ingredient measurements.
3. Chill the Cookie Dough
Chilling is one of the easiest ways to reduce cookie spreading. When you refrigerate the dough, the butter becomes firmer, helping the cookie dough balls maintain their shape for longer in the oven.
For best results:
-
Cover the mixing bowl with plastic wrap.
-
Refrigerate the dough for the time specified in your recipe.
-
Scoop the dough into portions after chilling if it becomes firm.
-
Keep unused dough refrigerated while the first batch bakes.
If your kitchen is warm, chilling can be especially helpful.
4. Check Your Baking Soda Measurement
Baking soda helps cookies spread and brown during baking. However, using too much can affect the way the dough rises and spreads.
Always measure baking soda with a proper measuring spoon rather than estimating the amount.
Make sure your baking soda is fresh as well. Old or improperly stored leavening ingredients can affect baking results.
5. Don’t Place Dough on a Hot Baking Sheet
Adding fresh cookie dough to a baking sheet that is still hot from the previous batch can cause the butter to soften before the cookies enter the oven.
This may lead to excessive spreading and uneven baking.
Allow your baking sheet to cool completely between batches. If you’re baking several batches, using two baking sheets makes the process easier.
6. Use Parchment Paper and the Right Baking Sheet
A light-colored metal baking sheet lined with parchment paper is a good choice for baking chocolate chunk cookies.
Dark baking sheets absorb more heat and can cause the bottoms of cookies to brown faster. Parchment paper also helps prevent sticking and makes cleanup easier.
Avoid greasing the baking sheet heavily because additional fat can encourage spreading.
7. Preheat Your Oven Properly
Always preheat your oven before putting the cookie dough inside. If the oven is too cool, the butter may melt before the cookie structure has time to set.
For a recipe that calls for 350°F (175°C), allow the oven to reach that temperature before baking.
An oven thermometer can help you check the actual temperature because some ovens run hotter or cooler than their display suggests.
8. Shape the Cookie Dough Correctly
The shape and size of your cookie dough balls can also affect the finished cookies.
Instead of flattening the dough before baking, shape it into slightly rounded balls. This gives the cookies more height as they spread in the oven.
Try to keep the portions similar in size so they bake evenly. A cookie scoop is helpful for creating consistent portions.
Quick Troubleshooting Guide
| Problem | Possible cause | How to fix it |
|---|---|---|
| Cookies spread too much | Dough is too warm | Chill the dough |
| Cookies look greasy | Butter is too hot | Cool melted butter before mixing |
| Cookies become very thin | Too little flour | Measure flour accurately |
| Cookies spread unevenly | Hot baking sheet | Cool the baking sheet between batches |
| Cookies have dark edges | Oven temperature is too high | Check with an oven thermometer |
| Cookies lose their shape | Dough balls are too flat | Shape them into rounded portions |
My best tip: If your chocolate chunk cookies repeatedly turn out flat, start by checking your flour measurement, butter temperature and dough temperature. These three factors can make a noticeable difference in how much the cookies spread and how thick they remain after baking.
How to Keep Chocolate Chunk Cookies Soft
To keep chocolate chunk cookies soft and chewy, avoid overbaking them, use enough brown sugar, store them in an airtight container and protect them from dry air. Let the cookies cool properly before storing them, and keep them at room temperature rather than leaving them uncovered on the counter. These simple steps help preserve their moisture, tender centers and rich chocolate flavor for several days.
Here are the best ways to keep your homemade chocolate chunk cookies fresh and soft.
1. Don’t Overbake the Cookies
Overbaking is one of the biggest reasons chocolate chunk cookies become hard and dry. If you leave them in the oven until the centers look completely firm, they may lose too much moisture.
For soft and chewy cookies:
-
Bake until the edges are lightly golden.
-
Remove them while the centers still look slightly soft.
-
Let them rest on the baking sheet for 5–10 minutes.
-
Transfer them to a wire cooling rack afterward.
The residual heat continues cooking the centers, helping the cookies set without becoming overly crunchy.
2. Use Enough Brown Sugar
Brown sugar contains molasses, which helps retain moisture in cookie dough. It also gives chocolate chunk cookies their rich caramel-like flavor and chewy texture.
Using a good balance of light brown sugar and granulated sugar helps create cookies with tender centers and lightly crisp edges.
Avoid changing the sugar quantities randomly because too much or too little can affect the final texture.
3. Avoid Adding Too Much Flour
Too much all-purpose flour can make cookies dry, dense and cakey. It can also affect how well the cookies spread during baking.
For accurate results, measure flour using the spoon-and-level method or a kitchen scale. Don’t pack flour into your measuring cup.
Following the correct flour-to-butter ratio helps maintain the moisture needed for soft chocolate chunk cookies.
4. Let the Cookies Cool Before Storing
Freshly baked cookies need time to cool before you place them in a storage container.
If you seal warm cookies inside an airtight container, trapped steam can create condensation. This can make the cookies soggy and affect their texture.
Let them cool completely on a wire rack before storing them.
5. Store Cookies in an Airtight Container
An airtight container is one of the easiest ways to keep homemade chocolate chunk cookies soft.
Once completely cooled:
-
Place the cookies in a clean, airtight food storage container.
-
Arrange them in a single layer or separate layers with parchment paper.
-
Close the lid tightly.
-
Store the container at room temperature away from direct sunlight and heat.
Properly stored cookies generally stay enjoyable for around 3–5 days, although freshness depends on the recipe and storage conditions.
6. Add a Slice of Bread to the Container
A simple trick for maintaining cookie softness is placing a small piece of fresh white bread inside the airtight container.
The bread helps maintain moisture in the enclosed space, which can help prevent cookies from drying out. The cookies may gradually absorb some of that moisture and remain softer.
Keep the bread separate from the cookies if possible, and replace it when it becomes dry. Check the container regularly and discard everything if you notice mold.
7. Freeze Cookies for Longer Storage
If you want to keep chocolate chunk cookies fresh for longer, freezing is a great option.
Follow these steps:
-
Allow the baked cookies to cool completely.
-
Place them in a freezer-safe airtight container or freezer bag.
-
Separate layers with parchment paper to prevent sticking.
-
Remove excess air from the freezer bag.
-
Label the container with the freezing date.
For the best quality, enjoy frozen baked cookies within about 2–3 months.
When you’re ready to eat them, thaw at room temperature or warm them briefly in the microwave.
8. Reheat Cookies Before Serving
If your cookies have become slightly firm after storage, warming them can bring back some of their soft texture.
Place one cookie on a microwave-safe plate and microwave it for about 8–10 seconds. Check its temperature and add a few more seconds if needed.
You can also warm cookies in an oven at a low temperature for a few minutes.
Be careful not to overheat them because excessive heat can dry out the cookie and make the chocolate too hot.
How Long Do Chocolate Chunk Cookies Stay Soft?
| Storage method | Recommended time |
|---|---|
| Room temperature in an airtight container | Around 3–5 days |
| Refrigerator | Usually up to 1 week, depending on the recipe |
| Freezer | Best quality within 2–3 months |
These are general quality guidelines. Always discard cookies if you notice mold, an unusual smell or signs of spoilage.
My best tip: If you want your chocolate chunk cookies to stay soft for several days, let them cool completely and store them in an airtight container at room temperature. Avoid overbaking in the first place because keeping the moisture inside the cookies is much easier than trying to bring it back later.
To make thick chocolate chunk cookies with gooey chocolate centers, use properly measured flour, keep the butter from becoming too warm, chill the cookie dough when needed and shape the dough into tall portions instead of flat discs. Use a generous amount of chopped chocolate and avoid overbaking the cookies. These techniques help create thick, bakery-style cookies with golden edges, soft centers and melted chocolate pockets.
Here are the best ways to get that thick, gooey texture at home.
1. Use the Correct Flour-to-Butter Ratio
The balance between flour and butter plays a major role in cookie thickness. Flour provides structure, while butter adds richness and helps the dough spread during baking.
If you use too little flour, the cookies may spread into thin, flat circles. Too much flour, however, can make them dry and cakey.
Measure all-purpose flour accurately using a kitchen scale or the spoon-and-level method. Follow the recipe measurements rather than adding extra flour without checking the dough consistency.
2. Chill the Cookie Dough Before Baking
Chilling helps firm up the butter and makes the cookie dough easier to handle. Cold dough generally spreads more slowly in the oven, giving the cookies more time to develop their structure.
For thicker chocolate chunk cookies:
-
Cover the dough with plastic wrap.
-
Refrigerate it for the recommended time.
-
Keep the dough cool while shaping the portions.
-
Bake the dough according to the recipe instructions.
If the dough becomes too firm after refrigeration, let it sit at room temperature briefly until you can scoop it comfortably.
3. Shape the Dough into Tall Portions
The shape of your cookie dough balls can affect the final thickness.
Instead of rolling the dough into perfectly round, flat balls, shape each portion slightly taller than it is wide. This gives the cookies more height as they spread during baking.
A cookie scoop can help you create evenly sized portions. Keeping the dough portions consistent also helps every cookie bake at a similar rate.
4. Use Plenty of Chopped Chocolate
For gooey chocolate centers, use good-quality semisweet chocolate or dark chocolate chopped into different-sized pieces.
Larger chocolate chunks create rich melted pockets, while smaller pieces distribute chocolate throughout the cookie.
Press a few extra chocolate chunks into the top of each dough ball before baking. This gives the cookies a bakery-style appearance and makes the chocolate more visible.
5. Avoid Overmixing the Dough
Once you add the all-purpose flour, mix only until the ingredients are combined.
Overmixing can develop excess gluten, making the cookies tougher and less tender. A gentle folding motion with a rubber spatula helps keep the dough soft and manageable.
6. Bake at the Correct Oven Temperature
A properly preheated oven helps the outside of each cookie begin setting while the inside remains soft.
For a recipe calling for 350°F (175°C), make sure the oven reaches that temperature before placing the baking sheet inside.
Avoid opening the oven door repeatedly because this can affect the temperature and baking time.
7. Don’t Overbake the Cookies
One of the biggest secrets to gooey chocolate chunk cookies is removing them from the oven at the right time.
Look for these signs:
-
The edges are lightly golden.
-
The outside looks set.
-
The centers still appear slightly soft.
-
The chocolate chunks look glossy and melted.
Let the cookies rest on the baking sheet for about 5–10 minutes. The residual heat will continue setting the centers without making them completely dry.
8. Use a Light-Colored Baking Sheet
A light-colored metal baking sheet lined with parchment paper is a good option for thick, chewy cookies.
Dark baking sheets absorb more heat and can cause the bottoms to brown faster. A properly prepared baking sheet helps the cookies bake more evenly.
Also, avoid placing fresh dough on a hot baking sheet between batches because the butter may begin melting before the cookies reach the oven.
Quick Tips for Thick and Gooey Chocolate Chunk Cookies
| What you want | What to do |
|---|---|
| Thick cookies | Chill the dough and shape tall dough portions |
| Soft centers | Avoid overbaking |
| Gooey chocolate pockets | Use chopped chocolate bars |
| Less spreading | Keep the dough cool |
| Golden edges | Bake at the correct oven temperature |
| Tender texture | Avoid overmixing the dough |
My best tip: If you want cookies that look and taste like thick bakery-style chocolate chunk cookies, focus on three things: properly chilled dough, tall dough portions and large chopped chocolate pieces. Remove the cookies while their centers are still soft, then let them finish setting on the baking sheet. This gives you thick cookies with golden edges and delicious melted chocolate in the middle.
How Long Should You Chill Chocolate Chunk Cookie Dough?
For the best results, chill chocolate chunk cookie dough for at least 30 minutes to 1 hour before baking. This gives the butter time to firm up, helps control cookie spreading and allows the flour to absorb moisture. If you have more time, chilling the dough for 2–3 hours or overnight can develop a deeper flavor and help produce thicker, chewier cookies.
The ideal chilling time depends on your recipe, the butter temperature and how thick you want your cookies to be. Here’s what to expect at different chilling times.
1. Chilling for 30 Minutes
A 30-minute chill is a good option if you’re short on time but still want better control over cookie spreading.
During this time, the melted butter begins to firm up, making the dough less sticky and easier to scoop. The cookies may hold their shape better than dough baked immediately after mixing.
Best for: Bakers who want a quick rest before baking without waiting several hours.
2. Chilling for 1 Hour
Chilling cookie dough for 1 hour gives the butter more time to become firm and allows the flour to absorb some of the moisture from the eggs and butter.
The dough also becomes easier to handle, which makes portioning more consistent.
Best for: Soft, chewy chocolate chunk cookies with a slightly thicker shape.
3. Chilling for 2–3 Hours
If you want thicker chocolate chunk cookies with less spreading, chilling the dough for 2–3 hours is a good option.
The firmer dough takes longer to spread in the oven, helping the cookies maintain more height. The resting time can also allow the flavors of brown sugar, butter and vanilla to blend together.
Best for: Thick, bakery-style cookies with soft centers.
4. Chilling Overnight
Overnight chilling gives the cookie dough more time to rest and allows the flour to absorb moisture gradually. This can create a richer, more developed flavor and make the dough easier to portion once properly softened.
Keep the dough covered in an airtight container or tightly wrapped in plastic wrap to prevent it from drying out or absorbing odors from the refrigerator.
Best for: Bakers who want to prepare cookie dough ahead of time and bake fresh cookies the next day.
Cookie Dough Chilling Time Comparison
| Chilling time | Expected result | Best for |
|---|---|---|
| No chilling | Softer dough and potentially more spreading | Quick baking |
| 30 minutes | Firmer dough and improved handling | Short preparation |
| 1 hour | Better dough consistency | Everyday baking |
| 2–3 hours | Firmer dough and thicker cookies | Bakery-style texture |
| Overnight | More time for moisture absorption and flavor development | Make-ahead baking |
How to Chill Chocolate Chunk Cookie Dough Properly
Follow these simple steps to chill your cookie dough without drying it out.
-
Prepare the cookie dough according to your recipe.
-
Cover the mixing bowl tightly with plastic wrap or transfer the dough to an airtight container.
-
Place it in the refrigerator at 40°F (4°C) or below.
-
Chill for the recommended time.
-
Scoop or shape the dough into portions as directed by your recipe.
-
Bake according to the recipe instructions.
If the dough becomes too firm to scoop after refrigeration, let it sit at room temperature briefly until it is workable. Avoid leaving perishable cookie dough at room temperature for extended periods.
Should You Chill the Dough Before or After Shaping?
You can do either, depending on how firm your cookie dough is.
Chilling the whole batch: This works well when the dough is soft or sticky. Cover the mixing bowl and refrigerate it before scooping.
Chilling individual dough balls: This is convenient when you want evenly portioned cookies ready for baking. Scoop the dough first, arrange the portions on a tray and refrigerate them until firm.
Both methods can work well. The important thing is to keep the dough covered and prevent it from becoming too warm before baking.
My recommendation: If you want thick, soft and chewy chocolate chunk cookies, start with a 1–2 hour chilling period. It gives the butter time to firm up and makes the dough easier to handle. However, the best chilling time depends on your recipe, so test the results before deciding whether a longer rest is necessary.
Can You Make Chocolate Chunk Cookies Without Chilling?
Yes! You can make chocolate chunk cookies without chilling the dough. A no-chill chocolate chunk cookie recipe saves time and lets you bake fresh cookies right after mixing the ingredients. The cookies may spread a little more than refrigerated dough, but you can still get soft, chewy centers and lightly crisp edges by using the correct ingredient measurements, properly cooled butter and a preheated oven.
If you’re craving homemade chocolate chunk cookies but don’t want to wait several hours, here are some tips to get good results without chilling.
1. Use Butter at the Right Temperature
Butter temperature is especially important in a no-chill cookie recipe. If you’re using melted butter, allow it to cool slightly before mixing it with the brown sugar and granulated sugar.
Hot butter can make the dough too loose, causing the cookies to spread excessively during baking.
If you’re using softened butter, make sure it is soft enough to press with your finger but not oily or melted.
2. Measure the Flour Accurately
Since you’re skipping refrigeration, the dough needs the right balance of flour and butter to hold its shape.
Measure all-purpose flour using the spoon-and-level method or a kitchen scale. Avoid adding too little flour because this can make the dough overly soft and cause flat cookies.
However, don’t add extra flour without checking the recipe measurements. Too much can make the cookies dry and cakey.
3. Shape the Dough into Slightly Taller Balls
For thicker no-chill chocolate chunk cookies, shape the dough into slightly taller portions instead of flattening it into discs.
Use a cookie scoop to make evenly sized dough balls. This helps the cookies bake consistently and gives them a better chance of maintaining some height as they spread.
4. Use Chocolate Chunks Instead of Only Chocolate Chips
Chopped semisweet chocolate bars are a great choice for no-chill cookies. They create larger melted chocolate pockets and give the cookies a rich, bakery-style appearance.
You can also combine semisweet chocolate with dark chocolate for a deeper cocoa flavor.
Press a few extra chocolate chunks onto the tops of the dough balls before baking for a more attractive finish.
5. Preheat Your Oven Properly
Always preheat your oven before placing the cookie dough inside. For a recipe that calls for 350°F (175°C), make sure the oven has reached that temperature.
A properly heated oven helps the cookie edges begin setting while the centers remain soft.
If the oven is too cool, the butter may melt before the cookie structure develops, leading to excessive spreading.
6. Bake the Cookies Without Overbaking
No-chill chocolate chunk cookies usually bake in a similar amount of time to refrigerated cookie dough, but the exact time depends on dough temperature and cookie size.
Look for lightly golden edges and centers that still appear slightly soft.
Remove the baking sheet from the oven and let the cookies rest for about 5–10 minutes. The residual heat will help the centers finish setting while keeping the cookies tender.
No-Chill vs. Chilled Chocolate Chunk Cookie Dough
| Feature | No-Chill Dough | Chilled Dough |
|---|---|---|
| Preparation time | Faster | Requires extra time |
| Dough consistency | Softer | Firmer |
| Cookie spreading | May spread more | Usually spreads less |
| Cookie thickness | Can be thinner | Often thicker |
| Flavor development | Less resting time | More time for flavors to develop |
| Best for | Quick homemade cookies | Make-ahead baking |
When Should You Still Chill No-Chill Cookie Dough?
Even if you’re following a no-chill recipe, there are situations where a short refrigeration period can help.
For example, if your kitchen is very warm, your butter has become too soft or the dough feels greasy and difficult to shape, place it in the refrigerator for about 15–20 minutes.
This short rest can firm up the butter and make the dough easier to handle without requiring a long chilling period.
My recommendation: If you want quick homemade chocolate chunk cookies, a no-chill method is perfectly fine. Focus on accurate flour measurements, properly cooled butter, evenly shaped dough balls and the correct oven temperature. You’ll still get delicious cookies with soft centers, golden edges and plenty of melted chocolate without waiting hours for the dough to chill.
How to Tell When Chocolate Chunk Cookies Are Done
Chocolate chunk cookies are done when their edges look lightly golden and set, while the centers still appear slightly soft and puffy. You don’t need to wait until the entire cookie becomes firm or dark brown. The cookies will continue baking from the residual heat of the baking sheet after you remove them from the oven, helping the centers set while keeping the texture soft and chewy.
Here are the signs to look for so you can avoid underbaked or overbaked cookies.
1. Check the Edges for a Light Golden Color
The edges are one of the easiest ways to tell whether chocolate chunk cookies are ready.
Look for these signs:
-
The outer edges should have a light golden-brown color.
-
The edges should look set rather than wet.
-
The cookies should hold their shape when you gently move the baking sheet.
-
The bottoms should be lightly browned, not dark or burnt.
If the edges are still pale and look completely wet, the cookies may need another minute or two in the oven.
2. Make Sure the Centers Still Look Slightly Soft
For soft and chewy chocolate chunk cookies, the centers should look a little underdone when you first remove them from the oven.
This is normal because the residual heat continues cooking the middle as the cookies rest.
Avoid waiting until the centers look completely firm. Doing so can result in dry, crunchy cookies after cooling.
3. Check the Cookie Texture
Freshly baked chocolate chunk cookies should have set edges and soft centers.
You can gently check one cookie after allowing it to rest for a few minutes.
A properly baked cookie should:
-
Hold its shape without falling apart.
-
Have a tender, slightly soft center.
-
Show melted chocolate pockets.
-
Have edges that are lightly crisp rather than hard.
Don’t press the cookies too hard while they’re hot because they are still delicate.
4. Follow the Recommended Baking Time
Most chewy chocolate chunk cookie recipes bake at around 350°F (175°C), with baking times often ranging from 10–12 minutes for medium-sized cookies.
However, the exact time depends on your oven, dough temperature and cookie size.
| Cookie size | Approximate baking time |
|---|---|
| Small cookies | 8–10 minutes |
| Medium cookies | 10–12 minutes |
| Large cookies | 12–15 minutes |
| Extra-large cookies | 15–18 minutes |
These are general estimates. Always check the cookie edges and centers rather than relying on the clock alone.
5. Let the Cookies Rest on the Baking Sheet
Once the cookies look ready, remove the baking sheet from the oven and let them rest for about 5–10 minutes.
This resting period is important because:
-
Residual heat finishes cooking the centers.
-
The edges become firm enough to handle.
-
The cookies become easier to transfer.
-
The soft centers settle without losing their chewy texture.
After resting, transfer the cookies to a wire cooling rack if you want them to cool completely.
6. Avoid Waiting for the Chocolate to Become Completely Firm
Melted chocolate chunks can make it difficult to judge cookie doneness because the chocolate may remain glossy and soft even after the cookie dough has baked properly.
Don’t use the appearance of melted chocolate alone to decide whether your cookies are ready.
Instead, check the edges, the cookie structure and the appearance of the center. Chocolate chunks should look melted and glossy, while the surrounding cookie dough should look mostly set.
Underdone vs. Perfectly Baked vs. Overbaked Cookies
| Cookie condition | Appearance | Final texture |
|---|---|---|
| Underdone | Pale edges and very wet centers | Too soft and potentially raw |
| Perfectly baked | Lightly golden edges and slightly soft centers | Chewy with tender centers |
| Overbaked | Dark edges and firm centers | Dry, hard and crunchy |
My best tip: For chewy chocolate chunk cookies, take them out when the edges are lightly golden but the centers still look slightly soft. Let them rest on the hot baking sheet for 5–10 minutes before moving them. This small step helps create the perfect balance of crisp edges, soft centers and gooey chocolate pockets.
The most common chocolate chunk cookie mistakes include using too much flour, melting the butter incorrectly, overmixing the dough, skipping chilling when needed and baking the cookies for too long. These problems can cause cookies to spread too much, turn out hard, become cakey or lose their soft, chewy centers. The good news is that most cookie problems are easy to fix once you know what causes them.
Here are the common baking mistakes to avoid and how to get better results with your homemade chocolate chunk cookies.
1. Using Too Much Flour
The problem: Your chocolate chunk cookies turn out thick, dry and cakey instead of soft and chewy.
Why it happens: Adding too much all-purpose flour creates a stiff dough with less moisture. This can prevent the cookies from spreading properly and make their texture dense.
How to fix it:
-
Measure flour using the spoon-and-level method.
-
Avoid scooping flour directly from the bag.
-
Use a kitchen scale for more accurate measurements.
-
Follow the recipe’s flour quantity instead of adding extra flour unnecessarily.
2. Using Butter That Is Too Hot
The problem: Your cookie dough looks greasy, loose or unusually runny, and the cookies spread too much during baking.
Why it happens: Extremely hot melted butter can make the dough too warm and affect how the other ingredients combine.
How to fix it:
-
Let melted butter cool slightly before mixing.
-
Avoid adding hot butter directly to the egg mixture.
-
Follow the butter preparation method specified in your recipe.
-
Chill the dough if it becomes too soft to handle.
3. Skipping Dough Chilling When It’s Needed
The problem: Your cookies spread too much and become thinner than expected.
Why it happens: Warm cookie dough contains softer butter, which melts quickly in the oven. This can cause the cookies to spread before their structure sets.
How to fix it:
-
Refrigerate the dough for 30–60 minutes if your recipe allows.
-
Cover the dough tightly to prevent it from drying out.
-
Keep the dough cool while preparing the baking sheets.
-
Avoid leaving shaped dough balls in a warm kitchen.
4. Overmixing the Cookie Dough
The problem: Your cookies turn out tough, dense or less tender than expected.
Why it happens: Mixing the dough too much after adding flour can develop excess gluten. This affects the texture and can make cookies less tender.
How to fix it:
-
Whisk the dry ingredients separately.
-
Add the flour mixture gradually.
-
Fold the ingredients together using a rubber spatula.
-
Stop mixing once the flour disappears.
5. Baking the Cookies for Too Long
The problem: Your cookies become hard, crunchy or dry instead of soft and chewy.
Why it happens: Excessive baking removes too much moisture from the cookie dough. The cookies also continue cooking after you remove them from the oven.
How to fix it:
-
Start checking the cookies near the minimum recommended baking time.
-
Look for lightly golden edges.
-
Remove them while the centers still appear slightly soft.
-
Let them rest on the baking sheet for 5–10 minutes.
6. Using the Wrong Oven Temperature
The problem: Your cookies brown too quickly, remain underbaked in the center or spread more than expected.
Why it happens: An oven that runs too hot or too cool can change how the butter melts and how quickly the cookie structure sets.
How to fix it:
-
Preheat the oven before baking.
-
Use an oven thermometer to check the actual temperature.
-
Follow the temperature stated in your recipe.
-
Avoid opening the oven door repeatedly during baking.
7. Placing Cookie Dough on a Hot Baking Sheet
The problem: Your second batch spreads more than the first batch.
Why it happens: A hot baking sheet starts melting the butter in the dough before the cookies even enter the oven.
How to fix it:
-
Let the baking sheet cool completely between batches.
-
Use a second baking sheet if you’re baking multiple batches.
-
Line the baking sheet with parchment paper.
-
Never place fresh cookie dough directly onto a hot tray.
8. Using Low-Quality Chocolate
The problem: Your cookies lack rich chocolate flavor and don’t have the melted chocolate pockets you expected.
Why it happens: The type and quality of chocolate affect the final taste and texture. Some chocolate chips are formulated to hold their shape during baking rather than melt into large pools.
How to fix it:
-
Choose good-quality semisweet chocolate.
-
Use chopped chocolate baking bars.
-
Combine small and large chocolate chunks.
-
Try dark chocolate for a deeper cocoa flavor.
-
Save a few chocolate pieces to press onto the dough before baking.
9. Making Uneven Cookie Dough Portions
The problem: Some cookies are overbaked while others remain too soft in the middle.
Why it happens: Different-sized dough portions bake at different speeds. Smaller cookies finish sooner than larger ones.
How to fix it:
-
Use a cookie scoop for consistent portions.
-
Keep dough balls approximately the same size.
-
Leave enough space between cookies.
-
Bake different-sized cookies in separate batches when necessary.
10. Storing Cookies Before They Cool Completely
The problem: Your cookies become soggy or develop an unpleasant texture after storage.
Why it happens: Warm cookies release steam. When sealed inside an airtight container, the trapped moisture creates condensation.
How to fix it:
-
Let cookies cool completely on a wire rack.
-
Use a clean, airtight storage container.
-
Separate layers with parchment paper.
-
Store them at room temperature away from heat and direct sunlight.
Chocolate Chunk Cookie Troubleshooting Guide
Here’s a quick reference to help you identify and fix common cookie baking problems.
| Cookie problem | Possible cause | Best solution |
|---|---|---|
| Cookies spread too much | Warm dough or excess butter | Chill dough and check measurements |
| Cookies are too dry | Too much flour | Measure flour accurately |
| Cookies are hard | Overbaking | Reduce baking time |
| Cookies are cakey | Too much flour or incorrect ingredient balance | Follow the recipe measurements |
| Cookies are greasy | Butter is too hot | Cool melted butter before mixing |
| Cookies are raw in the middle | Cookies are too large or underbaked | Adjust baking time and check doneness |
| Chocolate doesn’t melt much | Chocolate type | Try chopped baking chocolate |
| Cookies bake unevenly | Uneven dough portions | Use a cookie scoop |
| Cookies become soggy after storage | Stored while warm | Cool completely before sealing |
My best advice: If your chocolate chunk cookies aren’t turning out the way you expected, don’t change several ingredients at once. Check your flour measurements, butter temperature, dough consistency and baking time first. These are some of the biggest factors affecting cookie texture. Make one adjustment at a time so you can identify what improves your next batch.
Chocolate chunk cookies usually turn out hard, dry or cakey because of incorrect flour measurements, too much baking time, an unbalanced butter-to-flour ratio or improper mixing. Too much flour can make cookies dense and cakey, while overbaking removes moisture and creates a hard texture. Using the right ingredient quantities and following the correct baking time can help you get soft, chewy cookies with lightly crisp edges.
Let’s look at the most common reasons your homemade chocolate chunk cookies might not turn out as expected and how to fix each problem.
1. Why Are My Chocolate Chunk Cookies Hard?
If your cookies become hard after baking, the most likely reason is that they have spent too much time in the oven.
When cookies bake for too long, they lose moisture and become increasingly firm as they cool. Using too much flour or storing baked cookies without proper protection can also make them hard.
How to fix it:
-
Reduce the baking time slightly.
-
Remove cookies when the edges are lightly golden and the centers still look soft.
-
Measure all-purpose flour accurately.
-
Let cookies rest on the baking sheet for 5–10 minutes.
-
Store completely cooled cookies in an airtight container.
If your cookies are already hard, try warming one in the microwave for about 8–10 seconds to soften it slightly.
2. Why Are My Chocolate Chunk Cookies Dry?
Dry chocolate chunk cookies usually indicate that the dough doesn’t have enough moisture or contains too much flour.
This can happen if you scoop flour directly from the bag, use incorrect ingredient measurements or bake the cookies for too long.
How to fix it:
-
Use the spoon-and-level method when measuring flour.
-
Weigh ingredients with a kitchen scale for better accuracy.
-
Follow the recipe’s butter and egg quantities.
-
Avoid adding extra flour when the dough feels slightly sticky.
-
Check the cookies before the full baking time is over.
Brown sugar also helps retain moisture because it contains molasses. Using the correct balance of brown sugar and granulated sugar helps create a softer, chewier texture.
3. Why Are My Chocolate Chunk Cookies Cakey?
Cakey chocolate chunk cookies usually have a soft, bread-like texture instead of a dense, chewy center.
This often happens when the dough contains too much flour, too much leavening or an ingredient balance that produces more lift than spread.
How to fix it:
-
Measure flour carefully.
-
Avoid adding extra baking soda or baking powder.
-
Follow the egg quantities in your recipe.
-
Don’t overmix the dough after adding flour.
-
Use the correct ratio of butter and sugars.
If you prefer dense, chewy chocolate chunk cookies, make sure your dough follows the tested ingredient measurements rather than adding extra flour to make it easier to handle.
4. Why Do My Cookies Become Hard After Cooling?
Sometimes chocolate chunk cookies look soft when they first come out of the oven but become hard after cooling.
This can happen because the cookies continue cooking from residual heat after you remove them from the oven. If they were already fully baked, this extra cooking can make them too firm.
How to fix it:
Remove the cookies when their edges are set but their centers still look slightly soft. Allow them to rest on the baking sheet for about 5 minutes before transferring them to a wire cooling rack.
Avoid leaving them on the hot baking sheet for too long.
5. Why Are My Cookies Soft but Not Chewy?
Soft and chewy are related textures, but they aren’t exactly the same.
Cookies can be soft because they contain moisture, yet still lack the dense, slightly stretchy bite associated with chewy cookies.
This may happen when the dough has too much flour, too little brown sugar or an ingredient balance that produces a more cake-like texture.
How to fix it:
-
Use the correct amount of light or dark brown sugar.
-
Keep the flour quantity accurate.
-
Avoid overmixing.
-
Use the recommended butter preparation method.
-
Don’t overbake the cookies.
An extra egg yolk can also help create a richer, more tender texture in some cookie recipes, but only add it if the recipe has been adjusted for it.
6. Why Are My Cookies Thick but Still Dry?
Thick cookies aren’t automatically chewy. If your chocolate chunk cookies have plenty of height but feel dry when you bite into them, the dough may contain too much flour or the cookies may have been overbaked.
How to fix it:
Use accurate flour measurements and check the centers before removing the cookies from the oven. Aim for a thick cookie with lightly golden edges and a soft middle rather than one that feels firm all the way through.
Chocolate Chunk Cookie Texture Problems and Solutions
| Problem | Most likely cause | How to fix it |
|---|---|---|
| Hard cookies | Overbaking | Reduce baking time |
| Dry cookies | Too much flour | Measure flour accurately |
| Cakey cookies | Excess flour or leavening | Follow ingredient ratios |
| Hard after cooling | Residual heat and overbaking | Remove cookies earlier |
| Soft but not chewy | Ingredient imbalance | Check brown sugar and flour quantities |
| Thick but dry | Too much flour or baking time | Adjust measurements and doneness |
My best tip: If you want soft and chewy chocolate chunk cookies, pay close attention to flour measurements and baking time. Take the cookies out when the edges are lightly golden and the centers still look slightly soft. Let them finish setting on the baking sheet instead of waiting for them to become completely firm in the oven. This helps preserve their moisture and gives you the chewy texture you’re looking for.
Can You Freeze Chocolate Chunk Cookie Dough?
Yes! You can freeze chocolate chunk cookie dough for up to 3 months without losing much of its flavor or texture when stored properly. Freezing individual dough portions is especially convenient because you can bake fresh, chewy chocolate chunk cookies whenever you want without preparing a new batch. Simply scoop the dough, freeze the portions until firm, transfer them to a freezer-safe bag or airtight container, and bake when needed.
Here’s how to freeze cookie dough properly and get delicious results when you’re ready to bake.
1. Prepare and Portion the Cookie Dough
Start by preparing your chocolate chunk cookie dough according to the recipe. Once the chocolate chunks are evenly mixed into the dough, divide it into individual portions using a cookie scoop or tablespoon.
Try to keep the dough balls approximately the same size. This helps them freeze evenly and makes it easier to control baking time later.
If you want bakery-style cookies, shape the dough portions slightly taller rather than flattening them into discs.
2. Freeze the Cookie Dough Balls on a Baking Sheet
Line a baking sheet or tray with parchment paper and arrange the cookie dough balls in a single layer.
Make sure the portions aren’t touching each other because they can stick together as they freeze.
Place the tray in the freezer for approximately 1–2 hours, or until the dough balls become firm.
This method is called flash freezing. It prevents the individual portions from sticking together when you transfer them to a storage container.
3. Transfer the Frozen Dough to a Freezer Bag
Once the cookie dough portions are completely firm, remove them from the baking sheet and place them in a freezer-safe zip-top bag or airtight container.
Before sealing the bag, remove as much excess air as possible to help prevent freezer burn.
Label the container with the freezing date so you know how long the cookie dough has been stored.
For the best quality, use frozen chocolate chunk cookie dough within 3 months.
4. Can You Bake Frozen Chocolate Chunk Cookie Dough Without Thawing?
Yes! You can bake chocolate chunk cookie dough directly from frozen. You don’t necessarily need to thaw the dough balls overnight in the refrigerator.
Arrange the frozen portions on a parchment-lined baking sheet, leaving enough space between them for spreading.
Bake according to your recipe, allowing a little extra time if needed. Start checking the cookies a few minutes later than the usual baking time and look for lightly golden edges with slightly soft centers.
The exact baking time depends on the size of your frozen dough portions and your oven.
5. Can You Thaw Frozen Cookie Dough Before Baking?
Yes, you can thaw frozen chocolate chunk cookie dough if you prefer to bake it using the original recipe’s instructions.
Transfer the required number of dough portions from the freezer to the refrigerator and let them thaw overnight or until soft enough to handle.
Once thawed, arrange them on a parchment-lined baking sheet and bake according to the recipe.
Avoid leaving raw cookie dough at room temperature for extended periods.
6. How to Keep Frozen Cookie Dough Fresh
Proper storage helps protect the cookie dough from freezer burn, unwanted odors and changes in texture.
Follow these simple tips:
-
Use freezer-safe bags or airtight containers.
-
Remove excess air before sealing.
-
Freeze individual portions instead of one large batch.
-
Keep the dough away from strongly scented frozen foods.
-
Label the container with the freezing date.
-
Avoid repeatedly thawing and refreezing the dough.
If your recipe contains chocolate chunks, make sure they are evenly distributed before freezing so every cookie has plenty of chocolate.
Freezing Chocolate Chunk Cookie Dough: Quick Guide
| Storage method | Recommended time |
|---|---|
| Refrigerator | Follow the recipe and keep at 40°F (4°C) or below |
| Freezer | Best quality within 3 months |
| Thawing in refrigerator | Overnight or until workable |
| Baking from frozen | Add a few minutes if needed |
7. Can You Freeze Already Baked Chocolate Chunk Cookies?
Yes! If you’ve already baked a batch, you can freeze the finished cookies too.
Allow the cookies to cool completely, then arrange them in a freezer-safe container with parchment paper between layers.
Seal the container tightly and freeze for up to 2–3 months for the best quality.
When you’re ready to enjoy them, let the cookies thaw at room temperature or warm them briefly in the microwave to soften the centers and melt the chocolate slightly.
My best tip: Freeze your chocolate chunk cookie dough in individual portions rather than one large batch. This makes it easy to bake just two or three fresh cookies whenever you want. You can enjoy warm, chewy cookies with melted chocolate chunks without having to prepare the entire recipe again.
How to Store Homemade Chocolate Chunk Cookies
The best way to store homemade chocolate chunk cookies is to let them cool completely and place them in an airtight container at room temperature. Proper storage helps prevent moisture loss and keeps the cookies soft, chewy and flavorful for around 3–5 days. If you want to keep them fresh for longer, you can refrigerate or freeze them using the right storage method.
Here are the best ways to store your chocolate chunk cookies and maintain their delicious texture.
1. Store Cookies at Room Temperature
If you plan to enjoy your cookies within a few days, storing them at room temperature is the easiest option.
Follow these steps:
-
Allow freshly baked cookies to cool completely on a wire cooling rack.
-
Place them in a clean, airtight food storage container.
-
Arrange them in a single layer or separate layers with parchment paper.
-
Close the lid tightly to prevent air from drying them out.
-
Keep the container in a cool, dry place away from direct sunlight and heat.
Properly stored chocolate chunk cookies generally stay fresh for around 3–5 days.
2. Use an Airtight Container to Keep Cookies Soft
Air exposure can gradually remove moisture from baked cookies, making them hard and dry.
An airtight container helps reduce this moisture loss and protects your cookies from outside odors.
A few helpful tips:
-
Choose a container with a tight-fitting lid.
-
Avoid leaving cookies uncovered on the kitchen counter.
-
Separate different cookie varieties if you don’t want their flavors to mix.
-
Don’t store warm cookies because trapped steam can create condensation.
A glass or food-safe plastic container works well for storing homemade chocolate chunk cookies.
3. Can You Store Chocolate Chunk Cookies in the Refrigerator?
Yes, you can refrigerate chocolate chunk cookies, but it’s usually unnecessary for ordinary cookies that will be eaten within a few days.
Refrigerator air can make cookies firm and dry if they aren’t properly sealed.
If you prefer refrigeration:
-
Let the cookies cool completely.
-
Place them in an airtight container.
-
Separate layers with parchment paper.
-
Keep them refrigerated at 40°F (4°C) or below.
-
Allow them to come closer to room temperature or warm them briefly before serving.
For most homemade chocolate chunk cookies, an airtight container at room temperature is a better choice for maintaining a soft texture.
4. Freeze Baked Chocolate Chunk Cookies for Longer Storage
Freezing is a great option if you’ve baked a large batch and want to save some for later.
Here’s how to freeze baked cookies:
-
Let the cookies cool completely.
-
Place them in a freezer-safe airtight container or zip-top freezer bag.
-
Separate each layer with parchment paper.
-
Remove excess air before sealing.
-
Label the container with the freezing date.
-
Place it in the freezer.
For the best quality, enjoy frozen cookies within 2–3 months.
5. How to Thaw Frozen Chocolate Chunk Cookies
When you’re ready to enjoy your frozen cookies, remove the number you need from the freezer.
Place them on a plate and let them thaw at room temperature for about 30–60 minutes, depending on their size.
If you prefer warm cookies with melted chocolate, microwave one cookie for around 8–10 seconds. Check it before adding more time because overheating can make the cookie dry or the chocolate uncomfortably hot.
6. Use the Bread Trick to Help Keep Cookies Soft
A small piece of fresh white bread can help maintain moisture inside an airtight cookie container.
Place the bread in a separate area of the container so it doesn’t sit directly on the cookies. The cookies may absorb some moisture from the enclosed space, helping them stay softer.
Replace the bread when it becomes dry and check the container regularly for any signs of mold.
How Long Do Homemade Chocolate Chunk Cookies Last?
Here’s a quick storage guide for your homemade cookies.
| Storage method | Approximate storage time |
|---|---|
| Room temperature in an airtight container | 3–5 days |
| Refrigerator in an airtight container | Up to 1 week |
| Freezer | Best quality within 2–3 months |
These are general quality guidelines. Actual freshness depends on the recipe, ingredients and storage conditions. Discard cookies if you notice mold, unusual odors or other signs of spoilage.
My best tip: If you want your chocolate chunk cookies to stay soft and chewy, let them cool completely before placing them in an airtight container. Store only the amount you’ll eat within a few days at room temperature and freeze the remaining cookies for later. This way, you can enjoy homemade cookies with their rich chocolate flavor and tender centers whenever you like.
Chocolate Chunk Cookie Variations and Substitutions
You can easily customize chewy chocolate chunk cookies by changing the type of chocolate, adjusting the sugar, adding nuts or using different ingredients to suit your taste. Whether you prefer rich dark chocolate, sweeter milk chocolate, nutty flavors or a smaller batch, these variations let you enjoy homemade cookies in different ways while keeping their soft, chewy texture.
Here are some delicious chocolate chunk cookie variations and ingredient substitutions to try.
1. Brown Butter Chocolate Chunk Cookies
Brown butter is a great way to add a deeper, nutty flavor to homemade chocolate chunk cookies.
To make this variation, cook unsalted butter in a saucepan over medium heat until it melts, foams and develops golden-brown bits at the bottom. Stir frequently to prevent burning, then allow it to cool before adding it to your cookie dough.
Brown butter adds a toasted, caramel-like flavor that pairs beautifully with semisweet chocolate chunks.
Best for: Rich cookies with a nutty aroma and deeper flavor.
2. Dark Chocolate Chunk Cookies
If you prefer cookies that aren’t overly sweet, replace semisweet chocolate with chopped dark chocolate.
Dark chocolate with around 60%–70% cocoa content gives the cookies a stronger chocolate flavor and balances the sweetness of brown sugar.
You can also combine dark chocolate with semisweet chocolate for a balanced flavor.
Best for: Chocolate lovers who enjoy a rich, slightly bitter cocoa taste.
3. Milk Chocolate Chunk Cookies
For a sweeter version, use milk chocolate chunks instead of semisweet chocolate.
Milk chocolate melts into creamy, sweet pockets throughout the cookie dough. It works especially well if you’re making cookies for children or anyone who prefers a milder chocolate flavor.
Since milk chocolate is sweeter, combining it with semisweet chocolate can help balance the overall sweetness.
Best for: Sweet, creamy chocolate chunk cookies.
4. Chocolate Chunk Cookies with Walnuts or Pecans
Adding chopped nuts gives chocolate chunk cookies extra crunch and a delicious nutty flavor.
Walnuts have a slightly earthy taste, while pecans offer a buttery sweetness. Both pair well with semisweet and dark chocolate.
Fold a small handful of chopped nuts into the dough along with the chocolate chunks. You can lightly toast them beforehand to bring out their flavor.
Best for: Cookies with a crunchy texture and rich, nutty flavor.
5. Chocolate Chunk Cookies with Sea Salt
If you enjoy sweet-and-salty desserts, finish your cookie dough balls with a small sprinkle of flaky sea salt before baking.
Sea salt balances the sweetness of brown sugar and chocolate while bringing out the cocoa flavor.
Use a light hand because too much salt can overpower the cookies.
Best for: Bakery-style chocolate chunk cookies with a sweet-and-salty finish.
6. Small Batch Chocolate Chunk Cookies
If you don’t need a full batch, you can prepare a smaller quantity of cookie dough.
A small-batch recipe is useful when you’re baking for one or two people or simply want a few fresh cookies without storing leftovers.
For the best results, scale every ingredient proportionally. If the original recipe uses one egg, beat it separately and weigh or measure the amount needed for your smaller batch.
Avoid estimating half an egg by eye because inaccurate measurements can affect the dough consistency.
Best for: Small households and quick dessert cravings.
7. Gluten-Free Chocolate Chunk Cookies
You can make gluten-free chocolate chunk cookies by replacing regular all-purpose flour with a good-quality gluten-free baking flour blend.
Choose a blend formulated for a one-to-one replacement in baking. Some blends already contain xanthan gum, which helps provide structure and improve the texture.
Check that your chocolate and other packaged ingredients are also certified gluten-free if you’re baking for someone with celiac disease.
The dough may need a short resting period so the gluten-free flour can absorb moisture before baking.
Best for: People avoiding gluten.
8. Chocolate Chunk Cookies Without Brown Sugar
If you run out of brown sugar, you can make chocolate chunk cookies using granulated sugar, although the flavor and texture will be different.
Brown sugar contains molasses, which contributes moisture and a caramel-like flavor. Without it, cookies may turn out slightly crisper and less chewy.
For a closer flavor match, you can combine granulated sugar with a little molasses, adjusting the quantities according to your recipe.
Best for: A convenient alternative when brown sugar isn’t available.
9. Chocolate Chunk Cookies with Peanut Butter
Peanut butter adds a creamy texture and a roasted nut flavor that pairs especially well with semisweet chocolate.
You can add a small amount of creamy peanut butter to a recipe, but remember that peanut butter changes the fat and moisture balance. Adjust the recipe rather than simply adding a large amount without changing anything else.
You can also press a few peanut butter chips into the dough for extra flavor.
Best for: Peanut butter and chocolate lovers.
10. Double Chocolate Chunk Cookies
For an extra-rich chocolate dessert, turn your regular cookie dough into a double chocolate version.
Replace a portion of the all-purpose flour with unsweetened cocoa powder, using a tested recipe adjustment to maintain the correct dough consistency.
Add semisweet or dark chocolate chunks for extra chocolate flavor.
The cocoa powder gives the cookies a deep chocolate color, while the chunks create melted chocolate pockets throughout.
Best for: Anyone who loves rich, chocolate-packed cookies.
Chocolate Chunk Cookie Substitution Guide
| Original ingredient | Possible substitution | Expected result |
|---|---|---|
| Semisweet chocolate | Dark chocolate | Richer, less-sweet flavor |
| Semisweet chocolate | Milk chocolate | Sweeter, creamier flavor |
| Unsalted butter | Salted butter | Similar texture; adjust added salt |
| Brown sugar | Granulated sugar with molasses | Closer to brown sugar flavor |
| All-purpose flour | One-to-one gluten-free baking flour | Gluten-free version |
| Walnuts | Pecans | Buttery, nutty flavor |
| Chocolate chunks | Chocolate chips | Smaller chocolate pieces |
| Regular chocolate | Dairy-free chocolate | Dairy-free variation, if other ingredients are also dairy-free |
My recommendation: If you want to experiment without changing the original cookie texture too much, start with chocolate varieties, chopped walnuts, pecans or flaky sea salt. These simple additions can give your chewy chocolate chunk cookies a different flavor while keeping their soft centers and delicious melted chocolate pockets.
Chocolate chunk cookies contain carbohydrates from flour and sugar, fats from butter and chocolate, and small amounts of protein from eggs and flour. The exact nutritional values depend on the ingredients, chocolate type, cookie size and number of servings.
Here is an approximate nutrition breakdown for one medium-sized homemade chocolate chunk cookie.
| Nutrient | Approximate amount |
|---|---|
| Calories | 180–220 kcal |
| Total fat | 9–12 g |
| Saturated fat | 5–7 g |
| Carbohydrates | 23–28 g |
| Sugar | 14–18 g |
| Protein | 2–3 g |
| Fiber | 1–2 g |
| Sodium | 90–140 mg |
Please note: These values are estimates, not calculated nutrition facts for your exact recipe. Actual values depend on the ingredient quantities and cookie yield. For accurate nutrition information, calculate the complete recipe using the actual ingredients and divide the totals by the number of cookies produced.
Enjoy these homemade chewy chocolate chunk cookies as an occasional sweet treat with a glass of milk or your favorite cup of coffee.
Making perfectly chewy chocolate chunk cookies comes down to getting a few important details right. From my baking experience, I’ve found that accurate flour measurements, properly prepared butter and careful baking time make a noticeable difference in the final texture.
One mistake worth avoiding is leaving the cookies in the oven until their centers look completely firm. Removing them when the edges are lightly golden and the centers are still slightly soft helps preserve their chewy texture as they cool. Using chopped semisweet chocolate also gives you those delicious melted chocolate pockets that make homemade cookies so satisfying.
Whether you’re baking these cookies for your family, sharing them with friends or preparing a batch for a special occasion, take your time with the measurements and follow the baking instructions closely. You can also experiment with dark chocolate, milk chocolate, walnuts or a sprinkle of flaky sea salt to create your favorite version. If you try this chewy chocolate chunk cookies recipe, I’d love to hear how it turned out. Share your baking experience, any changes you made and your favorite chocolate combination in the comments!
Here are some common questions about making, baking and storing chewy chocolate chunk cookies. These answers will help you get soft centers, lightly crisp edges and rich melted chocolate in every batch.
1. What makes chocolate chunk cookies chewy?
Brown sugar, butter and the right amount of flour help create chewy chocolate chunk cookies. Brown sugar adds moisture, butter provides richness and proper baking time prevents the cookies from becoming dry. Removing them when the edges are lightly golden and the centers are still slightly soft also helps maintain their chewy texture.
2. Why are my chocolate chunk cookies flat?
Chocolate chunk cookies usually turn flat because the dough is too warm, contains too little flour or has too much melted butter. Chilling the dough, measuring flour accurately and using properly cooled melted butter can help reduce excessive spreading.
3. Should I chill chocolate chunk cookie dough before baking?
Chilling is helpful but not always necessary. Refrigerating the dough for 30–60 minutes helps firm up the butter and control spreading. If you’re using a tested no-chill recipe, you can bake the cookies immediately after mixing.
4. Can I use chocolate chips instead of chocolate chunks?
Yes! You can replace chocolate chunks with chocolate chips using the same amount by weight. Chocolate chips create smaller, evenly distributed chocolate pieces, while chopped chocolate bars produce larger melted chocolate pockets.
5. How do I make thick chocolate chunk cookies?
Use accurately measured flour, chill the dough when needed and shape the dough portions slightly taller than they are wide. Avoid flattening the dough balls before baking. Using large chocolate chunks and removing the cookies at the right time also helps create thick, soft cookies.
6. Can I make chocolate chunk cookies without brown sugar?
Yes, but the flavor and texture will change. Brown sugar contains molasses, which helps retain moisture and creates a caramel-like flavor. You can use granulated sugar with a little molasses as an alternative, following suitable recipe measurements.
7. What is the best chocolate for chocolate chunk cookies?
Semisweet chocolate is a great choice because it balances sweetness and rich cocoa flavor. Dark chocolate works well for a stronger cocoa taste, while milk chocolate creates sweeter cookies. Chopped chocolate baking bars are especially good for creating large melted chocolate pockets.
8. How do I know when chocolate chunk cookies are done?
The cookies are ready when their edges are lightly golden and their centers still look slightly soft. Most medium-sized cookies bake in approximately 10–12 minutes at 350°F (175°C), depending on the oven and recipe. Let them rest on the baking sheet for 5–10 minutes before transferring them to a cooling rack.
9. Can I freeze chocolate chunk cookie dough?
Yes! Scoop the dough into individual portions, arrange them on a parchment-lined baking sheet and freeze until firm. Transfer the frozen dough balls to a freezer-safe bag or airtight container. For the best quality, use them within 3 months.
10. Can I bake chocolate chunk cookies straight from the freezer?
Yes, frozen cookie dough can go directly into the oven. Place the frozen dough portions on a parchment-lined baking sheet and allow a few extra minutes of baking time if needed. Check for lightly golden edges and slightly soft centers before removing them.
11. How do I keep homemade chocolate chunk cookies soft?
Allow the cookies to cool completely before storing them in an airtight container at room temperature. Avoid leaving them uncovered because exposure to air can make them dry and hard. For the best quality, enjoy them within 3–5 days.
12. Why are my chocolate chunk cookies hard after cooling?
This usually happens because the cookies were overbaked or contained too much flour. Cookies continue cooking from residual heat after leaving the oven. Remove them when the edges are set but the centers still look slightly soft.
13. Can I use salted butter instead of unsalted butter?
Yes, salted butter works well in chocolate chunk cookies. However, it adds extra salt to the recipe. Reduce the additional salt slightly to keep the flavor balanced.
14. Can I make chocolate chunk cookies without eggs?
Yes, you can use an egg substitute made for baking. Commercial egg replacers or other suitable alternatives can help bind the dough, but the texture may differ from traditional cookies. Use a recipe tested with your chosen substitute for the best results.
15. Why do my chocolate chunks not melt in the oven?
Some baking chocolate and chocolate chips contain ingredients that help them hold their shape during baking. For larger melted chocolate pockets, use chopped semisweet or dark chocolate baking bars. Different chocolate types melt differently, so results may vary.
16. Can I make chocolate chunk cookies with brown butter?
Yes! Brown butter adds a rich, nutty and slightly caramel-like flavor that pairs beautifully with chocolate chunks. Brown the butter in a saucepan, allow it to cool and follow a recipe adjusted for brown butter because it loses some moisture during cooking.
17. How long do homemade chocolate chunk cookies last?
Homemade chocolate chunk cookies generally stay fresh for around 3–5 days in an airtight container at room temperature. You can also freeze baked cookies for up to 2–3 months for the best quality.
18. Can I make smaller or larger chocolate chunk cookies?
Yes! You can adjust the cookie dough portions using a tablespoon or cookie scoop. Smaller cookies bake faster, while larger cookies need more time in the oven. Keep the portions consistent within each batch to help them bake evenly.