
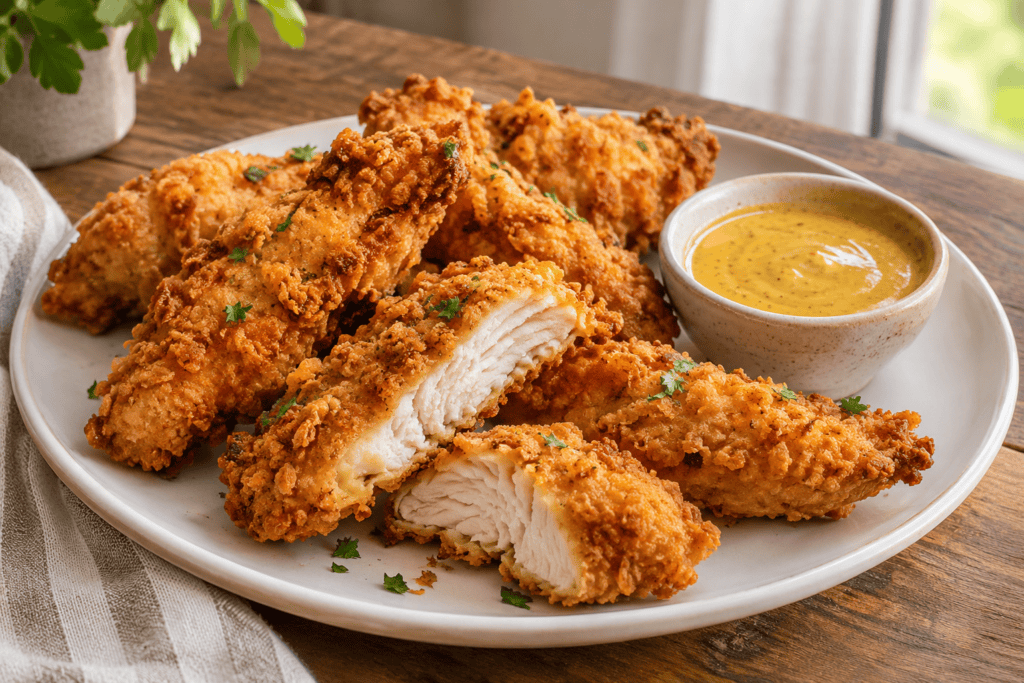
Have you ever planned to make homemade chicken tenders, only to realize you’re out of buttermilk? Or maybe you’ve tried making fried chicken strips at home, but the breading fell off, the coating turned soggy or the chicken came out dry.
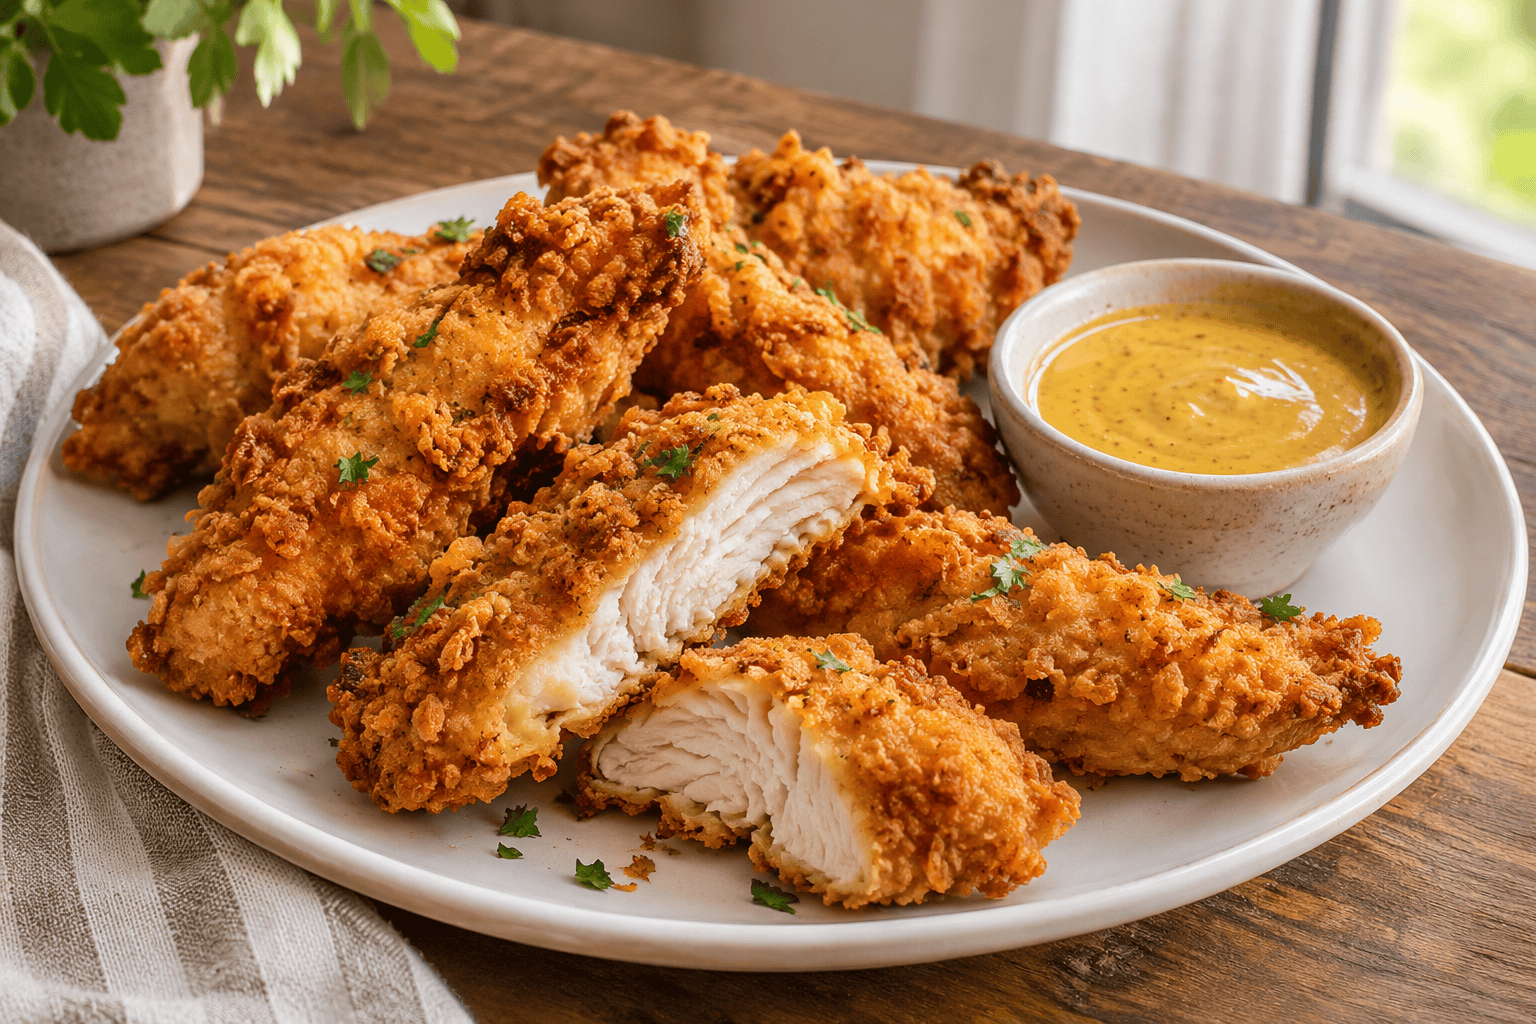
The good news is that you can make crispy homemade chicken tenders without buttermilk using simple ingredients like chicken tenderloins, eggs, all-purpose flour and everyday seasonings. The egg mixture helps the seasoned flour stick to the chicken, creating a golden, crunchy coating without a dairy marinade.
This homemade chicken tenders recipe keeps things simple without sacrificing flavor or texture. You get juicy chicken on the inside and a delicious crispy crust on the outside.
I’ll walk you through the coating process, the right frying temperature and simple tips to prevent soggy breading. You’ll also find helpful substitutions, storage instructions and reheating tips to make the recipe easier. Grab your ingredients and give these easy fried chicken tenders a try. You might find your new favorite homemade chicken recipe!
Key Points for This Recipe
These homemade chicken tenders without buttermilk are crispy on the outside and juicy on the inside. You only need simple ingredients like chicken tenderloins, all-purpose flour, eggs and everyday seasonings. An egg wash helps the seasoned flour stick to the chicken, so you can skip the buttermilk marinade without losing that crunchy coating.
- Prep time: 15 minutes
- Cook time: 15 to 20 minutes
- Total time: 30 to 35 minutes
- Servings: 4
- Cooking method: Deep frying
- Main ingredients: Chicken tenderloins, all-purpose flour, eggs, salt, black pepper, paprika, garlic powder and cooking oil.
- Oil temperature: 350°F to 375°F
- Safe internal temperature: 165°F
What makes this recipe special?
You don’t need buttermilk, milk or a long marinating time. The egg coating helps the seasoned flour cling to each chicken strip. A properly heated oil creates a golden, crunchy crust while keeping the chicken tender and juicy.
You can also use boneless, skinless chicken breasts if you don’t have chicken tenderloins. Just cut them into evenly sized strips so they cook at the same rate.
Quick tip: Use a food thermometer to check the thickest part of each chicken tender. The USDA recommends an internal temperature of 165°F for chicken. This helps you serve safely cooked chicken without drying it out.
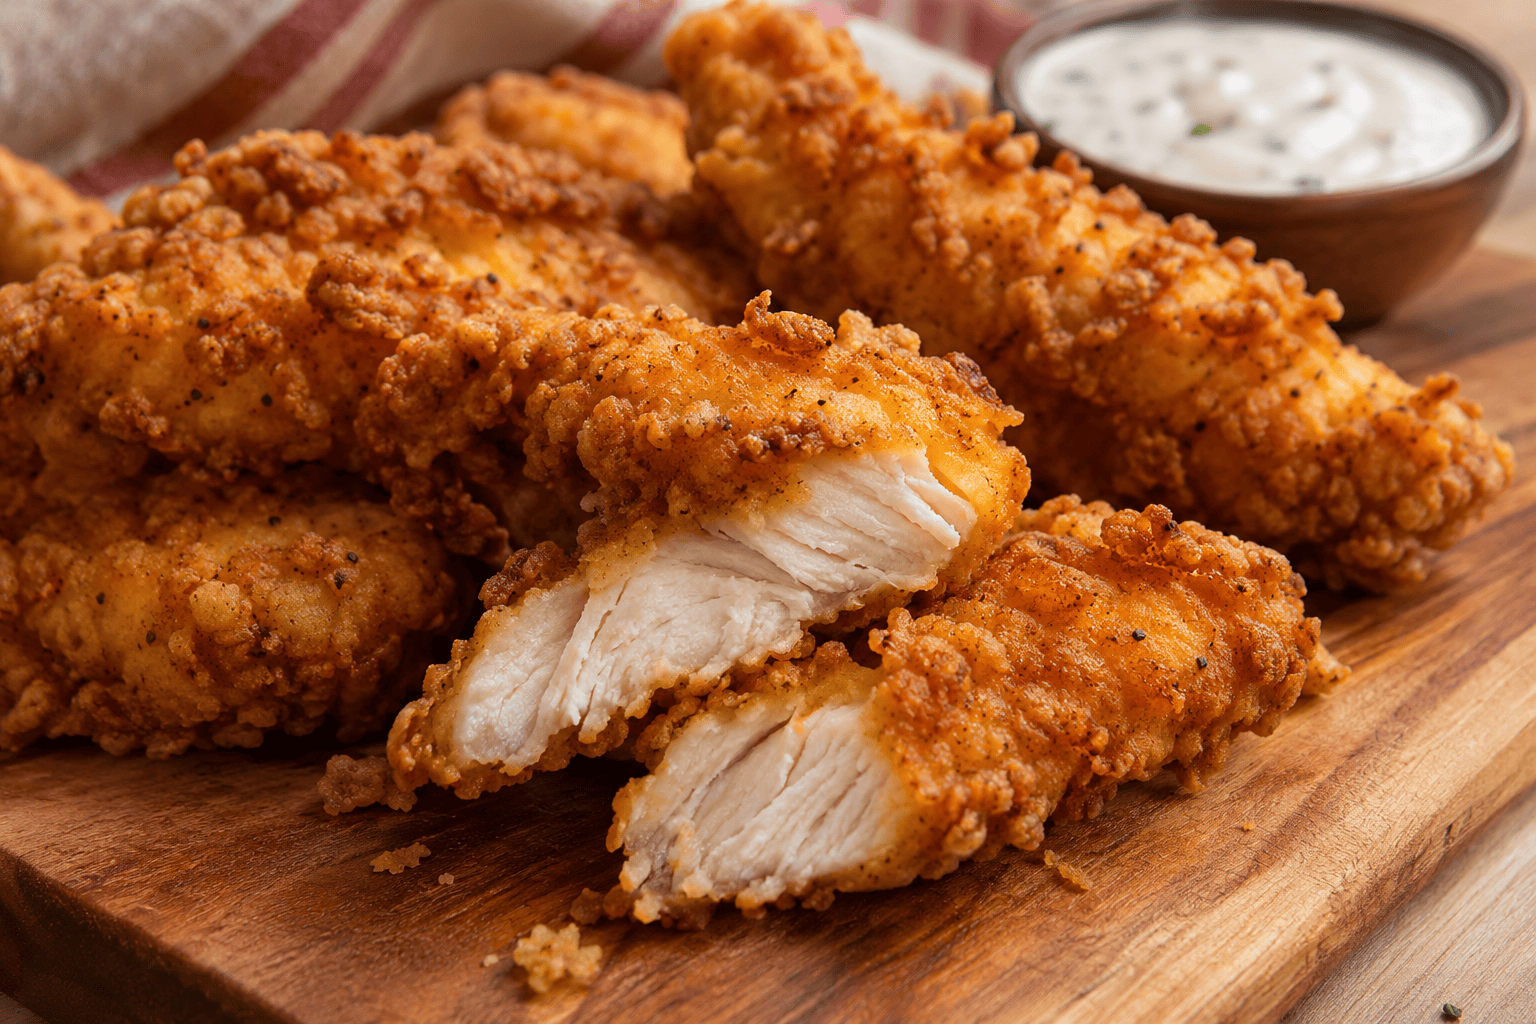
What’s the Difference Between Chicken Strips and Chicken Tenders?
Chicken strips and chicken tenders look similar, but they come from different parts of the chicken. The main difference comes down to the cut of meat.
Chicken tenders come from a small, naturally tender muscle called the pectoralis minor. Each chicken breast has one tenderloin underneath the larger breast muscle. This cut has a soft texture and a slightly narrow shape, which makes it perfect for frying.
Chicken strips, on the other hand, usually come from boneless, skinless chicken breasts. You cut the breast meat into long, even pieces to create strips. They may taste very similar to chicken tenders, especially after breading and frying, but their texture can vary depending on how you cut them.
Here are the main differences:
| Feature | Chicken Tenders | Chicken Strips |
| Meat source | Natural chicken tenderloin | Usually chicken breast |
| Shape | Naturally narrow and long | Cut into long strips |
| Texture | Naturally tender | Depends on thickness and cooking |
| Size | Usually smaller | Can be wider or thicker |
| Preparation | Remove any white tendon | Trim and slice the breast |
| Best use | Fried chicken tenders | Homemade chicken strips and breaded chicken |
Which one should you use for this recipe?
You can use either cut for homemade chicken tenders without buttermilk. Chicken tenderloins offer a naturally tender texture and save you some cutting time. Chicken breasts work just as well and often cost less.
If you use chicken breasts, slice them lengthwise into strips of similar thickness. Remove any visible fat and tough pieces. Try to keep each strip around ½ to ¾ inch thick so they cook evenly.
One quick tip: Chicken tenderloins often have a thin white tendon running through one end. You can remove it with a small knife or pull it out using a fork and paper towel. This helps prevent tough bites after frying.
Fried Chicken Tenders Recipe Ingredients
You only need a few simple ingredients to make crispy homemade chicken tenders without buttermilk. Most of them are pantry staples, so you can prepare this recipe without making a special trip to the grocery store.
Here is everything you need to make golden, crunchy chicken tenders with juicy meat inside.
Main Ingredients
| Ingredient | Amount | Purpose |
| Chicken tenderloins | 2 pounds | The main protein |
| All-purpose flour | 2 cups | Creates the crispy outer coating |
| Large eggs | 3 | Help the flour coating stick to the chicken |
| Vegetable oil | As needed for frying | Helps cook the chicken evenly |
Seasonings and Breading
| Ingredient | Amount | Purpose |
| Salt | 1¼ teaspoons | Brings out the flavor |
| Paprika | 2 teaspoons | Adds color and mild flavor |
| Garlic powder | 1 teaspoon | Adds savory flavor |
| Onion powder | 1 teaspoon | Gives the coating a deeper taste |
| Black pepper | 1 teaspoon | Adds a mild peppery kick |
| Dried thyme | 1 teaspoon | Adds an earthy flavor |
| Dried oregano | ¼ teaspoon | Adds a light herbal taste |
| Cayenne pepper | ¼ teaspoon | Adds a little heat |
A Few Notes About the Ingredients
Chicken tenderloins: Fresh or thawed chicken tenderloins work well for this recipe. You can also use boneless, skinless chicken breasts cut into even strips. Remove any tough white tendons before cooking.
All-purpose flour: Regular all-purpose flour creates the base of the breading. It helps form a golden crust when you fry the chicken in hot oil.
Eggs: Beaten eggs act as a binder. They help the seasoned flour cling to the chicken without using buttermilk, milk or another dairy product.
Seasonings: Paprika, garlic powder, onion powder, black pepper, thyme and oregano give the coating a savory flavor. Add a little extra cayenne if you enjoy spicy fried chicken.
Vegetable oil: Use a neutral cooking oil with a high smoke point. Vegetable, canola and peanut oil are suitable choices for deep-frying chicken tenders.
Quick tip: Keep the dry flour mixture and beaten eggs in separate shallow bowls. This makes coating each chicken strip easier and helps keep your work area clean.
How to Make Fried Chicken Strips Without Buttermilk
Making crispy fried chicken strips without buttermilk is easier than you might think. You don’t need a long marinade or special ingredients. A simple flour and egg coating gives the chicken a crunchy, golden crust while keeping the meat tender and juicy.
Follow these easy steps to make homemade chicken tenders from scratch.
Step 1: Prepare the Chicken
Start by patting the chicken tenderloins dry with paper towels. Remove any visible fat or tough white tendons.
If you’re using boneless, skinless chicken breasts, cut them lengthwise into strips of similar thickness. Try to keep each piece around ½ to ¾ inch thick. Even-sized chicken strips cook more evenly and help prevent dry or undercooked spots.
Step 2: Prepare the Seasoned Flour
Take a large, shallow bowl and add the all-purpose flour.
Mix in the salt, paprika, garlic powder, onion powder, black pepper, dried thyme, oregano and cayenne pepper. Stir everything until the seasonings spread evenly through the flour.
This seasoned flour creates the flavorful outer crust. Make sure you break up any lumps before coating the chicken.
Step 3: Prepare the Egg Mixture
Crack the eggs into a separate shallow bowl. Beat them with a fork or whisk until the yolks and whites combine.
The beaten eggs act as a binder. They help the seasoned flour stick to the chicken and create a coating without buttermilk or milk.
Step 4: Coat the Chicken Strips
Now it’s time to bread the chicken.
Work with one chicken strip at a time.
- Place a chicken strip in the seasoned flour. Turn it until all sides get an even coating.
- Shake off the extra flour.
- Dip the chicken into the beaten eggs. Let the excess egg drip back into the bowl.
- Return the chicken to the seasoned flour.
- Press the flour gently onto all sides to create a thick, even coating.
- Place the coated chicken strip on a clean plate or wire rack.
Repeat with the remaining chicken pieces.
Tip: Use one hand for the dry flour and the other for the egg mixture. This helps prevent thick clumps of wet flour from forming on your fingers.
Step 5: Heat the Cooking Oil
Pour vegetable oil into a deep, heavy-bottomed skillet or Dutch oven. Add enough oil to cover the chicken strips about halfway.
Heat the oil over medium to medium-high heat until it reaches 350°F to 375°F. Use a kitchen thermometer to check the temperature.
If you don’t have a thermometer, drop a small pinch of flour into the oil. It should sizzle gently. However, a thermometer gives you a much more reliable reading.
Avoid overheating the oil. Excessively hot oil can burn the coating before the chicken cooks through.
Step 6: Fry the Chicken Tenders
Carefully lower a few breaded chicken strips into the hot oil using kitchen tongs.
Don’t overcrowd the skillet. Leave enough space between the pieces so the oil stays hot and cooks the chicken evenly.
Fry each batch for about 3 to 5 minutes per side, depending on the thickness of the chicken. Turn the strips once the bottom develops a deep golden-brown crust.
The coating should look crispy and evenly browned. The exact cooking time can vary, so always check the thickest part of the chicken with a food thermometer.
Important: Chicken must reach an internal temperature of 165°F to be safe to eat. Follow the USDA’s guide
Step 7: Drain and Serve
Once the chicken tenders reach 165°F, remove them from the oil using clean tongs.
Place them on a wire rack set over a baking sheet. This lets extra oil drain while allowing air to move around the crispy coating. Avoid stacking the hot chicken strips because trapped steam can make the breading soggy.
Let them rest for a few minutes before serving.
Serve your homemade fried chicken tenders while they’re warm and crispy. Pair them with French fries, coleslaw or your favorite dipping sauce, such as honey mustard, ranch or barbecue sauce.
Final tip: If you’re frying multiple batches, let the oil return to around 350°F before adding the next batch. This helps every chicken strip develop the same golden, crunchy coating.
How to Dredge Chicken
Dredging means coating chicken in flour or another dry mixture before frying. It helps create a golden, crispy crust and gives the breading something to cling to.
For these homemade chicken tenders without buttermilk, use a simple three-step method: seasoned flour, beaten eggs and seasoned flour again. You can choose from a few different ways to dredge chicken, depending on how much chicken you’re preparing and how much mess you want to avoid.
Double-Handed Method
This method works well when you’re preparing a small batch of chicken tenders at home.
- Keep the seasoned flour in one shallow bowl and the beaten eggs in another.
- Use one hand to place the chicken strip in the flour.
- Transfer it to the egg mixture using the same hand.
- Use your other hand to coat the chicken in flour again.
- Press the flour gently onto the chicken to help it stick.
The trick is to keep one hand for dry ingredients and the other for wet ingredients. This prevents your fingers from collecting thick clumps of egg and flour.
Bag Technique
The bag technique works well when you want to coat several chicken strips quickly.
- Add the seasoned flour to a large food-safe zip-top bag.
- Add a few chicken strips at a time.
- Seal the bag, leaving some air inside.
- Shake gently until the chicken gets an even flour coating.
- Remove the strips and dip them into the beaten eggs.
- Return them to the flour bag for the final coating.
- Shake gently again to cover all sides.
Don’t add too many chicken strips at once. Crowding the bag can cause uneven breading. Also, use a separate bowl for the eggs and discard any flour mixture that comes into contact with raw chicken.
Container Technique
If you don’t have zip-top bags, use a large container with a tight-fitting lid.
- Add the seasoned flour to the container.
- Place a few chicken strips inside.
- Close the lid securely.
- Shake gently until the flour covers the chicken.
- Dip each strip into the beaten eggs.
- Return the chicken to the container for the final flour coating.
This method keeps most of the flour inside the container and makes cleanup easier.
Which dredging method works best?
All three methods can give you a crispy coating. The double-handed method gives you more control, while the bag and container techniques make it easier to coat several chicken strips.
For the best results, shake off excess flour before frying and press the final coating gently onto each piece. This helps the breading stay attached and creates an even, crunchy crust.
So What’s the Secret Ingredient to Crispy Fried Tenders?
The secret to crispy fried chicken tenders is cornstarch. It helps create a light, crunchy coating that stays crisp after frying. You don’t need buttermilk or a long marinade to get that satisfying crunch.
Cornstarch works well with all-purpose flour because each ingredient has a different job. Flour gives the breading structure, while cornstarch helps create a lighter, crispier crust.
Here are a few ingredients that can improve the texture of homemade chicken tenders.
- Cornstarch: Replace a small portion of the all-purpose flour with cornstarch. A good starting point is ¼ cup of cornstarch for every 1¾ cups of flour. This gives the coating a lighter texture.
- Baking powder: A small amount of baking powder can help create a lighter, less dense crust. Use it sparingly so it doesn’t affect the flavor.
- Eggs: Beaten eggs help the seasoned flour stick to the chicken. They also help form an even coating during frying.
- Panko breadcrumbs: Panko has larger, lighter flakes than regular breadcrumbs. It creates a rough, crunchy texture that works well for homemade chicken strips.
- Proper oil temperature: Even the best breading can turn soggy if the oil isn’t hot enough. Keep the frying oil around 350°F to 375°F and avoid overcrowding the pan.
One more trick: After coating the chicken, let the breaded strips rest on a wire rack for about 5 to 10 minutes before frying. This gives the coating time to settle and helps it stay attached during cooking.
For this recipe, a combination of seasoned flour, eggs and a little cornstarch offers a simple way to get crispy chicken tenders without buttermilk.
What Temperature Should the Oil Be Heated To?
The ideal oil temperature for frying chicken tenders is 350°F to 375°F. This range helps the breading turn golden brown and crispy while the chicken cooks through. If the oil is too cool, the coating absorbs more oil and becomes greasy. If it’s too hot, the outside can burn before the inside cooks fully.
For the best results, keep these temperature ranges in mind:
| Oil temperature | What happens |
| Below 325°F | Chicken may absorb too much oil and turn soggy |
| 350°F to 375°F | Creates a golden, crispy coating |
| Above 375°F | Breading may brown too quickly or burn |
How to Check the Oil Temperature
The easiest way to check frying oil is with a kitchen thermometer. Place the thermometer in the oil without touching the bottom of the pan. Wait for the reading to settle before adding the chicken.
Don’t have a thermometer? Drop a small piece of breading into the oil. It should start sizzling right away and turn golden within a short time. This gives you a rough idea, but a thermometer provides a more accurate reading.
Tips for Maintaining the Right Frying Temperature
- Avoid overcrowding the pan: Adding too many chicken strips at once lowers the oil temperature. Fry in small batches.
- Let the oil heat between batches: Wait until it returns to around 350°F before adding more chicken.
- Use a heavy-bottomed pan: A cast-iron skillet or Dutch oven helps maintain steady heat.
- Adjust the burner: Lower the heat if the oil gets too hot. Increase it slightly if the temperature drops.
- Watch the coating: The chicken should sizzle steadily and develop an even golden-brown crust.
Quick tip: Keep a close eye on the oil temperature throughout frying. Steady heat helps you get crispy chicken tenders without buttermilk, with a crunchy outside and juicy center. Always check that the thickest part of the chicken reaches 165°F before serving.
Pro Tips
A few simple tricks can make a big difference when frying homemade chicken tenders without buttermilk. Follow these tips to get a crunchy golden coating, juicy chicken and consistent results every time.
- Pat the chicken dry: Use paper towels to remove excess moisture before breading. Dry chicken helps the egg wash and seasoned flour stick better.
- Cut the chicken evenly: Keep your chicken strips close to the same thickness. This helps them cook at the same rate and prevents smaller pieces from drying out.
- Season every layer: Add salt, paprika, garlic powder and black pepper to your flour mixture. This gives the breading flavor instead of leaving the crust bland.
- Shake off excess flour: Too much loose flour can create thick, uneven patches. Give each chicken strip a gentle shake before dipping it into the beaten eggs.
- Press the coating firmly: After the final flour coating, gently press the flour onto each chicken strip. This helps the breading stay attached during frying.
- Let the breaded chicken rest: Place the coated strips on a wire rack for 5 to 10 minutes before frying. This gives the coating time to settle and helps reduce loose breading in the oil.
- Use a thermometer: Keep the frying oil between 350°F and 375°F. A steady temperature helps create a crispy crust without making the chicken greasy.
- Fry in small batches: Adding too many chicken strips at once lowers the oil temperature. Give each piece enough room to fry evenly.
- Use a wire rack for draining: Place the fried chicken tenders on a wire rack over a baking sheet. This allows excess oil to drain and prevents steam from making the bottom soggy.
- Check the internal temperature: Use a food thermometer to check the thickest part of each piece. Chicken must reach 165°F for safe eating, according to the USDA.
My best tip: Don’t rush the frying process. Keep the oil temperature steady, avoid overcrowding the skillet and let each batch develop a deep golden crust. These small steps help you make crispy, juicy chicken tenders without using buttermilk.
How to Know If Chicken Tenders Are Done
The best way to know if fried chicken tenders are fully cooked is to check their internal temperature with a meat thermometer. According to the USDA, chicken must reach 165°F (74°C) to be safe to eat.
Don’t rely on the golden-brown coating alone. Chicken tenders can look perfectly crispy on the outside but still remain undercooked in the center.
Here are three ways to check your homemade chicken tenders:
1. Use a Meat Thermometer
Insert an instant-read food thermometer into the thickest part of a chicken tender. Make sure the tip reaches the center of the meat without touching the pan.
The temperature should reach 165°F. Check a few of the largest pieces, especially if your chicken strips have different thicknesses.
2. Check the Color Inside
Cut open the thickest chicken tender if you don’t have a thermometer. The meat should look opaque and white throughout, with no raw or translucent center.
However, color alone cannot confirm that chicken is safe to eat. A thermometer gives you a more reliable result.
3. Check the Texture
Fully cooked chicken should feel firm but still tender when you cut into it. The meat should not look raw or feel soft and slippery in the center.
Avoid frying chicken for too long just to make sure it’s done. Overcooking can dry out the meat and make your crispy chicken tenders tough.
Quick tip: Chicken tenderloins and chicken breast strips can cook at different rates because of their thickness. Always check the thickest piece rather than relying on one fixed frying time.
Seasoning Options
The right seasoning can turn simple homemade chicken tenders into a flavorful family favorite. The basic combination of salt, black pepper, paprika, garlic powder and onion powder gives fried chicken a classic savory taste. However, you can easily adjust the spices to match your preferences.
Mix your chosen seasonings into the all-purpose flour before coating the chicken. This helps spread the flavor evenly through the crispy breading.
Here are some easy seasoning combinations to try.
1. Classic Southern Chicken Seasoning
For a traditional Southern-style flavor, use:
- 1 teaspoon garlic powder
- 1 teaspoon onion powder
- 1 teaspoon paprika
- ½ teaspoon black pepper
- ½ teaspoon dried thyme
- ¼ teaspoon dried oregano
This combination gives chicken tenders a warm, savory flavor without making them too spicy.
2. Spicy Cajun Seasoning
If you enjoy a little heat, try a Cajun-inspired seasoning blend.
- 1 teaspoon paprika
- ½ teaspoon cayenne pepper
- ½ teaspoon garlic powder
- ½ teaspoon onion powder
- ½ teaspoon black pepper
- ½ teaspoon dried oregano
Cayenne adds heat, while paprika and garlic powder give the chicken a bold, smoky flavor. Adjust the cayenne to control the spice level.
3. Garlic Parmesan Seasoning
For a rich, savory flavor, try garlic and Parmesan.
- 1 teaspoon garlic powder
- ½ teaspoon onion powder
- ¼ teaspoon black pepper
- 2 tablespoons finely grated Parmesan cheese
Mix the dry seasonings into the flour. Sprinkle the Parmesan over the hot chicken tenders just after frying. This gives the chicken a cheesy, garlicky finish.
4. Nashville Hot Chicken Seasoning
Want spicy fried chicken with a little Southern flair? Nashville hot seasoning is a great choice.
- 1 teaspoon cayenne pepper
- 1 teaspoon paprika
- ½ teaspoon garlic powder
- ½ teaspoon brown sugar
- ¼ teaspoon black pepper
For a more traditional Nashville hot finish, mix the spices with a little hot frying oil to make a spicy coating. Brush or spoon it over the cooked chicken tenders while they’re still hot.
My tip: Keep the basic seasoning mild if you’re serving children or people who prefer less heat. You can always serve spicy seasoning or hot sauce on the side so everyone can enjoy their chicken tenders just the way they like them.
Gluten-Free Option
You can easily make these homemade chicken tenders without buttermilk and gluten by swapping regular all-purpose flour for a gluten-free alternative. The key is choosing a flour that creates a good coating and helps the breading stick to the chicken.
Here are some simple gluten-free options:
1. Gluten-Free All-Purpose Flour
Use a 1:1 gluten-free all-purpose flour blend instead of regular flour. Choose a blend that works as a direct replacement for wheat flour. It gives the chicken a familiar coating and makes the recipe easy to adapt.
2. Cornstarch
Cornstarch is another good option for crispy fried chicken tenders. It creates a light, crunchy coating and works well on its own or mixed with gluten-free flour.
For a simple coating, try mixing:
- 1 cup gluten-free all-purpose flour
- ½ cup cornstarch
- 1 teaspoon paprika
- ½ teaspoon garlic powder
- Salt and black pepper to taste
Use the same egg wash method to help the coating stick to the chicken.
3. Gluten-Free Breadcrumbs
If you prefer a thicker, crunchier crust, use certified gluten-free breadcrumbs or gluten-free panko. Dip each chicken strip in beaten eggs, then press the breadcrumbs onto all sides.
Important tips for gluten-free chicken tenders:
- Check the ingredient labels on flour, breadcrumbs and seasonings.
- Choose products labeled gluten-free if you need to avoid gluten.
- Use clean bowls, utensils and cooking equipment to prevent cross-contact with regular flour.
- Don’t reuse frying oil that has cooked foods containing wheat flour.
- Check that your dipping sauces are also gluten-free.
Quick tip: A mixture of gluten-free flour and cornstarch gives you a good starting point for crispy chicken tenders. For the best texture, test the coating before making a large batch, as different gluten-free flour blends can produce different results.
Serving Suggestions
These homemade chicken tenders without buttermilk taste best when served hot and crispy. Their savory coating pairs well with classic American side dishes, fresh vegetables and creamy dipping sauces.
Whether you’re making a quick family dinner, a weekend lunch or a meal for kids, here are some easy serving ideas.
1. French Fries
Crispy French fries are a classic side for fried chicken tenders. Serve them with ketchup, ranch dressing or your favorite dipping sauce for a simple restaurant-style meal.
2. Creamy Coleslaw
Coleslaw adds a cool, refreshing crunch that balances the warm, crispy chicken. Make it with shredded cabbage, carrots, mayonnaise and a little vinegar.
3. Mac and Cheese
Creamy macaroni and cheese makes a filling side dish. Its smooth, cheesy texture pairs well with the crunchy chicken coating.
4. Mashed Potatoes
Serve the chicken tenders with buttery mashed potatoes for a comforting family dinner. Add homemade gravy if you want an even heartier meal.
5. Corn on the Cob
Boiled or grilled corn on the cob adds natural sweetness to your plate. Brush it with butter and sprinkle on a little salt and black pepper.
6. Green Salad
If you want something lighter, serve your fried chicken strips with a fresh green salad. Add lettuce, cucumber, tomatoes and your favorite dressing.
7. Roasted Vegetables
Roasted broccoli, carrots, green beans or Brussels sprouts make simple sides. Season them with olive oil, garlic powder and black pepper before roasting.
My serving tip: For a complete family meal, serve crispy chicken tenders with French fries, creamy coleslaw and honey mustard sauce. This combination gives you a mix of crunchy, creamy and tangy flavors that everyone can enjoy.
How to Store Leftover Chicken Tenders
If you have leftover homemade chicken tenders, you can store them in the refrigerator and enjoy them later. Proper storage helps keep the fried chicken safe to eat and prevents it from losing too much moisture.
Follow these simple steps to store your leftover chicken tenders.
1. Let the Chicken Cool Slightly
After frying, place the chicken tenders on a wire rack and let excess oil drain. Allow them to cool slightly before storing.
Don’t leave cooked chicken at room temperature for more than 2 hours. If the temperature is above 90°F, such as during a hot summer day, refrigerate it within 1 hour.
2. Use an Airtight Container
Place the cooled chicken tenders in a clean, airtight food storage container. If you’re stacking several pieces, separate the layers with parchment paper to help prevent the crispy coating from sticking together.
3. Refrigerate the Chicken
Store the container in the refrigerator at 40°F or below. According to the USDA, cooked chicken leftovers stay safe in the refrigerator for 3 to 4 days when handled and stored properly.
Tips for Keeping Leftover Chicken Tenders Fresh
- Store chicken in shallow containers so it cools quickly.
- Keep the container tightly sealed to prevent the chicken from drying out.
- Refrigerate leftovers promptly instead of leaving them on the kitchen counter.
- Keep cooked chicken separate from raw meat and other foods that could cause cross-contamination.
- Label the container with the storage date so you know when to use it.
Can you store chicken tenders while they’re still warm?
Yes. You don’t need to wait until chicken reaches room temperature. Let excess oil drain, then refrigerate the tenders promptly in shallow containers. This helps limit bacterial growth and keeps your leftovers safe.
Quick tip: Refrigeration can soften the crispy breading. For the best texture, reheat leftover chicken tenders in an oven or air fryer rather than eating them straight from the refrigerator.
How to Freeze Chicken Tenders
You can freeze homemade chicken tenders if you want to save leftovers or prepare a batch for another day. Freezing helps extend their storage life and makes meal prep easier. For the best results, let the chicken cool slightly and protect it from freezer burn before storing.
How to Freeze Cooked Chicken Tenders
Follow these simple steps to freeze your leftover fried chicken tenders:
- Cool the chicken: Let the freshly fried chicken tenders cool slightly. Don’t leave them at room temperature for more than 2 hours.
- Arrange on a baking sheet: Place the chicken strips in a single layer on a parchment-lined baking sheet. Keep a little space between each piece.
- Freeze until firm: Put the baking sheet in the freezer for about 1 to 2 hours, or until the chicken tenders feel firm.
- Transfer to a freezer bag: Move the frozen chicken tenders into a freezer-safe zip-top bag or airtight container.
- Remove excess air: Press out as much air as possible before sealing the bag. This helps prevent freezer burn.
- Label and freeze: Write the freezing date on the bag and return it to the freezer.
How Long Can You Freeze Chicken Tenders?
For the best quality, use frozen cooked chicken tenders within 2 to 6 months. Keep your freezer at 0°F or below. Frozen food kept at this temperature remains safe for longer, although its taste and texture may decline over time.
Can You Freeze Breaded Chicken Tenders Before Frying?
Yes. You can also freeze uncooked, breaded chicken tenders for convenient future meals.
Arrange the coated chicken strips on a parchment-lined baking sheet and freeze them until firm. Then transfer them to a freezer-safe bag or airtight container.
Keep raw chicken separate from cooked food, and don’t thaw breaded raw chicken on the kitchen counter. Thaw it safely in the refrigerator before cooking.
Quick tip: Freeze chicken tenders in individual portions. This makes it easier to take out only what you need without thawing the entire batch.
How to Reheat Chicken Tenders
Leftover chicken tenders can taste almost as good as freshly fried ones if you reheat them the right way. The key is to warm the chicken through while bringing back its crispy, golden coating.
The oven and air fryer work best because they help remove excess moisture from the breading. Here are three easy ways to reheat homemade chicken tenders.
1. Reheat Chicken Tenders in the Oven
The oven is a great choice when you’re reheating several chicken tenders at once.
- Preheat your oven to 375°F.
- Place the leftover chicken tenders on a wire rack set over a baking sheet.
- Leave a little space between each piece so hot air can circulate.
- Heat for about 10 to 15 minutes, depending on their size.
- Turn the chicken halfway through if needed.
- Check the center with a food thermometer before serving.
The wire rack helps keep the bottom coating from turning soggy.
2. Reheat Chicken Tenders in the Air Fryer
The air fryer is one of the easiest ways to bring back the crunch in leftover fried chicken.
- Preheat your air fryer to 350°F.
- Arrange the chicken tenders in a single layer in the basket.
- Avoid stacking or overcrowding the pieces.
- Heat for about 3 to 5 minutes.
- Flip the tenders halfway through for even heating.
- Check that the center reaches 165°F before eating.
If the chicken strips are especially thick or cold from the refrigerator, they may need a little more time.
3. Reheat Chicken Tenders in the Microwave
The microwave works when you’re short on time, but it won’t keep the breading as crispy as the oven or air fryer.
- Place the chicken tenders on a microwave-safe plate.
- Cover them loosely with a microwave-safe cover.
- Heat in short 30-second intervals.
- Turn the chicken between intervals.
- Check the center temperature before serving.
The microwave heats quickly, but it can make the crispy coating soft. If you want a crunchy finish, place the tenders in a preheated oven or air fryer for a few minutes afterward.
What Is the Best Way to Reheat Chicken Tenders?
| Reheating method | Temperature | Approximate time | Result |
| Oven | 375°F | 10–15 minutes | Even heating and crispy coating |
| Air fryer | 350°F | 3–5 minutes | Quick and crunchy |
| Microwave | High | 30-second intervals | Quick but softer coating |
Important food safety tip: According to the USDA, reheat leftover chicken to an internal temperature of 165°F. Always check the thickest piece with a food thermometer. Don’t rely on the outside feeling hot.
My recommendation: Use an air fryer if you’re reheating just a few chicken tenders. It brings back the crunchy coating quickly without adding extra oil.
What’s the Best Way to Defrost Chicken?
The safest way to defrost frozen chicken tenders or chicken breasts is in the refrigerator. Slow thawing keeps the chicken at a safe temperature and helps prevent harmful bacteria from growing.
If you’re planning to make homemade chicken tenders without buttermilk, it’s best to thaw the chicken before seasoning and breading it. This also makes it easier to remove excess moisture and helps the egg wash and seasoned flour stick properly.
The USDA recommends three safe ways to thaw frozen chicken: in the refrigerator, in cold water or in the microwave.
How to Defrost Chicken in the Fridge
Refrigerator thawing is the easiest and safest method if you have enough time.
- Remove the frozen chicken from the freezer.
- Keep it in a leak-proof container or sealed bag.
- Place the container on the bottom shelf of your refrigerator to prevent raw chicken juices from dripping onto other foods.
- Keep the refrigerator temperature at 40°F or below.
- Allow enough time for the chicken to thaw completely.
Small chicken portions may thaw overnight, while larger packages can take longer.
Once thawed in the refrigerator, raw chicken can stay refrigerated for another 1 to 2 days before cooking.
How to Defrost Chicken Using Cold Water
If you forgot to thaw your chicken overnight, the cold-water method offers a faster option.
- Place the frozen chicken in a leak-proof plastic bag.
- Fill a large bowl with cold tap water.
- Submerge the sealed bag completely.
- Change the water every 30 minutes to keep it cold.
- Check the chicken until it feels completely thawed.
Small portions may take about an hour, while larger packages can take longer.
Important: Cook chicken immediately after thawing it in cold water. Don’t put it back in the refrigerator to cook another day.
How to Defrost Chicken in the Microwave
The microwave is another option when you’re short on time.
- Remove the chicken from any packaging that isn’t microwave-safe.
- Place it in a microwave-safe dish.
- Select the defrost setting or use a low power setting.
- Follow your microwave’s instructions and turn the chicken as needed.
- Separate the pieces as they thaw.
Some parts may start cooking during microwave defrosting. That’s why you should cook the chicken immediately after thawing.
Which method should you choose?
Refrigerator thawing is best when you plan ahead. Cold-water thawing works well when you need chicken sooner, while microwave thawing is useful when you’re in a hurry.
Never thaw frozen chicken on the kitchen counter or in hot water. These methods can allow harmful bacteria to grow.
Here are the introduction and conclusion. I’ve used a personal, friendly recipe-blog tone, addressed common cooking frustrations and included a clear answer early. I have avoided making up personal recipe-testing claims. You can add your actual kitchen experience where appropriate.
Conclusion
These homemade chicken tenders without buttermilk prove that you don’t need a long marinade or special ingredients to make delicious fried chicken at home. A simple egg wash, well-seasoned flour and properly heated oil can give you a golden, crispy coating with tender, juicy chicken inside. The key is to keep the chicken pieces evenly sized, coat each strip properly and avoid overcrowding the pan.
If you’re making this recipe for the first time, pay close attention to the oil temperature and use a meat thermometer to check that the chicken reaches 165°F. Once you get comfortable with the basic method, you can adjust the seasonings, try different coatings and serve the tenders with your favorite dipping sauces. Give this recipe a try, and let me know in the comments how your chicken tenders turned out and which sauce you served with them!
Frequently Asked Questions
1. Can I Use Eggs Instead of Buttermilk for Fried Chicken?
Yes! Eggs work well as a buttermilk alternative when making fried chicken tenders. They help the seasoned flour and breadcrumbs stick to the chicken, creating an even coating. Simply dip each chicken strip into beaten eggs before coating it with seasoned flour. Eggs help bind the breading, but they don’t tenderize chicken in the same way as a marinade.
2. Why Add Buttermilk to Fried Chicken?
Buttermilk adds a mild tangy flavor and helps tenderize chicken because of its acidity. It also helps the coating stick to the meat. However, you don’t need buttermilk to make crispy fried chicken. An egg wash and seasoned flour work well for homemade chicken tenders without buttermilk.
3. What Tenderizes Chicken Besides Buttermilk?
You have several options if you don’t have buttermilk. A simple saltwater brine helps chicken retain moisture, while plain yogurt can add tenderness and flavor if you don’t need a dairy-free option. You can also use a little lemon juice in a marinade. For this recipe, chicken tenderloins are naturally tender, so you can skip the marinade altogether.
4. Can I Use Buttermilk for This Recipe?
Yes! You can use buttermilk if you prefer its tangy flavor. Dip the chicken in buttermilk before coating it with seasoned flour. However, this recipe uses beaten eggs instead, so you can make crispy chicken tenders without needing buttermilk, milk or a long marinating time.
5. What Does Cornstarch Do in Breading?
Cornstarch helps create a light, crispy coating on fried chicken. It contains less protein than all-purpose flour, so it produces a different texture when fried. Mixing a small amount of cornstarch with flour can give your chicken tenders an extra-crunchy crust. You can also use it in place of some flour in your breading mixture.
6. How Do You Make Oven-Baked Chicken Tenders?
To make baked chicken tenders, coat the chicken strips in seasoned flour, beaten eggs and breadcrumbs. Arrange them in a single layer on a wire rack over a baking sheet. Lightly spray the coating with cooking oil and bake in a preheated oven at 400°F until golden and cooked through. Cooking time depends on the thickness of the chicken. Check that the thickest piece reaches an internal temperature of 165°F.
7. What Oil Is Best for Frying Chicken Tenders Like KFC?
For homemade fried chicken tenders, choose a neutral oil with a high smoke point. Vegetable oil, canola oil and peanut oil are good options. They handle the heat needed for deep-frying without adding a strong flavor to the chicken. Keep the oil temperature around 350°F to 375°F for a crispy, golden coating. KFC’s commercial frying oils can vary by location, so these home-cooking options are practical alternatives rather than exact copies.
8. How Do You Keep Chicken Tenders Crispy After Frying?
Place freshly fried chicken tenders on a wire rack over a baking sheet instead of stacking them on a plate. The rack allows air to circulate around the coating and prevents steam from making the bottom soggy. Avoid covering the hot chicken tightly. If you’re making several batches, keep the cooked tenders warm in an oven set to around 200°F until you’re ready to serve them.