



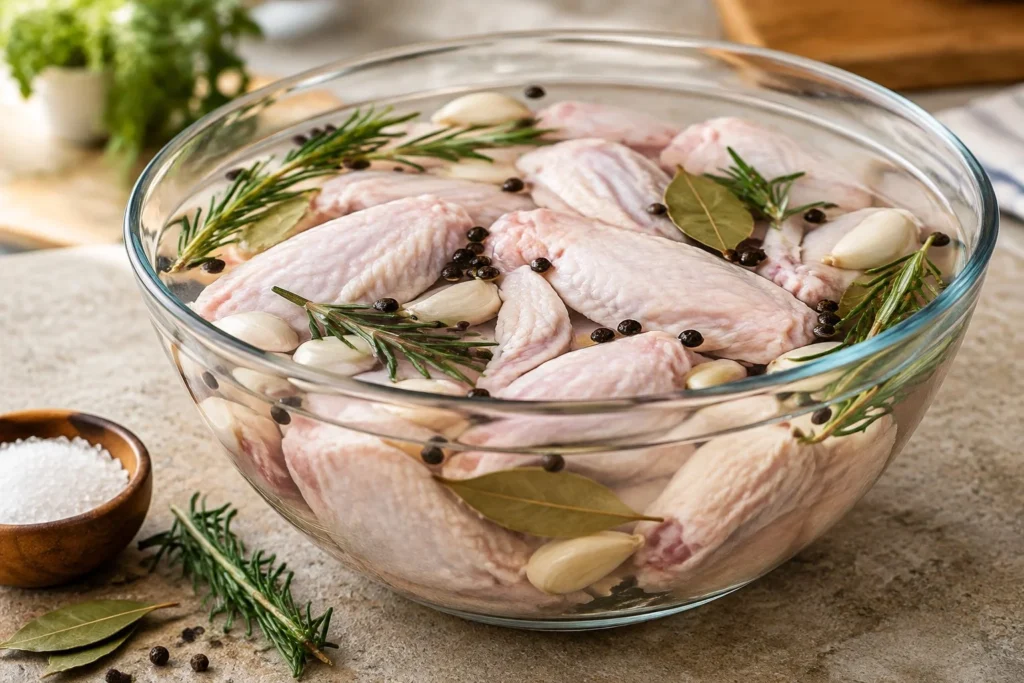
Have you ever made chicken wings that looked delicious but turned out dry, bland, or too salty? I know how frustrating it can be to spend time preparing wings only to find that they lack flavor or have soggy skin instead of the crispy texture you wanted.
The secret to better wings starts with a simple chicken wing brine recipe made with water, salt, and a few everyday seasonings. For a moderate wet brine, start with about 30–40 grams of salt per liter of water and brine the wings in the refrigerator for 2–4 hours, adjusting the time to suit the salt concentration and wing size.
In this guide, you’ll learn how to make chicken wing brine, choose the right salt-to-water ratio, determine the best brining time, and prepare juicy wings with crispy skin in the oven, air fryer, smoker, or on the grill.
You’ll also find easy flavor variations, practical troubleshooting tips, and food safety advice to help you avoid common mistakes. Try this simple brine for your next batch of chicken wings, and follow the steps below to get started
Juicy Wings Every Time!
A good chicken wing brine recipe helps you make juicy, flavorful chicken wings that are full of flavor from the first bite. The secret is a simple mix of water, salt, and a few seasonings that gives the chicken time to absorb salt before cooking.
Brining helps the meat retain moisture during cooking and seasons the wings more evenly. You can use this method for fresh or thawed chicken wings before baking, grilling, smoking, air frying, or deep frying. The same basic brine works with flats and drumettes, so you do not need a different recipe for each cut.
For the best results, keep these tips in mind:
- Measure the salt carefully: Too much salt or too much brining time can leave the wings overly salty.
- Keep the wings refrigerated: Always brine chicken in the refrigerator, never at room temperature.
- Dry the skin well: After brining, drain the wings and pat them dry with paper towels. For crispier skin, let them air-dry uncovered on a rack in the refrigerator.
- Choose the right cooking method: Brining helps with moisture and seasoning, but crispy skin also depends on surface dryness, heat, and cooking technique.
- Check the internal temperature: Cook chicken wings to 165°F (74°C), measured with a food thermometer at the thickest part without touching the bone.
Whether you’re preparing Buffalo wings for game day or making a batch for a family dinner, a well-balanced brine can help you get juicy meat and better flavor without complicated ingredients.
Why Brine Chicken Wings?
Brining chicken wings helps season the meat, improve moisture retention, and add flavor before cooking. A simple chicken wing brine made with water, salt, and optional seasonings can make a noticeable difference, especially when you’re grilling, smoking, baking, or frying wings.
Here are the main benefits of brining chicken wings:
- Juicier meat: Salt changes the way muscle proteins hold water, helping the wings retain more moisture during cooking. This can reduce the chance of dry, tough meat.
- Better flavor: Salt moves into the meat during brining, seasoning the wings beyond the surface. Garlic, black pepper, bay leaves, and other seasonings can add extra flavor to the brine.
- More consistent results: Brining gives the salt time to spread through the meat, helping the wings taste more evenly seasoned.
- Great for different cooking methods: You can brine chicken wings before baking, grilling, smoking, air frying, or deep frying. The brine seasons the meat regardless of the cooking method.
- A good starting point for crispy wings: Brining does not make the skin crispy by itself. For crispier chicken wings, drain them well, pat the skin dry, and refrigerate them uncovered on a rack before cooking.
Is Brining Chicken Wings Worth It?
Yes, if you want juicy, well-seasoned wings and have time to prepare them ahead. Wet brining is especially useful for people who prefer a simple preparation method with everyday ingredients.
However, brining is optional. Chicken wings already contain fat and connective tissue, and you can still make flavorful wings without soaking them in salt water. A dry rub or dry brine may be a better choice if crispy skin is your main goal.
The key is balance: Use the right amount of salt, follow a suitable brining time, and dry the wings properly before cooking. These steps help you get flavorful meat without making the wings too salty.
What Does Brining Do?
Brining is the process of soaking chicken wings in a mixture of water, salt, and sometimes sugar or other seasonings before cooking. The main purpose of a chicken wing brine is to season the meat and help it retain moisture during cooking.
When you add salt to water, it creates a salty solution that interacts with the proteins in the chicken. Over time, salt moves into the meat, changing how some proteins hold water. This helps the wings stay juicier as they cook.
Here is what happens when you brine chicken wings:
- Salt seasons the meat: Salt gradually moves into the chicken, giving the wings flavor beyond the outer surface.
- Moisture retention improves: Salt changes the behavior of muscle proteins, helping them hold onto more water during cooking.
- Seasonings add flavor: Ingredients such as garlic, black pepper, bay leaves, and herbs can give the brine extra flavor.
- Sugar can balance the taste: Brown sugar or regular sugar adds mild sweetness. It is optional and does not replace salt’s role in the brining process.
- Cooking results can improve: Properly brined wings may be less likely to turn dry, although cooking time and temperature still matter.
Does Brining Make Chicken Wings Crispy?
No. Brining mainly helps with seasoning and moisture retention, not crispy skin. In fact, a wet brine can leave extra moisture on the surface of the wings.
For crispier chicken wings, drain them after brining, pat them dry with paper towels, and place them uncovered on a rack in the refrigerator before cooking. This helps remove surface moisture so the skin can brown more easily in the oven, air fryer, grill, or fryer.
Can You Over-Brine Chicken Wings?
Yes. Leaving chicken wings in a strong salt brine for too long can make them overly salty and give the meat an unpleasant texture. The ideal brining time depends on the salt concentration, the amount of water, and the size of the wings.
For the best results, follow a tested chicken wing brine recipe, keep the wings refrigerated throughout the process, and remove them when the recommended brining time is complete.
Ingredients for Brined Chicken Wings
You only need a few simple ingredients to make a flavorful chicken wing brine at home. Water and salt form the base, while brown sugar and seasonings add extra flavor. This recipe is suitable for fresh or fully thawed chicken wings before baking, grilling, smoking, air frying, or deep frying.
Ingredients You’ll Need
Makes enough brine for approximately 2 pounds of chicken wings.
| Ingredient | Amount | Purpose |
| Cold water | 4 cups | Forms the base of the brine |
| Kosher salt | ¼ cup, measured carefully | Seasons the chicken and helps it retain moisture |
| Brown sugar | 2 tablespoons | Adds mild sweetness and balances the salty taste |
| Garlic cloves | 3, lightly crushed | Adds savory flavor |
| Black peppercorns | 1 teaspoon | Gives the brine a mild peppery flavor |
| Bay leaves | 2 | Add a subtle herbal note |
Important: Kosher salt brands have different crystal sizes, so the weight of ¼ cup can vary. For consistent results, measure salt by weight and follow a tested recipe’s salt-to-water ratio. If you use table salt instead, adjust the amount rather than replacing it cup for cup.
Choosing the Right Chicken Wings
Use about 2 pounds of fresh or fully thawed chicken wings. You can brine whole wings or separate them into flats and drumettes. Remove any loose feathers and check that the wings are clean before preparing the brine.
Optional Flavor Additions
You can change the flavor without changing the basic purpose of the brine.
- Apple cider vinegar: Adds a tangy note. Use a tested amount to avoid making the brine too acidic.
- Red pepper flakes: Add mild heat for spicy wings.
- Lemon peel: Gives the brine a fresh citrus aroma.
- Fresh thyme or rosemary: Adds an herbal flavor.
- Onion slices: Provide extra savory notes.
These additions are optional. Keep the salt concentration consistent with your tested recipe so the wings do not become too salty.
What You Need to Prepare the Brine
Use a measuring cup, measuring spoons or a kitchen scale, a large food-safe container, and enough refrigerator space to keep the chicken fully covered by the brine. If you heat the water to dissolve the salt and sugar, let the brine cool completely before adding the raw chicken.
Keep the wings refrigerated during brining, and discard the used brine after removing the chicken.
How to Make Brine for Chicken Wings
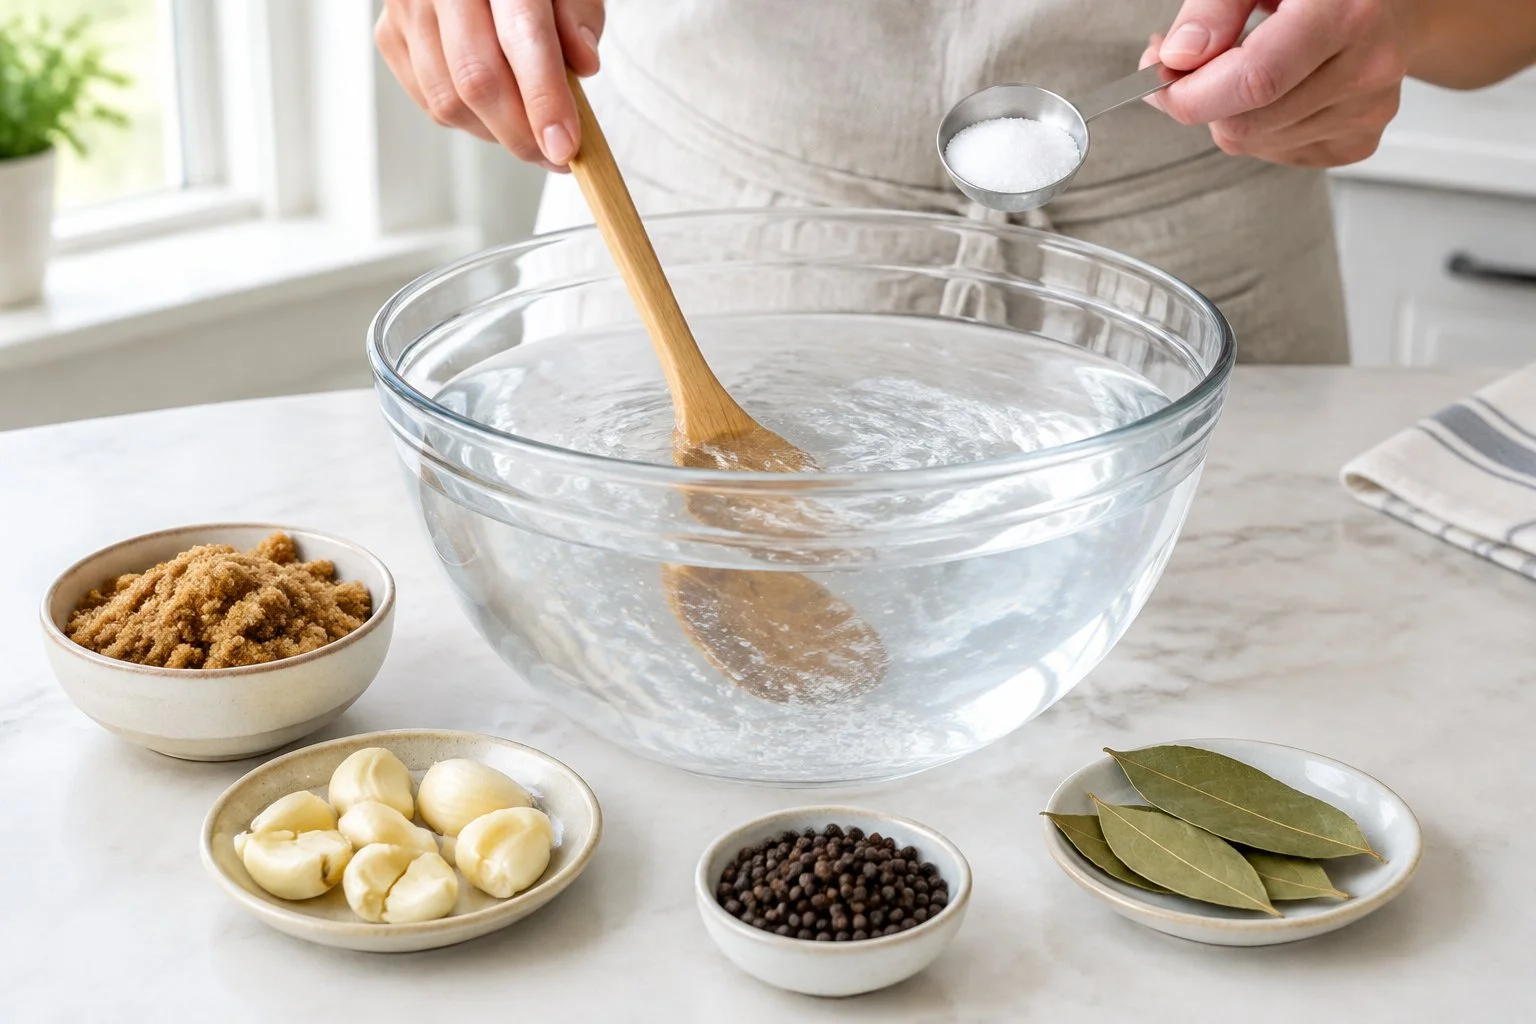
Making chicken wing brine takes just a few minutes and requires basic kitchen ingredients. The key is to dissolve the salt and sugar in water, add your preferred seasonings, and cool the brine before adding the chicken wings. For the best results, use a food-safe container that fits the wings and keeps them fully covered with liquid.
Step 1: Mix the Salt and Water
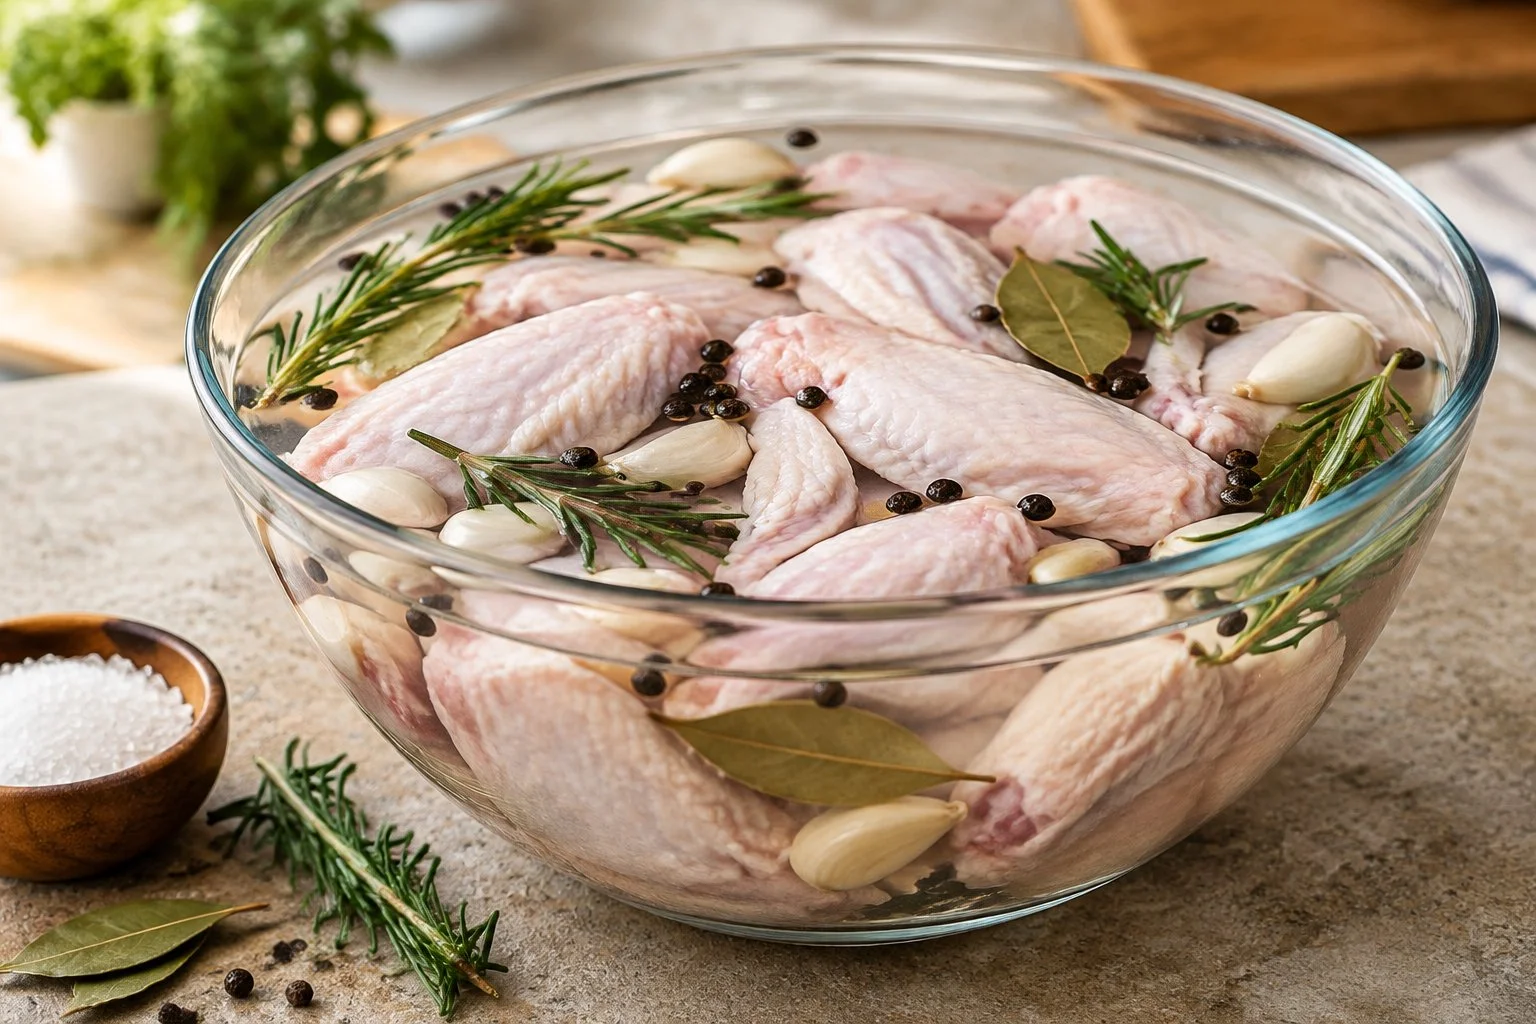
Pour 4 cups of cold water into a clean, food-safe container. Add ¼ cup of kosher salt and stir until the salt dissolves. You can measure the salt by weight for more consistent results because different brands of kosher salt vary in crystal size and density.
Step 2: Add Sugar and Seasonings
Stir in 2 tablespoons of brown sugar, then add 3 lightly crushed garlic cloves, 1 teaspoon of black peppercorns, and 2 bay leaves. The sugar adds a mild balance to the salty flavor, while the garlic, peppercorns, and bay leaves give the chicken wings extra flavor.
You can also customize your chicken wing brine with lemon peel, fresh thyme, rosemary, red pepper flakes, or a small amount of apple cider vinegar. Start with a few additions so the seasoning does not overpower the natural flavor of the chicken.
Step 3: Cool the Brine Completely
If you prefer to dissolve the salt and sugar in warm water, heat only part of the water, mix in the ingredients, and then add the remaining cold water. Let the mixture cool completely before adding the chicken wings. Never place raw chicken in warm brine, as warm temperatures can encourage bacterial growth.
Step 4: Add the Chicken Wings
Place about 2 pounds of fresh or fully thawed chicken wings in the cooled brine. Make sure every wing is submerged. If needed, use a clean, food-safe plate to keep the wings under the liquid.
Step 5: Refrigerate the Wings
Cover the container and place it in the refrigerator while the wings brine. Keep the chicken at 40°F (4°C) or below throughout the process. Avoid leaving raw chicken in brine at room temperature.
When the brining time is complete, remove the wings and discard the used brine. Do not reuse it for another batch of chicken or as a sauce. Pat the wings thoroughly dry with paper towels before cooking. Removing surface moisture helps the skin brown and become crisp in the oven, air fryer, or on the grill.
How to Brine Chicken Wings
Brining chicken wings is simple: soak the wings in a properly prepared saltwater solution, keep them refrigerated, and dry them well before cooking. This process helps the meat retain moisture and gives the wings a more seasoned flavor. Follow these steps for juicy, flavorful chicken wings.
- Prepare the chicken wings. Use about 2 pounds of fresh or fully thawed chicken wings. Separate whole wings into flats and drumettes if desired, and remove any loose feathers.
- Place the wings in the brine. Put the chicken wings in a clean, food-safe container and pour the cooled brine over them. Make sure all the wings are submerged so they season evenly.
- Cover and refrigerate. Cover the container and place it in the refrigerator at 40°F (4°C) or below. Never leave chicken wings soaking in brine on the kitchen counter.
- Brine for the appropriate amount of time. For average-sized chicken wings, start with 2–4 hours. The ideal time depends on the salt concentration and wing size. Avoid leaving them in a strong brine for too long, as excess salt can make the meat overly salty.
- Remove the wings and discard the brine. Take the wings out with clean utensils. Discard the used liquid rather than reusing it, since it has been in contact with raw chicken.
- Pat the wings completely dry. Use paper towels to remove moisture from the skin. This step is especially helpful if you plan to bake, grill, smoke, or air-fry the wings and want browned, crispy skin.
- Cook the wings safely. Add your preferred dry rub or other seasonings, keeping in mind that the brine has already added salt. Cook the wings until the thickest part reaches an internal temperature of 165°F (74°C), measured with a food thermometer without touching the bone.
Beginner tip: Brining adds moisture and flavor, but it does not guarantee crispy skin. Thoroughly drying the wings after brining is one of the best ways to help the skin brown during cooking.
How Long to Brine Chicken Wings
For most chicken wings, 2–4 hours in the refrigerator is a good starting point for a wet brine. The exact brining time depends on the salt concentration, wing size, and how strongly seasoned you want the meat to be. Chicken wings are smaller than whole chicken pieces, so they generally need less time to absorb salt.
| Brining time | What to expect |
| 30–60 minutes | Mild seasoning with less time for the salt to work |
| 2–4 hours | A good starting range for flavorful, juicy chicken wings |
| 4–6 hours | More pronounced seasoning; monitor the salt concentration |
| Overnight | Usually unnecessary for wings and may make them too salty, especially in a strong brine |
Should You Brine Chicken Wings Overnight?
Overnight brining is usually unnecessary because chicken wings are relatively small. Leaving them in a salt-heavy solution for too long can make the meat overly salty and affect its texture. For a standard saltwater brine, start with 2–4 hours and adjust the time based on your recipe and results.
Do You Brine Chicken Wings in the Refrigerator?
Yes. Always brine chicken wings in a covered, food-safe container in the refrigerator at 40°F (4°C) or below. Do not leave raw chicken soaking at room temperature, even for a short period.
What Should You Do After Brining?
Remove the chicken wings from the brine and discard the used liquid. Pat the wings thoroughly dry with paper towels before baking, grilling, smoking, or air-frying. Dry skin helps the wings brown and crisp more effectively.
Best tip: If you are unsure how long to brine chicken wings, begin with 2 hours, then adjust the time in future batches. Keep in mind that a stronger brine requires less soaking time than a weaker one.
Molly’s Brining Tips
Use these simple tips to get juicy, flavorful chicken wings without making them too salty or losing their crispy texture.
– Measure the salt carefully. Different brands of kosher salt have different crystal sizes, so the same volume can contain different amounts of salt. For consistent results, measure by weight when possible and follow the salt-to-water ratio in your recipe.
– Always cool the brine before adding chicken. Hot or warm brine can raise the temperature of raw chicken. Let the solution cool completely before placing the wings in it.
– Keep the wings fully submerged. Make sure every piece of chicken is covered by the brine so the seasoning is distributed evenly. Use a clean, food-safe container with enough room for the liquid and wings.
– Avoid over-brining. Chicken wings are small and do not need to soak overnight in a strong saltwater solution. Start with 2–4 hours in the refrigerator and adjust the time based on your brine’s strength.
– Dry the skin before cooking. After removing the wings from the brine, pat them dry with paper towels. Excess moisture can prevent the skin from browning properly, especially when baking or air-frying.
– Go easy on extra salt. Brined chicken wings already contain salt, so check the ingredients in your dry rub, seasoning blend, or wing sauce before adding more.
– Choose your cooking method based on your preferred texture. An air fryer or hot oven can help produce crisp skin, while smoking and grilling add a smoky, charred flavor. Regardless of the method, cook the wings to an internal temperature of 165°F (74°C).
– Never reuse the brine. Once raw chicken has soaked in the liquid, discard it. Keep the wings refrigerated at 40°F (4°C) or below throughout brining.
Molly’s best tip: For juicy chicken wings with crisp skin, focus on three things: the correct salt ratio, enough refrigerated brining time, and thoroughly drying the wings before cooking.
What to Serve With Chicken Wings?
Brined chicken wings pair well with fresh vegetables, creamy dips, crispy sides, and flavorful sauces. Whether you serve baked, grilled, smoked, or air-fried wings, the right side dishes can turn them into a complete meal or an easy party appetizer.
Best Dips and Sauces for Chicken Wings
- Ranch dressing: A cool, creamy dip that balances spicy or smoky chicken wings.
- Blue cheese dressing: A classic choice for Buffalo wings, with a tangy flavor that complements hot sauce.
- Buffalo sauce: Adds heat and a tangy kick to baked or air-fried wings.
- Honey garlic sauce: Combines sweet honey with savory garlic for a delicious coating.
- Barbecue sauce: Pairs especially well with grilled or smoked chicken wings.
- Garlic Parmesan sauce: Adds a rich, savory flavor without the heat of spicy sauces.
Easy Side Dishes to Serve With Wings
- Celery and carrot sticks: Fresh, crunchy vegetables that pair well with creamy dips.
- French fries: A classic side for a casual chicken wing dinner.
- Coleslaw: Creamy or vinegar-based coleslaw adds a refreshing contrast to savory wings.
- Potato wedges: Crispy on the outside and soft inside, they work well with oven-baked or air-fried wings.
- Corn on the cob: A simple side that complements grilled and barbecue chicken wings.
- Macaroni and cheese: A comforting option for family dinners and game-day gatherings.
- Green salad: A lighter choice that balances the richness of the wings.
What to Serve With Brined Chicken Wings for a Party
For a simple party platter, arrange the cooked chicken wings on a large serving tray with celery sticks, carrot sticks, ranch dressing, blue cheese dip, and a bowl of barbecue or Buffalo sauce. Add French fries, potato wedges, or coleslaw if you want a more filling spread.
Tip: Brined chicken wings already have a seasoned flavor, so taste them before adding extra salt or serving them with salty sauces. This helps keep the overall meal balanced and flavorful.
How to Cut a Chicken Wing
Cutting whole chicken wings into smaller pieces makes them easier to brine, season, cook, and serve. A whole chicken wing has three parts: the drumette, flat, and wing tip. You can separate these pieces at home with a sharp knife and a sturdy cutting board.
Step 1: Place the Wing on a Cutting Board
Pat the raw chicken wing dry with paper towels so it is easier to handle. Place it on a clean, stable cutting board and locate the joints where the three sections connect.
Step 2: Separate the Drumette and Flat
The drumette is the meaty section closest to the chicken’s body, while the flat is the middle section with two small bones.
Bend the wing gently at the joint to locate the natural separation point. Use a sharp kitchen knife to cut through the joint rather than chopping directly through the bones.
Step 3: Remove the Wing Tip
The wing tip is the small, pointed end of the wing. Bend it back slightly to locate the joint connecting it to the flat, then cut through the joint.
Save the wing tips in a freezer-safe bag for making chicken stock, or discard them if you do not need them.
Step 4: Prepare the Pieces for Brining
Once separated, you will have drumettes and flats ready for your chicken wing brine. Place the pieces in the cooled brine and make sure they are fully submerged. Smaller pieces may absorb salt more quickly, so avoid extending the brining time unnecessarily.
Safety Tips for Cutting Raw Chicken
- Use a clean cutting board and sharp knife.
- Wash your hands with soap and water before and after handling raw chicken.
- Keep raw chicken and its juices away from ready-to-eat foods.
- Clean and sanitize the cutting board, knife, and work surface after use.
Tip: You do not have to cut chicken wings before brining. Whole wings work just as well; separating them into drumettes and flats simply makes portioning and serving easier.
Wet Brine vs. Dry Brine for Chicken Wings
Wet brining and dry brining are two simple ways to season chicken wings before cooking. The main difference is that a wet brine uses salt dissolved in water, while a dry brine uses salt applied directly to the chicken skin and meat. Both methods can improve flavor, but they produce slightly different results.
Wet Brine
Saltwater solution
- Helps the meat retain moisture.
- Adds seasoning throughout the wings.
- Requires a container and refrigerator space.
- Needs extra drying before cooking.
Dry Brine
Salt applied directly
- Seasons the chicken without added water.
- Helps the skin dry in the refrigerator.
- Can produce crispier skin.
- Requires less preparation and cleanup.
Which Brining Method Is Better for Chicken Wings?
Choose the method based on your preferred texture and cooking style.
| Feature | Wet brine | Dry brine |
| Main ingredients | Water and salt, plus optional seasonings | Salt, plus optional dry seasonings |
| Moisture | Helps the meat retain moisture | Seasons the meat without adding water |
| Skin texture | Skin must be dried well before cooking | Often easier to achieve crispy skin |
| Preparation | Mix and cool the brine before use | Sprinkle salt evenly over the wings |
| Best for | Juicy, well-seasoned wings | Crispy baked or air-fried wings |
How to Wet Brine Chicken Wings
Mix kosher salt with water until the salt dissolves, then add optional ingredients such as garlic, black peppercorns, bay leaves, or brown sugar. Cool the brine completely, add the chicken wings, and refrigerate them for about 2–4 hours as a starting point. Remove the wings, discard the used brine, and pat the skin thoroughly dry before cooking.
How to Dry Brine Chicken Wings
Pat the raw chicken wings dry with paper towels, then sprinkle them evenly with salt. Add black pepper, garlic powder, paprika, or your favorite dry rub if desired. Arrange the wings on a wire rack over a baking sheet and refrigerate them uncovered for several hours, or overnight if the salt amount and recipe allow. This helps dry the skin, which supports better browning and crispiness during cooking.
Keep the wings refrigerated at 40°F (4°C) or below throughout either process, and cook them to an internal temperature of 165°F (74°C).
Which method should you choose? For this chicken wing brine recipe, wet brining is a good choice if your priority is juicy, flavorful meat. If you care most about crispy skin, dry brining may be the better option because it avoids adding extra moisture to the chicken.
How to Get Crispy Skin After Brining
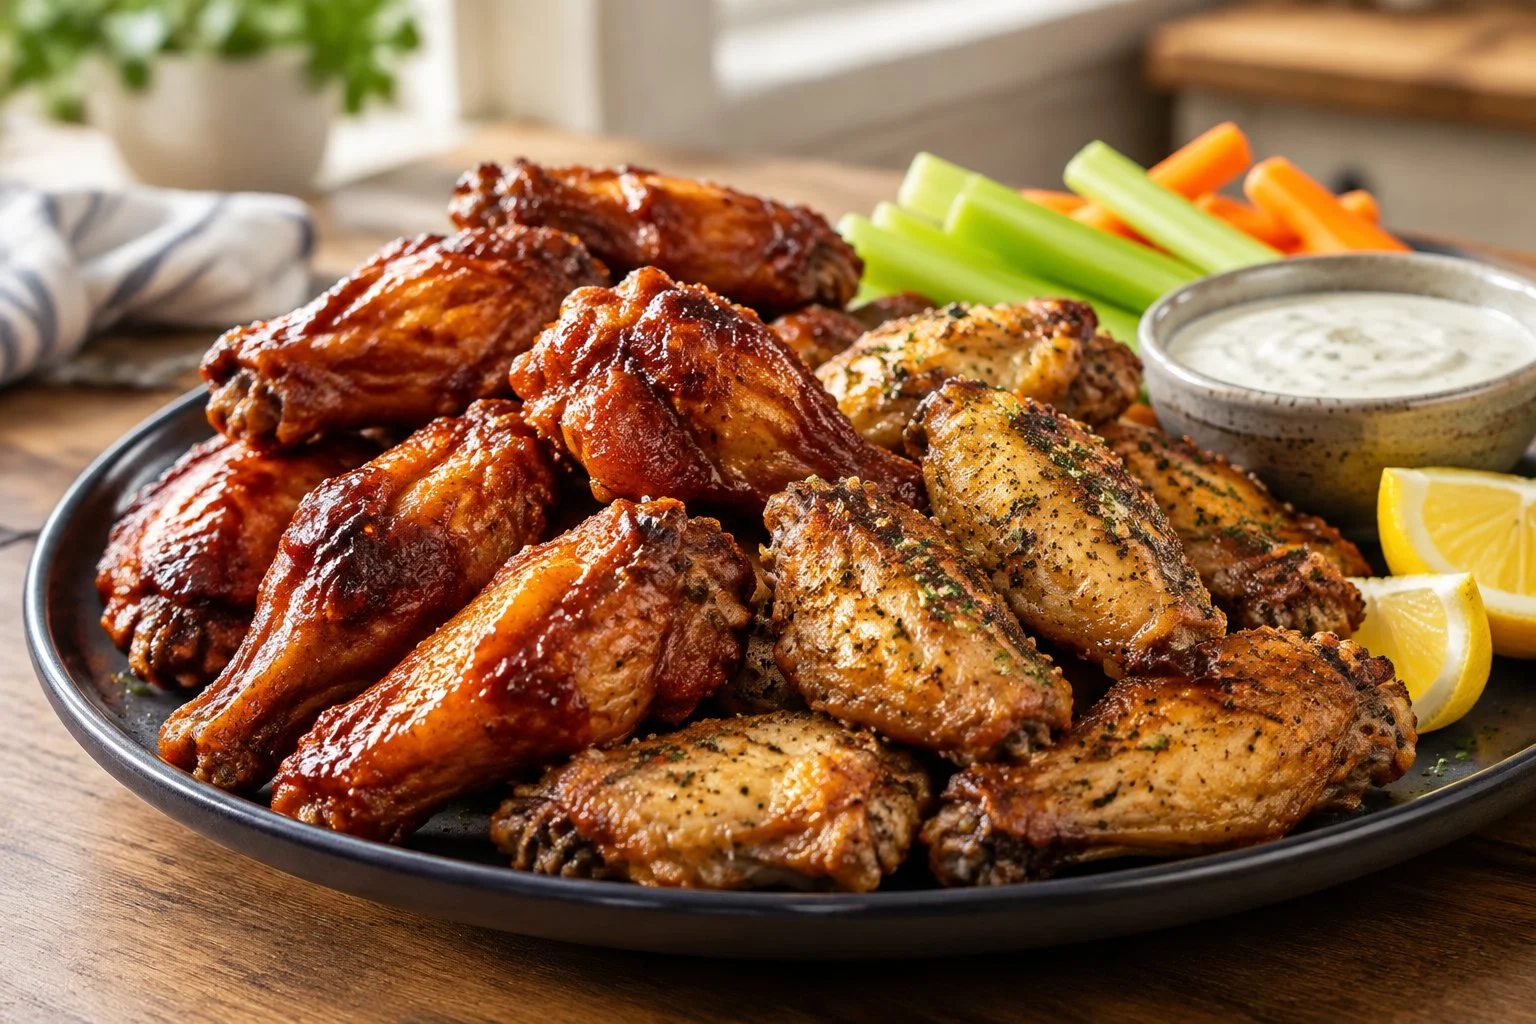
Brining helps chicken wings stay juicy and flavorful, but it can leave the skin too wet to crisp properly. The secret to crispy chicken wings is to remove excess moisture, use the right cooking temperature, and give the skin enough time to brown. These simple steps work for oven-baked, air-fried, grilled, and smoked chicken wings.
1. Pat the Chicken Wings Completely Dry
After removing the wings from the wet brine, discard the liquid and pat each piece thoroughly dry with paper towels. Pay special attention to the skin around the drumettes and flats. Removing surface moisture helps the skin brown instead of steaming during cooking.
2. Refrigerate the Wings Uncovered
For even drier skin, arrange the brined wings on a wire rack set over a baking sheet. Refrigerate them uncovered for several hours, if time allows. The circulating cold air helps moisture evaporate from the skin, improving the chance of a crispy finish.
Keep the wings refrigerated at 40°F (4°C) or below. Do not leave raw chicken at room temperature to dry.
3. Avoid Adding Too Much Oil or Sauce
A light coating of oil can help the skin brown, especially when baking or air-frying. However, too much oil or a wet marinade can interfere with crisping. If you plan to use Buffalo sauce, barbecue sauce, or honey garlic sauce, add it after cooking so the skin stays crisp longer.
Also, check your seasoning blend before adding salt. Brined chicken wings already contain salt, and too much extra seasoning can make them overly salty.
4. Cook at a High Enough Temperature
Choose a cooking method that allows the skin to brown and render its fat.
| Cooking method | Tips for crispy chicken wings |
| Oven-baked | Preheat the oven to around 425°F (220°C). Arrange wings in a single layer on a wire rack over a baking sheet. |
| Air fryer | Preheat according to the appliance instructions, arrange wings in a single layer, and leave space for hot air to circulate. |
| Grilled | Use a properly heated grill and turn the wings as needed to brown them without burning the skin. |
| Smoked | Smoke the wings for flavor, then finish them over higher heat if needed to crisp the skin. |
Cooking times vary with wing size, appliance, and temperature, so check doneness rather than relying on time alone.
5. Use Baking Powder Carefully for Extra Crispiness
For oven-baked or air-fried wings, a small amount of aluminum-free baking powder mixed with a dry seasoning can help the skin become crispier. Baking powder raises the skin’s surface pH and encourages browning. It is different from baking soda, which can leave an unpleasant taste if substituted.
Use only a small amount, follow a reliable wing recipe, and apply it to thoroughly dried skin. This step is optional; drying the wings properly is still important.
6. Cook Until Safe, Then Serve Promptly
Chicken wings must reach an internal temperature of 165°F (74°C) in the thickest part, measured with a food thermometer without touching the bone. Once cooked, serve them promptly because trapped steam and sauces can soften crispy skin as the wings sit.
Best tip: For juicy brined chicken wings with crispy skin, pat them dry, refrigerate them uncovered on a wire rack, and cook them with enough heat and space for air to circulate. Add wet sauces just before serving.
Salt-to-Water Ratio for Chicken Wing Brine
The right salt-to-water ratio is essential for juicy, flavorful chicken wings without making them too salty. For a simple wet brine, a good starting point is about 30–40 grams of salt per 1 liter of water, depending on how salty you want the wings and how long you plan to brine them. Measuring salt by weight is more reliable than using cups because kosher salt, table salt, and sea salt have different crystal sizes and densities.
Chicken Wing Brine Ratio Chart
| Water | Salt by weight | Best use |
| 2 cups (475 ml) | 14–19 g | Small batch of wings |
| 4 cups (950 ml) | 28–38 g | A typical home batch |
| 1 liter | 30–40 g | Easy ratio to scale |
| 2 liters | 60–80 g | Larger batch of wings |
These amounts are starting points, not a universal formula. Brining time, wing size, and the salt concentration all affect the final flavor.
How Much Salt Should You Use for 2 Pounds of Chicken Wings?
For approximately 2 pounds of chicken wings, start with enough water to cover the meat and use a measured salt concentration. For example, about 30–35 grams of salt per liter of water provides a practical starting point for a moderate brine. Use less salt or a shorter brining time if you prefer a milder flavor.
You can add brown sugar, garlic cloves, black peppercorns, and bay leaves for extra flavor, but these ingredients do not replace the salt needed for the brine.
Does the Type of Salt Matter?
Yes. Different salts have different weights per tablespoon or cup.
- Kosher salt: A common choice for chicken brine, but crystal size varies by brand.
- Table salt: Has finer crystals, so a cup generally contains more salt than a cup of many kosher salt brands. Do not substitute it cup-for-cup.
- Sea salt: Can also work, but its crystal size affects volume measurements.
For consistent results, weigh the salt in grams using a kitchen scale.
Can You Use Too Much Salt in Chicken Wing Brine?
Yes. A brine that is too salty or used for too long can make chicken wings unpleasantly salty. If the wings taste too salty after cooking, reduce the salt concentration or shorten the brining time next time.
Always dissolve the salt fully, cool the brine before adding raw chicken, and keep the container refrigerated at 40°F (4°C) or below. After brining, discard the liquid and pat the wings dry before cooking.
Best tip: Measure salt by weight, keep the water-to-salt ratio consistent, and adjust brining time rather than adding extra salt to get more flavor.
Common Chicken Wing Brining Mistakes
Brining chicken wings is easy, but a few common mistakes can leave them too salty, less crispy, or poorly seasoned. Follow these tips to get juicy, flavorful chicken wings with the texture you want.
1. Using Too Much Salt
Adding too much kosher salt or table salt can make chicken wings unpleasantly salty. Different salt brands have different crystal sizes, so measuring by volume can produce inconsistent results.
How to avoid it: Measure salt carefully, preferably by weight in grams. Follow the salt-to-water ratio in your recipe, and remember that table salt should not replace kosher salt cup-for-cup.
2. Brining the Wings for Too Long
Chicken wings are relatively small, so they need less time in a wet brine than larger cuts of chicken. Leaving them in a strong saltwater solution for too long can make the meat overly salty and affect its texture.
How to avoid it: Start with 2–4 hours in the refrigerator for a moderate brine. Adjust the time based on the salt concentration and your preferred flavor.
3. Adding Chicken to Warm Brine
Warm brine can raise the temperature of raw chicken and create conditions that encourage bacterial growth.
How to avoid it: Let the brine cool completely before adding the wings. If you heat water to dissolve the salt and sugar, cool the mixture fully before use.
4. Leaving Chicken Wings at Room Temperature
Raw chicken should never be left on the counter while it brines. Room-temperature storage can allow harmful bacteria to multiply.
How to avoid it: Brine chicken wings in a covered, food-safe container in the refrigerator at 40°F (4°C) or below.
5. Not Submerging the Wings Fully
When some wings remain above the brine, they may not receive even contact with the saltwater solution.
How to avoid it: Use a container that fits the chicken and enough brine to cover every piece. Turn the wings with clean utensils if needed.
6. Skipping the Drying Step
Wet skin makes it harder for chicken wings to brown and become crispy. Even a well-seasoned brine cannot guarantee crisp skin if the wings go straight into the oven or air fryer while still wet.
How to avoid it: Remove the wings from the brine, discard the liquid, and pat the skin thoroughly dry with paper towels. For extra-crispy wings, refrigerate them uncovered on a wire rack for several hours before cooking.
7. Adding Too Much Salt After Brining
Brined chicken already contains salt, so adding a salty dry rub, seasoning blend, or sauce can make the finished wings too salty.
How to avoid it: Use salt-free or low-salt seasonings when possible. Add Buffalo sauce, barbecue sauce, or garlic Parmesan sauce after cooking, and taste before adding more salt.
8. Reusing the Brine
Used chicken wing brine contains raw poultry juices and may carry harmful bacteria. It is unsafe to reuse as a marinade or sauce without proper handling.
How to avoid it: Discard the used brine immediately after removing the chicken. Prepare a fresh batch whenever you need more.
9. Cooking Without Checking the Temperature
Color alone cannot tell you whether chicken wings are safe to eat. Undercooked chicken can contain harmful bacteria, even if the outside looks browned.
How to avoid it: Use a food thermometer to check the thickest part of the meat without touching the bone. Chicken wings should reach an internal temperature of 165°F (74°C).
Best tip: The most common problems are too much salt, excessive brining time, unsafe storage, and wet skin. Measure your brine carefully, keep the wings cold, and dry them thoroughly before cooking for better results every time.
Chicken Wing Brine Variations
A basic chicken wing brine made with water and salt is easy to customize with herbs, spices, citrus, and sweet or savory ingredients. These chicken wing brine variations add different flavors while helping the meat stay juicy. Choose a combination that matches your preferred cooking method, whether you plan to bake, grill, smoke, or air-fry the wings.
1. Garlic and Herb Chicken Wing Brine
This savory brine works well for oven-baked, grilled, and roasted chicken wings.
Ingredients to add:
- 3 lightly crushed garlic cloves
- 2 bay leaves
- 1 teaspoon black peppercorns
- 2–3 sprigs of fresh thyme or rosemary
How it tastes: Garlic and fresh herbs give the wings a savory, aromatic flavor without overpowering the chicken.
2. Brown Sugar Chicken Wing Brine
Brown sugar adds a mild sweetness that balances the salt and complements smoky or grilled flavors.
Ingredients to add:
- 1–2 tablespoons brown sugar per liter of water
- 2 crushed garlic cloves
- 1 teaspoon black peppercorns
How it tastes: Slightly sweet and savory, making it a good match for grilled wings and barbecue sauce. Sugar can encourage browning, so watch the wings closely over high heat.
3. Spicy Chicken Wing Brine
If you like hot wings, add a little heat to the brine before refrigerating the chicken.
Ingredients to add:
- ½–1 teaspoon red pepper flakes
- 2 crushed garlic cloves
- 1 teaspoon black peppercorns
- Optional: a small sliced chili pepper
How it tastes: Mildly warm to spicy, depending on the amount of chili used. Add Buffalo sauce after cooking if you want a stronger, tangier heat.
4. Lemon Pepper Chicken Wing Brine
Lemon peel and black pepper create a fresh, zesty flavor that pairs well with baked or air-fried wings.
Ingredients to add:
- Strips of lemon peel
- 1 teaspoon black peppercorns
- 2 crushed garlic cloves
- Optional: a small sprig of thyme
How it tastes: Bright and citrusy with a gentle peppery kick. Use the yellow peel rather than large amounts of white pith, which can taste bitter.
5. Smoky Chicken Wing Brine
This variation complements wings cooked on a smoker or grill.
Ingredients to add:
- 1 teaspoon black peppercorns
- 2 crushed garlic cloves
- 1–2 bay leaves
- Optional: a small amount of smoked paprika added to the wings after brining
How it tastes: Savory and smoky, especially when paired with wood-smoked chicken wings or barbecue sauce. Smoked paprika is usually easier to distribute as a dry seasoning than in the brine.
6. Apple Cider Chicken Wing Brine
Apple cider can add a mild fruity note to chicken wings, especially when paired with herbs and black pepper.
Ingredients to add:
- Replace part of the water with unsweetened apple cider
- 2 crushed garlic cloves
- 1 teaspoon black peppercorns
- Optional: a sprig of fresh thyme
How it tastes: Mildly fruity and savory, with a flavor that works well for roasted or grilled wings. Keep the salt concentration appropriate for the total liquid volume, and avoid adding too much acidic liquid.
How to Customize Your Chicken Wing Brine
For any variation, begin with your basic water-and-salt mixture, then add the flavor ingredients you prefer. Keep these tips in mind:
- Measure the salt carefully. Different types and brands of salt vary in weight, so measuring by grams gives more consistent results.
- Keep the flavor balanced. Start with a few additions instead of combining every herb and spice.
- Cool the brine completely. Never add raw chicken to warm brine.
- Refrigerate the wings. Keep them at 40°F (4°C) or below during brining.
- Dry before cooking. Remove the wings from the brine, discard the used liquid, and pat the skin dry for better browning.
- Check for added salt. If you use a salty seasoning blend or sauce after brining, reduce or skip extra salt.
Best choice: Garlic and herb brine is a versatile starting point for most cooking methods. Choose lemon pepper for a fresh flavor, brown sugar for a hint of sweetness, or red pepper flakes for spicy chicken wings.
Food Safety and Storage
Proper food handling is essential when making chicken wing brine. Since raw chicken can carry harmful bacteria, keep the wings cold, use clean equipment, and avoid cross-contamination during preparation. These simple food safety steps help protect your family while keeping your brined chicken wings fresh and flavorful.
Keep Chicken Wings Refrigerated While Brining
Always brine chicken wings in a covered, food-safe container in the refrigerator at 40°F (4°C) or below. Never leave raw chicken soaking in brine on the kitchen counter. Warm temperatures allow bacteria to multiply, even when the chicken is covered with saltwater.
Place the container on a refrigerator shelf where it cannot drip onto ready-to-eat foods. Make sure the wings remain submerged in the brine throughout the soaking period.
How Long Can Chicken Wings Stay in Brine?
For a typical wet brine, 2–4 hours is a reasonable starting point for chicken wings, depending on the salt concentration and wing size. Follow your recipe’s recommended time, and avoid leaving the wings in a strong saltwater solution overnight unless the recipe specifically accounts for the salt level and soaking time.
Brining does not make raw chicken safe to store indefinitely. Keep the wings refrigerated and cook them within 1–2 days of purchase or thawing, provided they have been handled safely and remain within their use-by guidance. If the chicken has been refrigerated for too long or shows signs of spoilage, discard it.
Can You Store Chicken Wings After Brining?
Yes. Once the brining time is complete, remove the wings from the liquid and discard the used brine. Pat the chicken dry with clean paper towels.
If you are not cooking the wings immediately, place them in a clean, covered container and return them to the refrigerator. For the best skin texture, you can also arrange the wings on a wire rack over a tray and refrigerate them uncovered for a short period, provided they remain protected from contact with other foods.
For longer storage, freeze the raw chicken wings in a freezer-safe bag or airtight container. Label the package with the date. For best quality, use frozen chicken pieces within about 9 months, and thaw them in the refrigerator rather than on the counter.
Never Reuse Chicken Wing Brine
Once raw chicken has been placed in the brine, the liquid may contain harmful bacteria from the poultry.
- Discard the used brine after removing the wings.
- Never use the same liquid for another batch of chicken.
- Do not pour used brine over cooked wings or serve it as a dipping sauce.
- Wash your hands and clean any utensils, containers, and surfaces that touched raw chicken or its juices.
If you want a sauce with similar flavors, prepare a fresh sauce separately using clean ingredients.
Cook Chicken Wings to a Safe Temperature
Cook chicken wings until the thickest part of the meat reaches an internal temperature of 165°F (74°C). Use a food thermometer and avoid touching the bone when taking the reading. This temperature applies whether you bake, grill, smoke, deep-fry, or air-fry the wings.
Do not rely on color or cooking time alone to decide whether chicken is safe to eat.
Food safety tip: Keep chicken wings refrigerated at 40°F (4°C) or below during brining, discard the used saltwater solution, prevent cross-contamination, and cook the wings to 165°F (74°C) before serving..
Conclusion
A good chicken wing brine can help you prepare wings that are juicy, flavorful, and well-seasoned without requiring complicated ingredients. The key is to measure the salt carefully, cool the brine before adding the chicken, keep the wings refrigerated, and avoid soaking them for too long.
For better browning and crispy skin, pat the wings dry after brining and cook them until the thickest part reaches an internal temperature of 165°F (74°C).
When preparing brined chicken wings, small details make a real difference. Adjusting the brining time to the salt concentration, using garlic and herbs for extra flavor, and adding sauces after cooking can help you get more consistent results.
Give this chicken wing brine recipe a try for your next family dinner or game-day gathering, and adjust the seasonings to create your favorite version.
FAQ
1. Is it worth brining chicken wings?
Yes, brining chicken wings can help them retain moisture and absorb seasoning, making them juicy and flavorful. A wet brine works especially well if you want tender meat for baked, grilled, smoked, or air-fried wings. For crispier skin, dry the wings thoroughly before cooking.
2. How long should you brine chicken wings?
For a moderate wet brine, 2–4 hours in the refrigerator is a good starting point. The ideal time depends on the salt concentration, wing size, and your preferred flavor. Avoid leaving wings in a strong brine for too long, as they can become overly salty.
3. What is the best salt-to-water ratio for chicken wing brine?
A practical starting point is around 30–40 grams of salt per liter of water. Measuring salt by weight gives more consistent results because kosher salt, table salt, and sea salt vary in density. Adjust the concentration and brining time to suit your recipe.
4. Can you brine frozen chicken wings?
It is best to thaw chicken wings completely in the refrigerator before brining them. Fully thawed wings allow the brine to season the meat more evenly. Never thaw raw chicken on the kitchen counter.
5. Should chicken wings be rinsed after brining?
No, rinsing is generally unnecessary. Remove the wings from the brine, discard the liquid, and pat the skin dry with paper towels. Rinsing raw chicken can spread bacteria through splashes around your sink and kitchen.
6. How do you make brined chicken wings crispy?
Pat the wings dry after brining, then refrigerate them uncovered on a wire rack for several hours if time allows. Bake them in a hot oven or cook them in an air fryer with enough space for air to circulate. Add wet sauces after cooking to help preserve the crispy skin.
7. Can you brine chicken wings overnight?
Overnight brining is usually unnecessary for chicken wings, particularly when using a strong saltwater solution. A long soak can make the meat too salty. For a moderate brine, start with 2–4 hours and follow your recipe’s recommended timing.
8. Can you reuse chicken wing brine?
No. Once raw chicken has been in the brine, discard the liquid because it may contain harmful bacteria. Prepare a fresh batch if you need more brine, and never use the leftover liquid as a dipping sauce.
9. Can you add brown sugar, garlic, or herbs to chicken wing brine?
Yes. Brown sugar, crushed garlic, black peppercorns, bay leaves, thyme, rosemary, and lemon peel can add flavor to a basic saltwater brine. Keep the salt-to-water ratio consistent, and use extra seasonings to complement rather than overpower the chicken.
10. Do you need to season chicken wings after brining?
You can add extra seasoning, but use less salt because the brine has already seasoned the meat. Black pepper, garlic powder, paprika, and salt-free dry rubs are good options. You can also toss cooked wings in Buffalo, barbecue, or garlic Parmesan sauce.
11. What temperature should brined chicken wings reach?
Chicken wings should reach an internal temperature of 165°F (74°C). Check the thickest part of the meat with a food thermometer without touching the bone. This applies to oven-baked, grilled, smoked, deep-fried, and air-fried wings.
12. How long can brined chicken wings stay in the refrigerator?
For best results, cook the wings after the recommended brining period. Keep raw chicken refrigerated at 40°F (4°C) or below, and generally use fresh or thawed raw poultry within 1–2 days of purchase or thawing, provided it has been handled safely. Do not keep chicken in brine indefinitely.